


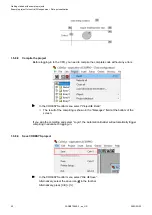


3.
Set station name to e.g. "ci502-pn-0b" according to hardware settings.
The last two values of the node’s
“Station Name”
in Automation Builder correspond to
the position of module’s rotary switches (
hexadecimal
values): e.g., "ci502-pn-0a" or
"ci502-pn-10".
ð
Use small letters for the station name and not large ones.
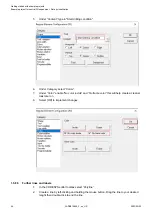
4.
Leave the default settings for
“IP Parameter”
.
5.
Adjust the communication time settings to get a Watchdog (ms) 24:
●
“Send clock (ms)”
: 4
●
“Reduction ratio”
: 2
●
“Phase”
: 1
6.
Leave the default settings for
“VLAN ID”
.
7.
Leave the default settings for
“RT Class”
.
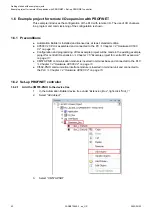
If the node has the same device address (the last two digits of the device name)
as set by means of the rotary switches on the module, all the node parameters
will be loaded automatically upon initialization scan of the CI50x module. This
allows, e.g., the module exchange without an engineering tool.
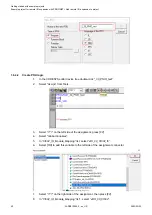
1.6.3.3.2 Create CI502-PNIO I/O mapping to symbols
1.
Double-click
“CI502_IO”
.
Getting started with example projects
Example project for remote I/O expansion with PROFINET > Set-up PROFINET device
2023/03/03
3ADR010649, 3, en_US
58