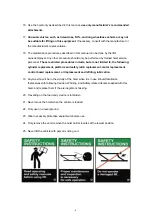
‐ ‐
14
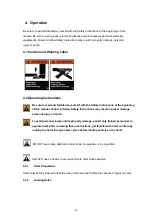
Push the equipment over the
hoist
while keeping the equipment parallel with the
hoist
and aligning
the center of gravity of the equipment with the center of the
hoist
. For motorcycles and other two
wheel vehicles/equipment, push forward until the front wheel goes into the wheel clamps.
Motorcycle Fixing
. Engage the parking break of the equipment if applicable. Secure
motorcycle to
hoist
using clamps and straps. Straps MUST be used to secure
motorcycle. Clamps are only for temporary holding.
4.2.3
Power Connection
Plug in the socket once the
hoist
is proper located. Be sure to wear gloves before starting up.
4.2.4
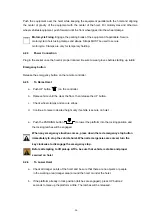
Emergency button
Release the emergency button on the remote controller.
4.2.5
To Raise
Hoist
a. Push UP button (
) on the controller.
b.
Raise vehicle until the clear the floor, then release the UP button.
c.
Check wheel clamps and secure straps.
d.
Continue to raise to desired height only if vehicle is secure on
hoist
e.
Push the PARKING button ( ) to lower the platform into the locking position
and
the locking latches will be engaged.
When any emergency situation comes, press down the red emergency stop
button
immediately to stop the vehicle
hoist
. When all emergencies are solved,
turn the
key clockwise to disengage the emergency stop.
Before attempting to lift pickup ATVs, be sure that vehicle is stable and proper
secured on
hoist
4.2.6
To Lower
Hoist
a.
Check all danger points of the
hoist
and be sure that there are no objects or people
in
the working area (danger area) around the
hoist
or under the
hoist
.
b.
If the platform already in lock position (latches are engaged), press UP button 2
seconds to raise up the platform a little. The latches will be released.
Содержание AutoLift AL-243156
Страница 6: ... 6 ...
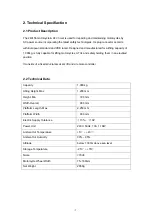
Страница 8: ... 8 Fig 1 2250mm 785mm 800 mm 380 mm 562mm 1270 mm ...
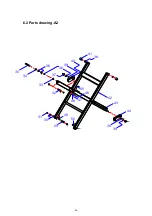
Страница 20: ... 20 6 2 Parts drawing A2 29 31 32 37 33 34 35 38 39 40 41 38 44 43 42 39 30 36 38 45 48 47 46 49 50 ...
Страница 21: ... 21 6 3 Parts drawing A3 29 31 52 53 54 55 31 66 51 51 65 59 60 57 56 58 61 62 63 64 54 4 68 67 27 72 72 27 ...
Страница 22: ... 22 6 4 Parts drawing A4 54 1 54 5 54 14 54 13 54 9 54 6 54 7 54 12 54 8 54 2 54 3 54 4 54 10 54 11 ...
Страница 23: ... 23 6 5 Parts drawing A5 1 6 5 10 28 ...
Страница 28: ... 28 72 5109 05020 000 threaded pin 2 ...
Страница 29: ... 29 6 8 Parts drawing B 2 9 10 12 13 14 16 19 20 22 23 24 25 5 15 11 8 7 1 3 6 18 17 4 6 21 ...


