


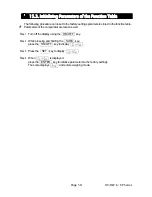


HV/HW-C/CP Series
Page 59
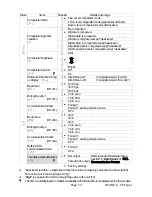
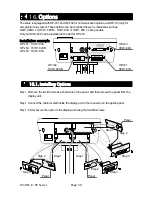
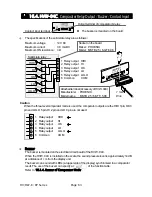
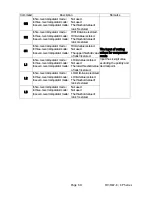
16. Options
The scale is equipped with OP-ch1 and OP-ch2 for communication options, and OP-ch3 only for
comparator relay output. Those options can be combined freely. Combinations such as
HVW
-
02BC x
2
, HVW
-
02CB
+
HVW
-
03C or HVW
-
03C x
2
are possible.
Only an HVW
-
04C can be installed to the slot for OP-ch3.
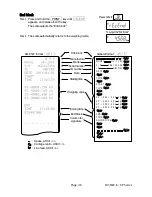
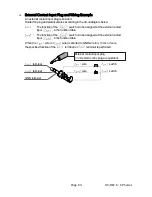
Installation example
OP-ch1: HVW
-
03C OP-ch3
OP-ch2: HVW
-
02CB
HVW
-
04C
OP-ch3: HVW
-
04C
OP-ch2
OP-ch1
HVW
-
02CB
HVW
-
03C
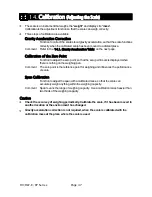
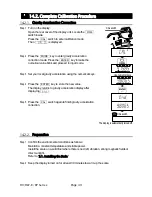
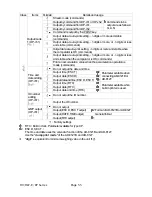
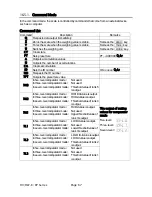
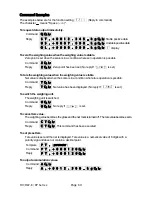
16.1. Installing Options
Step 1 Remove the two M3 screws at both side on the panel, and then remove the panel from the
display unit.
Step 2 Connect the cable located inside the display unit to the connector on the option panel.
Step 3 Firmly secure the option to the display unit using the two M3 screws.
Panel
Step
1
Step 2
Step 2
Step 1
Step 1
Step 3
Step
2
Step 3
Step 3
Panel
Panel
Содержание HV-C Series
Страница 89: ...HV HW C CP Series Page 87 MEMO...
Страница 90: ...Page 88 HV HW C CP Series MEMO...
Страница 91: ...13...


