background image


19 | 

P a g e


A 1 0   H a r m o n y

T M

  C o n t r o l l e r   2 0 0 0   I n s t a l l a t i o n   G u i d e


Содержание Harmony Controller 2000

Страница 1: ...1 P a g e A 1 0 H a r m o n y T M C o n t r o l l e r 2 0 0 0 I n s t a l l a t i o n G u i d e...

Страница 2: ...and Customer agrees to treat Software as confidential information Anyone who uses the Software does so only in compliance with the terms of the End User License Agreement EULA provided later in this...

Страница 3: ...tion 8 Power On 9 Power Supply Unit Installation 10 Overview 11 DC Power Supply Installation 12 Power Supply Hot Swap 13 Removing a Power Supply 13 Inserting a Power Supply 14 Fan Hot Swap 16 Fan Modu...

Страница 4: ...4 P a g e A 1 0 H a r m o n y T M C o n t r o l l e r 2 0 0 0 I n s t a l l a t i o n G u i d e...

Страница 5: ...ning a damaged box before inspection by the shipper will void any potential shipping claims CAUTION Do not attempt to install or operate damaged equipment As with any electrical equipment personal inj...

Страница 6: ...k mount installation Specifications for the equipment rack are listed in Table 2 Rack mount installation instructions are available in Rack Mount Kit Installation Other Requirements Other equipment ne...

Страница 7: ...nterface Console 1 Ethernet interface Mgmt for remotely managing the device over the network FIGURE 1 Harmony Controller 2000 Interface Locations and Numbers Using the Interface Connections To begin u...

Страница 8: ...ss Off No power access HDD Green On HDD under access Off No Data access Installation Table 2 describes the minimum requirements for your equipment rack Verify these specifications against your equipme...

Страница 9: ...he power switch NOTE Power OFF To perform a graceful shutdown use the shutdown command in the CLI If you made any changes to the device configuration you will be prompted to save your configuration in...

Страница 10: ...nstallation Power Supply Hot Swap CAUTION Do not attempt to install or operate damaged equipment As with any electrical equipment personal injury or damage to other equipment can result from commissio...

Страница 11: ...you must disconnect it from the power source This is required regardless of whether the power supply is in standby mode or powered on mode Likewise when installing a power supply insert the power sup...

Страница 12: ...Refer to the following instructions and figures for this procedure Also see figures on previous page 1 Attach Green wire to ground for both ends 2 Attach BLACK 48 volt wire to 48 volt pin on DC power...

Страница 13: ...i d e Power Supply Hot Swap Follow the directions in the following sections to remove and insert a power supply unit FIGURE 7 Power Supply Hot Swap Removing a Power Supply To remove a power supply 1 P...

Страница 14: ...0 H a r m o n y T M C o n t r o l l e r 2 0 0 0 I n s t a l l a t i o n G u i d e Inserting a Power Supply To insert a power supply 1 Push the power supply into the slot 2 Plug the power cable into th...

Страница 15: ...15 P a g e A 1 0 H a r m o n y T M C o n t r o l l e r 2 0 0 0 I n s t a l l a t i o n G u i d e...

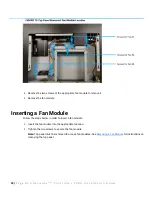
Страница 16: ...The following topics are covered Fan Module Location and Fan Numbers Removing a Fan Module Inserting a Fan Module Fan Module Location and Fan Numbers The location and number of each fan is shown in Fi...

Страница 17: ...i o n G u i d e FIGURE 9 Removing the Top Panel to Access Fan Modules 2 Hold both screws then pull them outward to slide the top panel out 3 Lift to remove the top panel CAUTION Operation on or for t...

Страница 18: ...dule to remove it 5 Remove the fan module Inserting a Fan Module Follow the steps below in order to insert a fan module 1 Insert the fan module into the appropriate location 2 Tighten the two screws t...

Страница 19: ...19 P a g e A 1 0 H a r m o n y T M C o n t r o l l e r 2 0 0 0 I n s t a l l a t i o n G u i d e...

Страница 20: ...ing Ear Bracket Installation Ear Bracket Installation This section describes how to install the ear brackets used for rack mount installation Front Mount Installation Front Mount Installation This sec...

Страница 21: ...fasten the bracket using the provided screws Make sure the fit is snug FIGURE 12 Alignment of Brackets Over Screw Holes 3 Repeat these steps to attach the other bracket 4 Attach the device to the fron...

Страница 22: ...22 P a g e A 1 0 H a r m o n y T M C o n t r o l l e r 2 0 0 0 I n s t a l l a t i o n G u i d e FIGURE 14 Verification of Screws...

Страница 23: ...23 P a g e A 1 0 H a r m o n y T M C o n t r o l l e r 2 0 0 0 I n s t a l l a t i o n G u i d e...

Страница 24: ...0W AC Power Supply Specifications Table 3 lists the specifications for the AC power supply TABLE 3 750W AC Power Supply Product Specification Item Specification Part Number ASK PS 040 Power Supply Out...

Страница 25: ...25 P a g e A 1 0 H a r m o n y T M C o n t r o l l e r 2 0 0 0 I n s t a l l a t i o n G u i d e...

Страница 26: ...26 P a g e A 1 0 H a r m o n y T M C o n t r o l l e r 2 0 0 0 I n s t a l l a t i o n G u i d e...

Страница 27: ...3...

Отзывы: