11
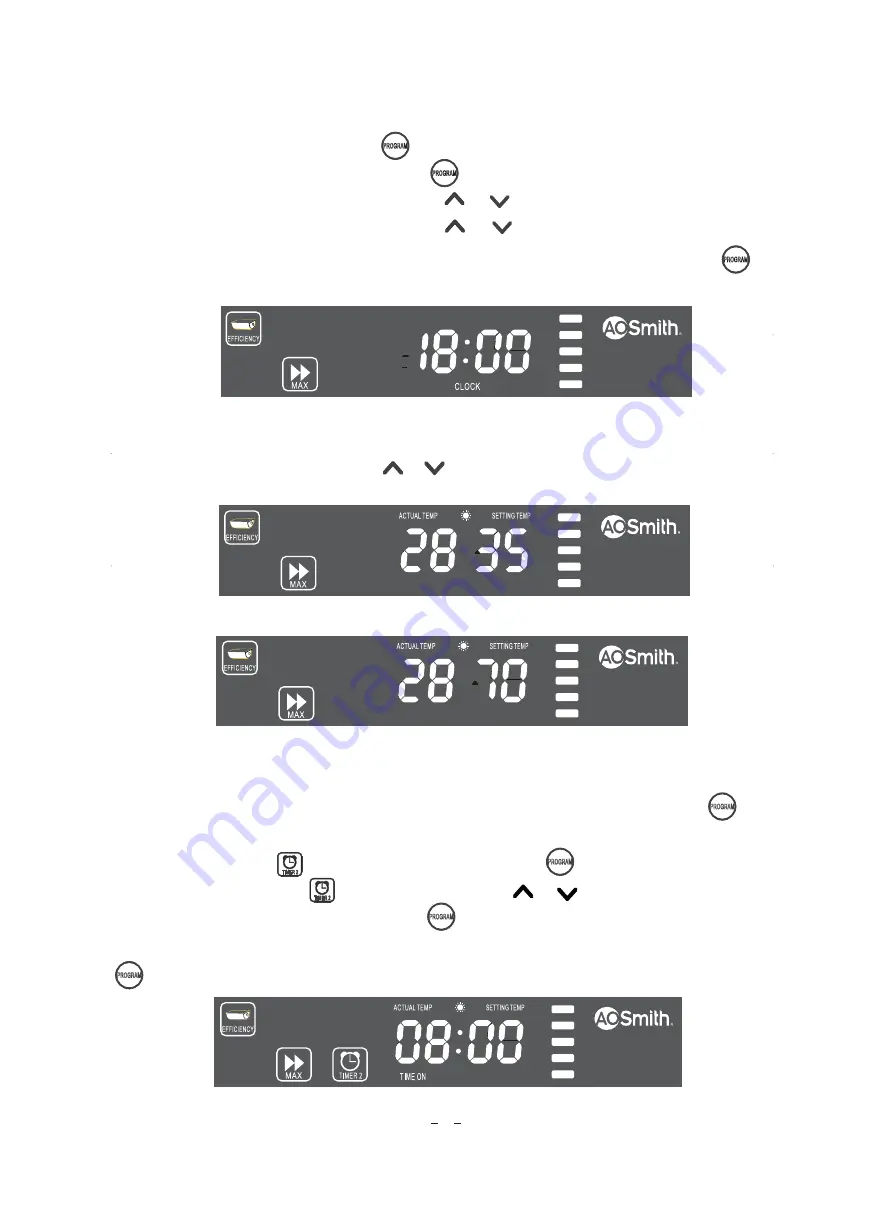
3. Clock Setting (Fig.11)
.
4. Temperature Setting
(Fig.12, 13)
With heater power on, user could press or to set temperature within the range form 35
℃
to
75
℃
.
.
5. Timing
Prior to timing, clock should be set. With heater power on, user could change the status among
“Clock display”, “Timer-1”, “Timer-2”, “Timer-1 and Timer-2” and off by touching .
z
Fig.11
Fig.12
Fig.13
Fig.14
Timer-2 (Fig.14)
With heater power on, by one-touch on
button, clock will be displayed for 10 seconds.
With timer-1 and timer-2 off, pressing and hold
button for a few seconds will enter clock setting
status. With hour digit flashing, user could press or to set hour digit within the range form 0
to 23. With minute digit flashing, user could press or to set minute digit within the range form
0 to 59. User could change the status among hour digit, minute digit and exit by touching .
With Timer-1 indicator
light up, user could press and hold
button to enter Timer-2 setting
status. With“TIME ON” and
flashing, user could press or to increase or decrease “TIME
ON” by 30 minutes. With
“TIME OFF”
and
flashing, user could increase or decrease “TIME
OFF” in the similar way. User could change the status among time-on, time off and exit by touching
.


