background image

25

WATER TEMPERATURE CONTROL


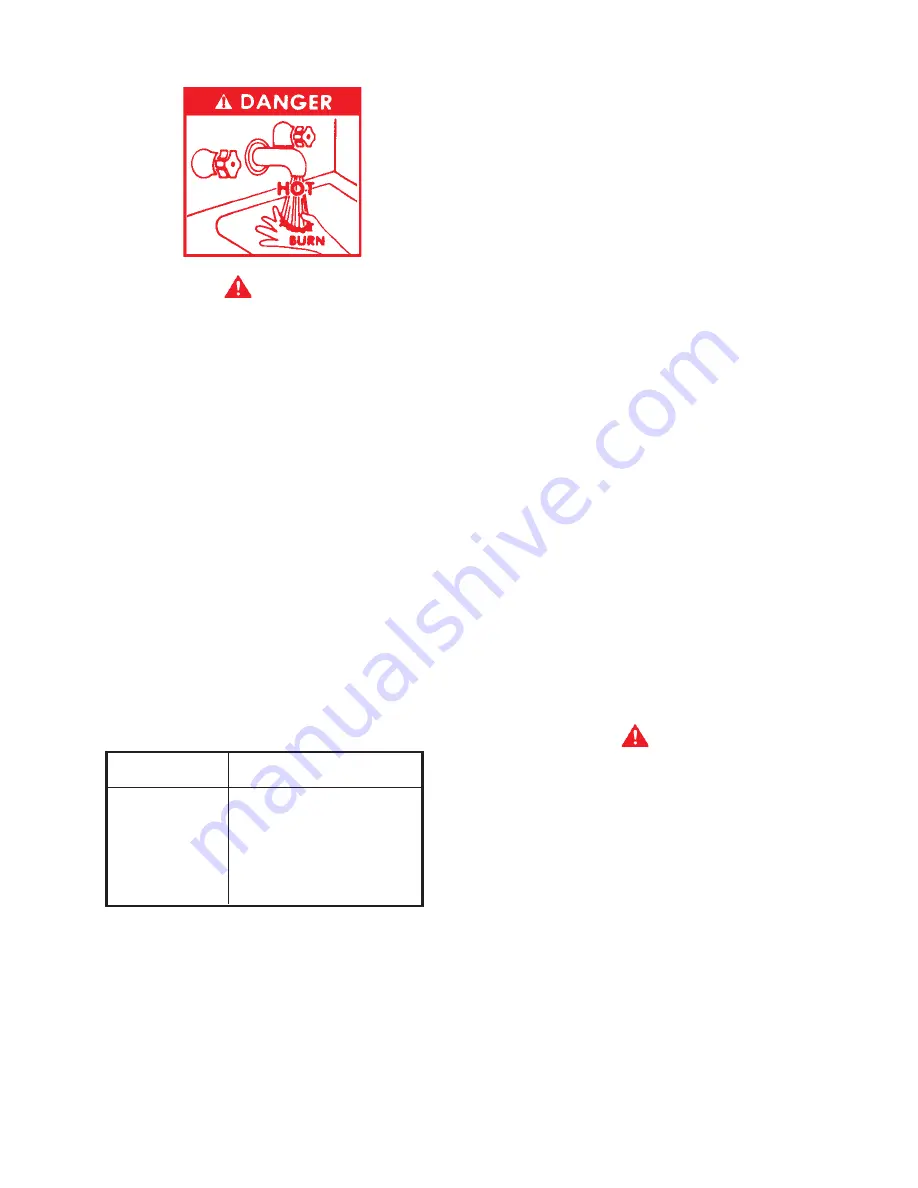
DANGER

THIS WATER HEATER IS EQUIPPED WITH AN ADJUSTABLE
THERMOSTAT TO CONTROL WATER TEMPERATURE.  HOT
WATER TEMPERATURES REQUIRED FOR AUTOMATIC
DISHWASHER AND LAUNDRY USE CAN CAUSE SCALD
BURNS RESULTING IN SERIOUS PERSONAL INJURY AND/
OR DEATH.  THE TEMPERATURE AT WHICH INJURY OCCURS
VARIES WITH THE PERSON'S AGE AND TIME OF EXPOSURE.
THE SLOWER RESPONSE TIME OF CHILDREN, AGED OR
DISABLED PERSONS INCREASES THE HAZARDS TO THEM.
NEVER ALLOW SMALL CHILDREN TO USE A HOT WATER TAP,
OR TO DRAW THEIR OWN BATH WATER.  NEVER LEAVE A
CHILD OR DISABLED PERSON UNATTENDED IN A BATHTUB
OR SHOWER.

THE WATER HEATER SHOULD BE LOCATED IN AN AREA
WHERE THE GENERAL PUBLIC DOES NOT HAVE ACCESS TO
SET TEMPERATURES.

SETTING THE WATER HEATER TEMPERATURE AT 120°F (49°C)

WILL REDUCE THE RISK OF SCALDS.

 Some states or provinces

require settings at specific lower temperatures.

Below you will find listed the approximate time-to-burn
relationship for normal adult skin.  Short repeated heating cycles
caused by small hot water uses can cause temperatures at the
point of use to exceed the thermostat setting by up to 20F°.  If you
experience this type of use, you should consider using lower
temperature settings to reduce scald hazards.

Temperature

Time to Produce 2nd & 3rd

Setting

Degree Burns on Adult 

Skin

180°F (82°C)

Nearly instantaneous

170°F (77°C)

Nearly instantaneous

160°F (71°C)

About 1/2 second

150°F (66°C)

About 1-1/2 seconds

140°F (60°C)

Less than 5 seconds

130°F (54°C)

About 30 seconds

120°F (49°C)

More than 5 minutes

Valves for reducing point-of-use temperature by mixing cold and
hot water are available.  Also available are inexpensive devices
that attach to faucets to limit hot water temperatures.  Contact a
licensed plumber or the local plumbing authority.

The water temperature is controlled by a thermostat, fig. 2, which
has two sensing elements.  One sensor is located near the top
of the tank and the other is near the center.  The thermostat is set
in the lowest position before the heater leaves the factory.

The thermostat temperature dial, fig. 2, is accessible by removing
the control cover.  The dial is adjustable and may be set for
120

(49°C)


 to 180

0

F (82°C) water temperature, but 120

0

F (49°C)

is the recommended starting point.  It is suggested the dial be

placed on the lowest setting which produces an acceptable hot
water supply.  This will always give the most energy efficient
operation.  The temperature control has a 4F° fixed differential.

CHECKING VENTING

The following steps shall be followed with each appliance
connected to the venting system placed in operation, while any
other appliances connected to the venting system are not in
operation.

1.  Seal any unused openings in the venting system.

2. Inspect  the venting system for proper size and horizontal

pitch, as required in the National Fuel Gas Code, ANSI
Z223.1or the CAN/CGA B149 Installation Codes and these
instructions.  Determine that there is no blockage or restriction,
leakage, corrosion and other deficiencies which could cause
an unsafe condition.

3. So far as is practical, close all building doors and windows

and all doors between the space in which the water heater(s)
connected to the venting system are located and other spaces
of the building.  Turn on all appliances not connected to the
venting system.  Turn on all exhaust fans, such as range
hoods and bathroom exhausts, so they shall operate at
maximum speed. Close fireplace dampers.

4.  Follow the lighting instruction.  Place the water heater being

inspected in operation.  Adjust thermostat so appliance shall
operate continuously.

5. Test for spillage at the burner level after 5 minutes of main

burner operation.

6.  After it has been determined that each BTN connected to the

venting system properly vents when tested as outlined above,
return doors, windows, exhaust fans, fireplace dampers and
any other gas burning appliance to their previous conditions
of use.

7.  If improper venting is observed during any of the above tests,

the venting system must be corrected.

 WARNING

FAILURE TO CORRECT BACK DRAFTS MAY CAUSE AIR
CONTAMINATION AND UNSAFE CONDITIONS.

• If the back draft cannot be corrected by the normal method or

if a suitable draft cannot be obtained, a blower type flue gas
exhauster must be employed to assure proper venting and
correct combustion.

PREVENTIVE MAINTENANCE

CHECK THE IGNITOR ASSEMBLY

At least once a year, check the ignitor assembly, Fig. 11, and the
main burner, Fig. 12, for proper operation.  Refer to the following
ignitor assembly and main burner sections.

IGNITOR ASSEMBLY

For access to ignitor assembly, unfasten two screws to burner
cover and remove.  Locate the burner with the ignitor assembly
and remove screw holding burner to manifold.  Slide burner out
to access ignitor assembly.

Содержание BTN 120 THRU 400/A Series

Страница 1: ...RENCE Printed in U S A 0603 PART NO 195714 000 ADIVISION OFA O SMITH CORPORATION McBEE SOUTH CAROLINA USA www hotwater com CAUTION TEXT PRINTED OR OUTLINED IN RED CONTAINS INFORMATION RELATIVE TO YOUR...

Страница 2: ...1107 1055 1022 949 BTN 400 390 000 85 80 GPH 1039 935 748 693 624 534 520 468 416 374 346 340 312 297 288 267 114 322 LPH 3934 3540 2832 2622 2360 2023 1967 1770 1573 1416 1311 1287 1180 1124 1089 101...

Страница 3: ...ing Aids 30 Sequence of Operation Flow Chart 30 Operational Checklist 31 Limited Warranty 32 Page Page FOREWORD These designs comply with ANSI Z21 10 3 as an automatic circulating or automatic storage...

Страница 4: ...nstallation and periodically thereafter to ensure a down draft condition does not exist DO NOT OBSTRUCT THE FLOW OF COMBUSTION AND VENTILATING AIR ADEQUATE AIR FOR COMBUSTION AND VENTILATION MUST BE P...

Страница 5: ...of the heater adjustment to the gas pressure regulator may be required See CHECKING THE INPUT section in this manual for inlet and manifold pressure requirements Also due to the input rating reductio...

Страница 6: ...N SERIOUS PERSONAL INJURY OR DEATH UNCRATING The heater is shipped with the inducer already installed The wiring conduit runs from the thermostat to the inducer Before turning unit on check to make su...

Страница 7: ...5 BTN 250 A 2 51mm 2 51mm 2 51mm 12 305 BTN 275 A 2 51mm 2 51mm 2 51mm 12 305 BTN 310 A 3 76mm 3 76mm 3 76mm 12 305 BTN 366 A 6 152mm 6 152mm 6 152mm 12 305 BTN 400 A 3 76mm 3 76mm 3 76mm 12 305 TABLE...

Страница 8: ...ommunicating with the outdoors through vertical ducts two permanent openings located in the above manner shall be provided Each opening shall have a free area of not less than one square inch per 4000...

Страница 9: ...r Inches 154 000 1 Ft 6 6 6 6 6 6 6 6 154 000 2 Ft 6 6 6 6 6 6 6 6 154 000 3 Ft 6 6 6 6 6 6 6 6 Number of Combined Input BTN 154 Heaters in Thousands of Btu hr Manifold and Common Vent Diameter Inches...

Страница 10: ...0 Input 310 000 Btu hr Total Vent Height Feet Vent Connector Size 6 inches 6 8 10 15 20 30 50 100 Input Btu hr Rise Vent Connector Diameter Inches 310 000 1 Ft 9 8 8 8 7 7 6 6 310 000 2 Ft 8 8 8 7 7 7...

Страница 11: ...may be required in the inlet supply line between the appliance and the meter or valve to compensate for the thermal expansion of the water SYSTEMCONNECTIONS The system installation must conform to th...

Страница 12: ...ATURE CONTROL WARNING ON PAGE 25 IF HIGHER PREHEAT TEMPERATURES ARE NECESSARY TO OBTAIN ADEQUATE BOOSTER OUTPUT ADD AN ANTI SCALD VALVE FOR HOT WATER SUPPLIED TO FIXTURES GENERAL The type size and loc...

Страница 13: ...OULD NOT EXCEED SAFE USE TEMPERATUREAT FIXTURES SEE WATERTEMPERATURE CONTROL WARNING ON PAGE 25 IF HIGHER PREHEAT TEMPERATURES ARE NECESSARYTO OBTAINADEQUATE BOOSTER OUTPUT ADDANANTI SCALD VALVE FOR H...

Страница 14: ...OGGLESWITCHMUSTBECLOSED ON DURING THERINSEOPERATIONANDOPEN OFF WHENDISHWASHER IS NOTOPERATING OR WHEN ON LONG STANDBY NOTE 2 INSTALLLINETEMPERATURECONTROLINANUNINSULATED TEEBEYONDTHEDISHWASHINGMACHINE...

Страница 15: ...ns shown in the installation diagrams on the following pages are typical TWO TEMPERATURE TWO HEATERS ONE PRE HEATER ONE BOOSTER HEATER WITH OR WITHOUT BUILDING RECIRCULATION The discharge opening of t...

Страница 16: ...NOTE 3 ADJUST PLUG COCK SO THE SANITIZING LOOP FLOW RATE DOES NOT CAUSE UNNECESSARYTURBULENCEINTHETANK PIPE RELIEF VALVE TO OPEN DRAIN INSTALL IN ACCORDANCE WITH LOCAL CODES CIRCULATING RETURN LINE C...

Страница 17: ...ERS WITH MIXING VALVE TWO PRE HEATERS WITH BOOSTER HEATER DANGER TEMPERATURE SETTING SHOULD NOT EXCEED SAFE USE TEMPERATURE AT FIXTURES SEE WATER TEMPERATURE CONTROL WARNING ON PAGE 25 IF HIGHER PREHE...

Страница 18: ...ER OUTPUT ADD AN ANTI SCALD VALVE FOR HOT WATER SUPPLIED TO FIXTURES PIPE RELIEF VALVE TO OPEN DRAIN WHEN USING AN A O SMITH T 140 200 350 OR 400 STORAGE TANK USE LOWER 3 4 OPENING FOR TANK TEMPERATUR...

Страница 19: ...N 154 68 BTN 180 72 BTN 199 72 BTN 200 A 72 BTN 250 A 72 BTN 275 A 72 BTN 310 A 73 BTN 366 A 73 BTN 400 A 73 MANIFOLD KITS TWO UNIT MANIFOLD KIT PART NO 78692 THREE UNIT MANIFOLD KIT PART NO 78593 FOU...

Страница 20: ...diction AN ELECTRICAL GROUND IS REQUIRED TO REDUCE RISK OF ELECTRICAL SHOCK OR POSSIBLE ELECTROCUTION If any of the original wire as supplied with the appliance must be replaced use only type 1050 C t...

Страница 21: ...BEFOREATTACHING THE GAS LINE BE SURE THATALL GAS PIPE IS CLEAN ON THE INSIDE TO TRAP ANY DIRT OR FOREIGN MATERIAL IN THE GAS SUPPLY LINE A DIRT LEG SOMETIMES CALLED SEDIMENT TRAP OR DRIPLEG MUST BE IN...

Страница 22: ...OVERHEATING OCCUR OR THE GAS SUPPLY FAIL TO SHUT OFF TURN OFF THE MANUALGAS CONTROLVALVE TO THE APPLIANCE CAUTION Before proceeding with the operation of the unit make sure the water heater and system...

Страница 23: ...d then shuts off power to the Silicon Nitride Ignitor 11 From the time the Silicon Nitride Ignitor s power is shut off the Ignition Control Board waits 3 more seconds to monitor the Flame Sensor 12 If...

Страница 24: ...ny gas If you then smell gas STOP Follow B in the safety information above on this label If you don t smell gas go on to the next step 7 Turn gas control knob counterclockwise to ON 8 Turn on all elec...

Страница 25: ...ed on the lowest setting which produces an acceptable hot water supply This will always give the most energy efficient operation The temperature control has a 4F fixed differential CHECKING VENTING Th...

Страница 26: ...valve should be installed in place of the defective one FIGURE13 CHECKING THE INPUT For appliance installation locations with elevations above 2000 feet refer to HIGH ALTITUDE INSTALLATIONS section of...

Страница 27: ...APPLIANCE HOT WATER ODOR On occasion hot water may develop a strong odor If this occurs drain the heater completely flush thoroughly and refill If the problem persists chlorination of the heater and r...

Страница 28: ...hy When and How booklet Form No 4800 Then install the long plastic male adapter fitting into the drain valve opening of the water heater Use teflon tape and hand tighten only Do not overtighten Prepar...

Страница 29: ...g Check that main manual gas shutoff valve is fully open and that gas service has not been interrupted Check that after following the appliance OPERATING INSTRUCTIONS the Top Knob of the appliance gas...

Страница 30: ...ription of this flow chart can be found in the SEQUENCE OF OPERATION section found on page 23 Switch power on to unit Thermostat calls for heat Ignition Control Board performs diagnostic check on comp...

Страница 31: ...Replace dual bulb controller if differential is too wide greater than 4 F Heater recovery is slower Call serviceman Check gas input If incorrect adjust gas pressure or replace main burner orifice Draf...

Страница 32: ...tive method of controlling thermal expansion is also installed at the heater s and operational at all times The relief valve installed on the heater is not an acceptable method 4 SERVICEANDREPAIREXPEN...

Отзывы: