


V-Series Camera Quick Start Guide |
VX-4V-B-RI
12000 Pecos St., Suite 290, Westminster, CO 80234 | www.3xlogic.com | (877) 3XLOGIC
5
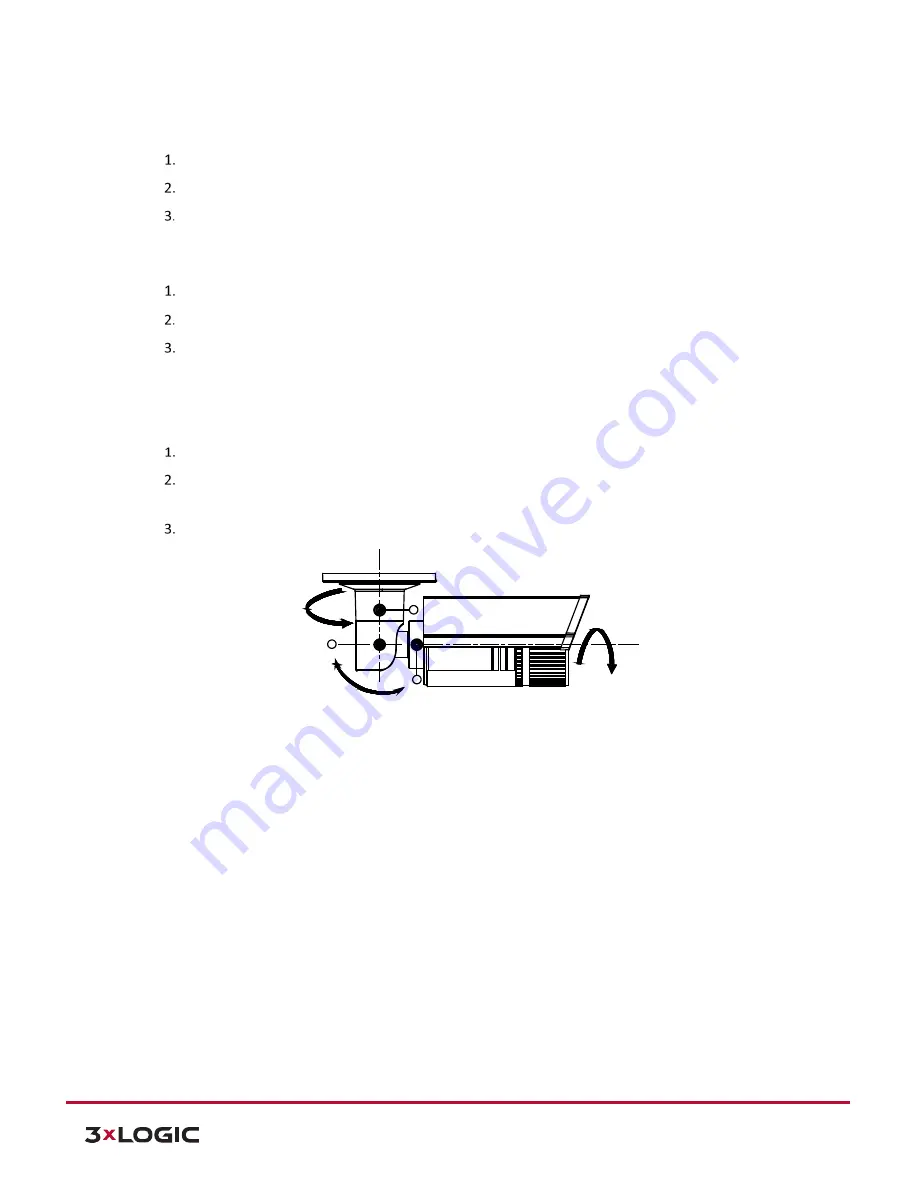
PAN ADJUSTMENT
Steps:
Loosen the lock screw-1.
Adjust the panning position of the camera. The adjusting range is from 0 degrees to 360 degrees.
Tighten the lock screw-1.
TILT ADJUSTMENT
Steps:
Loosen the lock screw-2.
Adjust the tilting position of the camera. The adjusting range is from 0 degrees to 90 degrees.
Tighten the lock screw-2.
ROTATION ADJUSTMENT
Steps:
Loosen the lock screw-3.
Rotate the rotation position to adjust the azimuth angle of the image. The adjusting range is from 0
degrees to 360 degrees.
Tighten the lock screw-3.
Figure 1-4
Lens Adjustment
ZOOM AND FOCUS ADJUSTMENT
You can use the zoom lever and focus lever to adjust the zoom and focus level. Follow the steps below to adjust
focus and zoom.
Steps:
1.
Remove the sun shield and front cover to expose the zoom lever and the focus lever.
2.
View the camera image on the monitoring screen.
3.
Loosen the zoom lever and move the lever between T (Tele) and W (Wide) to obtain the desired angle
of view.
4.
Tighten the zoom lever.
5.
Loosen the focus lever and move the lever between F (Far) and N (Near) to obtain the optimum focus.
6.
Tighten the focus lever.
7.
Install the sun shield and the front cover back to the camera.
Tilting
3
1
Rotation
Panning
2