Viewing data and Data Finder Page
1. Communicating/connecting the SoundPro to the pc
A. Turn On the Sound Pro.
B. Plug in USB cable from SoundPro to pc.
3.
SoundPro and downloading
A. Select the SLM family and the SoundPro mode from the
Instrument window (see A). Click on “
Go to session finder after
download
” box.
B. Click the button (See B).
C. Once downloaded, click the Data Finder tab (if you did not select
“go to session finder in step A”.) (See C).
A
2. DMS Welcome page and instrument communication
A. Click on icon (see A) to access the
Instrument download panel.
4. Selecting and viewing data
A. The Data Finder page (see A) is used to view, select, and
preview reports. Note: Click Browse to view all data files.
B. Select the data by clicking on either the session/study (Note:
you may need to expand to see the study data.
C. To view in Graphs and Tables, click on or
buttons.
B
A
Data Finder page
A
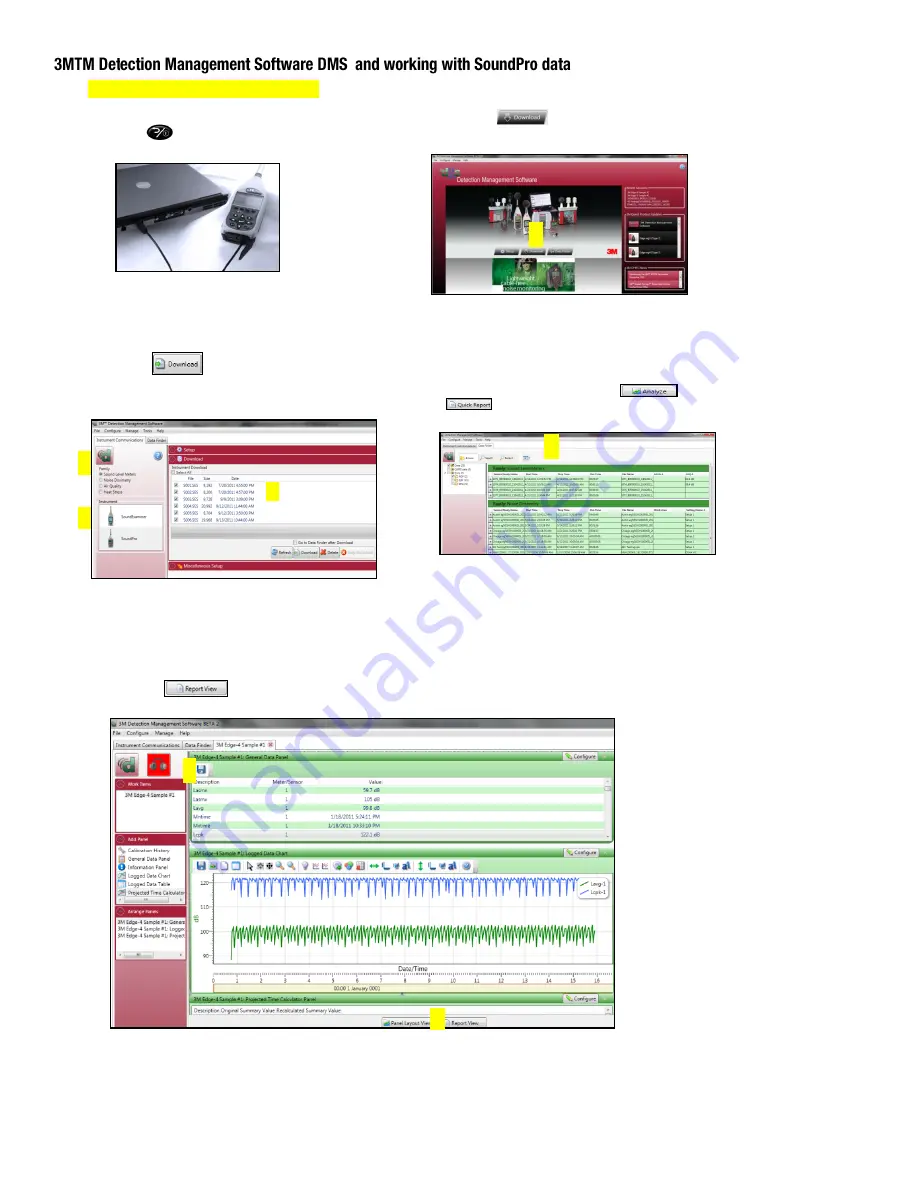
5. Viewing Data in graphs & tables & Report View
The graphs and tables page is noted as the panel layout view page.
A. The session/study data page displays the data in logged data
charts/tables (see A).
B. Click on to view the panels in a report format
(see B).
A
B
C


