TMA Grand Master 2.1 – User’s Guide
5 Using TMA Grand Master
5.4 Inserting Donor Blocks
1. Insert donor blocks into the first tray, positions A1-10.
For more information see section
4.4.3 Inserting a block into the main unit
.
Warning!
Make sure not to insert paraffin blocks that do not contain tissue samples in the slots
of the donor tray, because the puncher piston may stuck and break into the block
causing severe malfunction.
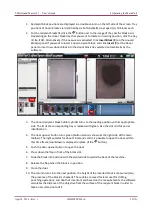
2. On each tray, donor block positions are numbered from left to right, starting with
1
. Click the
schematic picture of the first donor block you want to use.
The camera also records the label area of the donor block. The label area below the preview
image is displayed by default. If the label is upside-down, click
Rotate
.
3. The Donor block ID must be entered into the text field below the donor block image. After
typing an ID into the Donor ID field, hit Enter or click the button next to the label field to
accept the ID. After entering the donor block ID and hitting enter or clicking the button,
the label area disappears automatically. Click to make the label area reappear.
NOTE:
When reloading a project, blocks must be loaded to the same positions with the
previously set IDs entered into the label field. Otherwise you can accept the new position by
clicking
Yes
in the window displayed as below.
If you have already logged in to CaseCenter, after accepting the donor ID, the software
automatically searches for the corresponding slide stored on the server.
April 8, 2014 – Rev. 1
3DHISTECH Ltd.
41(79)


