3D Systems, Inc.
11
6
CREATING SCAN DATA
Please follow these steps to scan an object and create scan data.
SCAN AN OBJECT AND CREATE SCAN DATA
1.
Place either the partifact or another object on the stable plate. The partifact was designed for 3D scanning with Geomagic Capture
Series 3D scanners. For more information on preparation for 3D scanning, see
2.
Enter the scanning command in your Geomagic application to connect a scanner.
3.
After the Geomagic Capture application is initiated, check if the scanner has been connected properly.
Note: If you have an issue with the scanner connection, see
Network Configuration
.
4.
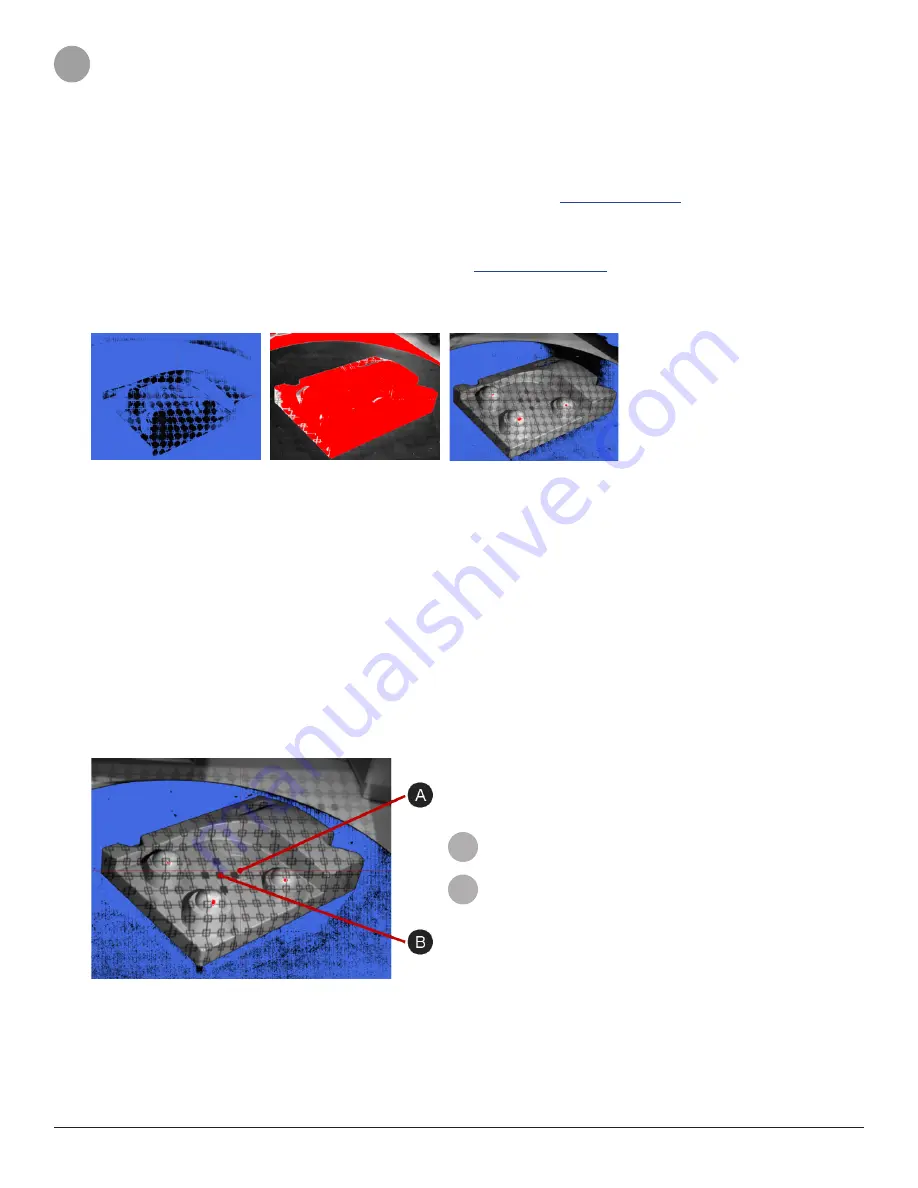
Adjust the Exposure setting to get an ideal scan.
For reference, A scan that shows a lot of red is over-exposed, and a scan that shows a lot of blue and black is under-exposed.
Under-Exposed
Over-Exposed
Optimal
Note: Scan quality can vary by the following factors:
•
Environmental conditions
Light and vibration can cause inaccuracies. Ensure the system is stable and the exposure is set to the conditions.
•
Stability of the scanner and the object
If either the scanner or the object move during the scan, the data will be inaccurate. Ensure both are stable and se-
cure.
•
Shape and size of the object
If the part you want to scan has limited features, you must use target markers or spheres to align the data.
5.
Align the center of projected pattern to the camera focus.
The red cross-hairs shows the camera focus and the gray grid on the object shows the projected pattern.
Note: An exact positioning is not necessary. As long as the center of projected pattern is close to the camera focus, a
satisfactory scan can be created.
A
Camera Focus
B
Center of Projected Pattern
6.
Click
Scan
. A scan will be taken and imported into the application.
7.
Reposition the part and click
Scan
again to take another scan.
Note: If a scan was made using the Best Fit alignment method, make sure at least 30% of the original scan area is in the
next scan. If the Target Markers alignment method was used, make sure that at least three target markers from the first
scan area are visible in the next scan.
8.
Continue scanning until the project is completed and click
Accept
(or
OK
) in your Geomagic application.


