


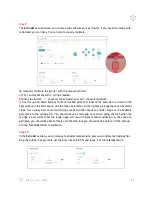


Step 11
Before starting the actual print, it is important to prime the syringe tip.
a)
First, lower the bedplate so that there is space between the syringe tip and any print surface.
This will let you see how well the material flows when you extrude (ie. If there are bubbles or if you
need to change the pressure slightly).
b)
Place a paper towel or wipe under the point of extrusion to catch any material.
c)
After setting the pressure, click and hold the extrude button. The ideal case is that the material
flows in a continuous, steady, downward stream.
d)
If the material curls upward, or extrudes in an uncontrolled stream, try lowering the pressure
by 2-3 PSI.
e)
If the material struggles to come out, or appears in discrete chunks try increasing the pressure
by 2-3 PSI.
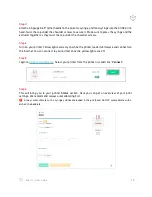
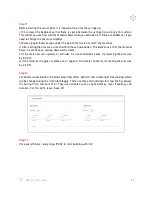
Step 12
For photocurable bioinks, the Allevi bioprinter offers both UV and visible light crosslinking, which
can be changed using the UV/Visible toggle. There are three main settings for crosslinking: Always
On, During Print, and Post Print. They use variables such as light intensity, layer frequency, and
duration. For this print, leave these off.
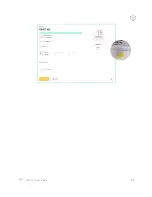
Step 13
Once everything is ready to go,
‘Print’
to start building with life!
22
Allevi 3 | User Guide
Содержание Allevi 3
Страница 1: ...Allevi 3 User Guide 1 1 2 ...
Страница 2: ...BUILD WITH LIFE ...
Страница 4: ...WELCOME ...
Страница 8: ...GETTING STARTED ...
Страница 10: ...28mm 77 50mm Diameter 88 30mm 9 Allevi 3 User Guide PRINT BED DIMENSIONS ...
Страница 18: ...START PRINTING ...
Страница 24: ...23 Allevi 3 User Guide ...
Страница 25: ...MAINTENANCE TROUBLESHOOTING ...
Страница 28: ...Copyright Allevi Inc 2022 Allevi Inc 2929 Arch St 17th Floor Philadelphia PA 19104 ...
Страница 29: ......