


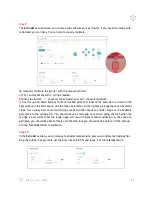


Step 9
The
Extruder
section allows you to move and calibrate your extruders. If you haven’t already auto-
calibrated, you can here. You can also manually calibrate.
To manually calibrate the printer with the manual controls:
a)
First, autocalibrate with a syringe loaded.
b)
Press the button to center the extruder over your chosen build plate.
c)
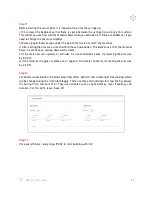
Use the up and down buttons to move the bed plate (Z) closer to the extruder as shown in the
figure above in the red square. Use the step size buttons on the right to pick appropriate movement
steps. It is usually best to start with large steps and then move to smaller steps as the bedplate
gets close to the syringe tip. You should leave a small gap to avoid scraping the dish when the
syringe is pressurized, but too large a gap will result in poor material adhesion. In the case of a
petridish, you should be able to freely spin the dish, but you should not be able to lift the dish up.
d)
Click
‘Set Calibration’
to calibrate.
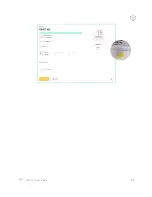
Step 10
In the
Extruder
section, you can also set extruder temperature, pressure, and test extrude by hol
-
ding the button. For pluronic, set the pressure to 80
PSI and leave it at room temperature.
21
Allevi 3 | User Guide
Содержание Allevi 3
Страница 1: ...Allevi 3 User Guide 1 1 2 ...
Страница 2: ...BUILD WITH LIFE ...
Страница 4: ...WELCOME ...
Страница 8: ...GETTING STARTED ...
Страница 10: ...28mm 77 50mm Diameter 88 30mm 9 Allevi 3 User Guide PRINT BED DIMENSIONS ...
Страница 18: ...START PRINTING ...
Страница 24: ...23 Allevi 3 User Guide ...
Страница 25: ...MAINTENANCE TROUBLESHOOTING ...
Страница 28: ...Copyright Allevi Inc 2022 Allevi Inc 2929 Arch St 17th Floor Philadelphia PA 19104 ...
Страница 29: ......