background image

Please note that the center of gravity and the throws must be dialled in by the pilot 
himself for each Naughty built - the values given here are only guide values.

We wish you a lot of fun with your Naughty!

Содержание Naughty 2000

Страница 1: ...CA medium thick Cutterknife Sanpaper 120 please check the Table for further vitamins part diameter length pcs horstab 4mm 285mm 1 fuselage 8mm 800mm 1 flaps 2mm 350mm 2 2mm 430mm 2 wingspars 10mm 1000mm 1 8mm 380mm 2 8mm 145mm 1 screws M6 20mm 2 Nylon M5 20mm 1 Nylon M3 20mm 1 Nylon nuts M6 2 M5 1 M3 1 Self tapping screws M2 4mm 6 mm 30 Round Magnets 10mm 4mm 10 ...

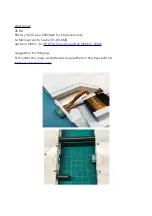
Страница 2: ...Lipo 2200mah for Motorversiom 6x Microservos fe Savöx SH 0264MG optional Motor fe HK NTM Prop Drive 28 36 1200KV 530W Suggestion for Winglug first solder the plugs and afterwards glue them in the bays with CA Multiplex Stecker 6 polig ...

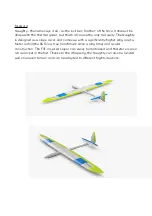
Страница 3: ...d as a slope racer and comes up with a significantly higher wing load a faster airfoil the RG15 is a true benchmark since a long time and a solid construction The F3F inspired sloper can easily be motorized and therefore is also a true rocket in the flat Thanks to the 4 flapwing the Naughty can also be landed well on uneven terrain and can be adapted to different flight situations ...

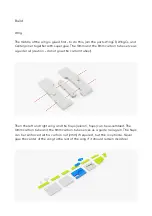
Страница 4: ...as a guide rail caution do not glue the carbon tubes Then the left and right wing and the flaps aileron flaps can be assembled The 10mm carbon tube and the 8mm carbon tube serves as a guide rail again The flaps can be reinforced with a carbon rod 2mm if required but this is optional Never glue the center of the wing to the rest of the wing if it should remain divisible ...

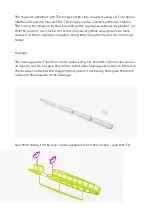
Страница 5: ...cessary thick superglue dries more slowly Use the accelerator only when everything fits perfectly and can be moved freely fuselage The fuselage parts FusLW 1 4 can be glued using CA the 8mm carbon tube serves as a guide rail Do not glue the carbon tube to the fuselage yet Insert an M6 nut in the recess provided at the wingjoint and glue it if necessary then glue the entire surface of the fusplate ...

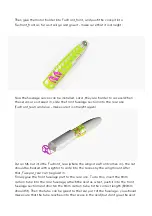
Страница 6: ...the Fusfront_rear where the wingscrew front comes in the nut should be heated with a lighter to slide into the recess by the wing mount After that Fusspar_rear can be glued in Finally glue the front fuselage part to the rear one To do this insert the 8mm carbon tube into the rear fuselage attach the skid as a test push it into the front fuselage section and shorten the 8mm carbon tube to the corre...

Страница 7: ...ght El_middle and El_left and the corresponding rudder surfaces together 4mm carbon tube obligatory Then screw the entire horizontal stab to the pylon using M5 and M3 screws and the associated nuts these are pushed into the slots in the pylon The tailplane must be parallel to the wing therefore as a guide mount the wing center section on the fuselage with 2x M6 screws apply adhesive to the pylon t...

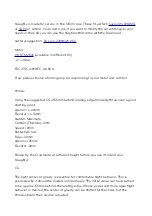
Страница 8: ...sted CG of 55mm behind leading edge following throws are a good starting point Aileron 20mm Elevator 10mm Rudder Maximum Camber Thermal 3mm Speed 2mm Butterfly Crow Flaps 30mm Ailerons 25mm Elevator 2mm Please try the Crowmode at sufficient height before you use it to land your Naughty CG The right center of gravity is essential for comfortable flight behavior This is precisely why it should be di...

Страница 9: ...lease note that the center of gravity and the throws must be dialled in by the pilot himself for each Naughty built the values given here are only guide values We wish you a lot of fun with your Naughty ...

Отзывы: