


UP Plus 2 3D Printer User Manual v 2013.10.24
7.
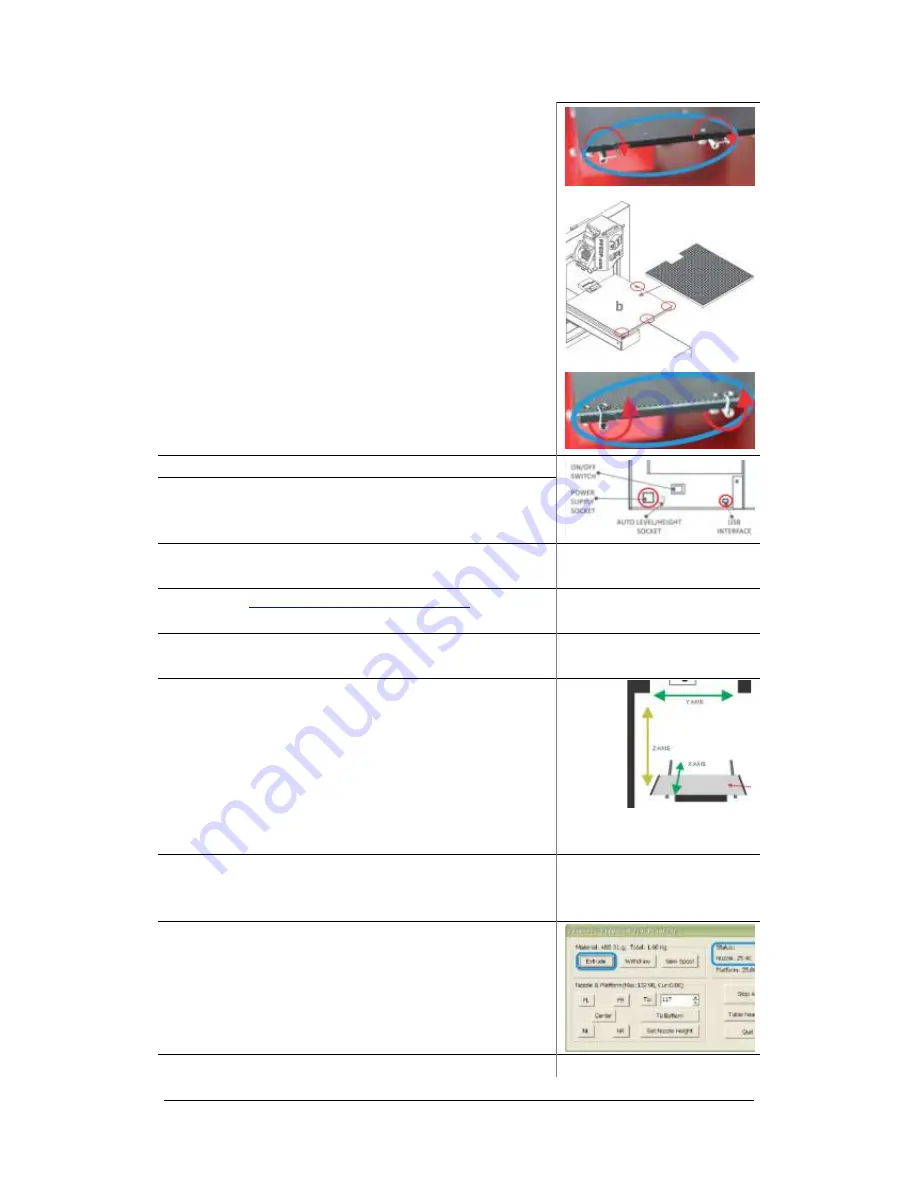
Twist the spring clips in a clockwise fashion and tuck
them under the platform
(as indicated in red).
Place the Perfboard on top of the black platform.
The Perfboard will only fit one way due to the cut out.
Then unclip (anti-clockwise) the springs onto of the
Perfboard so it locks it in place.
TIP:
Always remove the Perfboard after printing to
remove printed models; otherwise you will unlevel the
platform.
8.
Plug the USB cable into the back of the printer.
9.
Plug the power adapter into the back of the printer.
10.
Switch on at the wall socket and switch on at back of
the printer.
11.
Visit
www.3dprintingsystems.com/support
to download
and install the 3D Print Software.
Chapter 4 Installing the soft-
ware
12.
Installing the drivers (Windows)
Chapter 4.1 Installing drivers
(Windows)
13.
Open the software, click “3D Print” and “Initialise”.
The printer should align each of its 3 axis.
X axis – the platform forward and backwards,
Z axis – platform up & down,
Y axis – head moves left and right and then beeps.
(initialise only needs to be done when you switch on the
printer)
Chapter 5 Initialising the
Printer
14.
Let the printer know you have added a new spool of
material. Click “3D Print” / “Maintenance” / “New
Spool”
Chapter 3.3.4 Other Mainte-
nance Options – New Spool
15.
In the software, click “3D Print” / “Maintenance” /
“Extrude”.
Wait a few minutes for the extruder to
reach 260c, then it will beep and start feeding the fila-
ment out of the nozzle in a long line. It will do this for
about 30 seconds, remove the extruded filament.
Содержание UP Plus 2
Страница 1: ...UP Plus 2 3D Printer User Manual v 2013 10 24 ...
Страница 8: ...UP Plus 2 3D Printer User Manual v 2013 10 24 2 1 Appearance Figure 1 Front view of printer ...
Страница 10: ...UP Plus 2 3D Printer User Manual v 2013 10 24 2 3 Accessories PARTS ...
Страница 56: ...UP Plus 2 3D Printer User Manual v 2013 10 24 ...


