| Vinyl Blinds
4
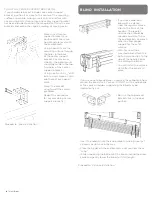
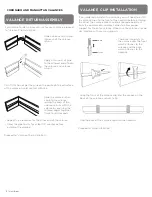
TO INSTALL CENTER SUPPORT BRACKET(S):
If your hardware packet includes one center support
bracket, position it as close to the center of the mounting
surface as possible, making sure it will not interfere with
any moving parts. If more than one center support bracket
has been provided, position them equidistant from the end
brackets and each other, again avoiding all moving parts.
Proceed to “Blind Installation”.
• Make sure all center
support brackets are
positioned at the same
height and are level with
the end brackets.
• Using a pencil, mark the
mounting surface through
the holes in the back
of the center support
bracket. For maximum
stability, the pencil marks
should be made in the top
two holes of the center
support bracket.
• Using a drill with a
1
/
16
" drill
bit or an awl, make a small
pilot hole at each pencil
mark.
• Mount the bracket
using two of the screws
provided.
• Repeat this procedure
for any remaining center
support bracket(s).
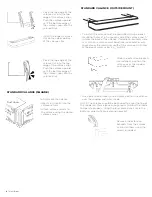
• If you have ordered a
blind with a valance,
snap the regular valance
clips to the front of the
headrail. The regular
valance clips should be
spaced equidistant from
the end brackets and each
other to allow proper
support for the entire
valance.
• Also, for an outside
mounted blind attach the
button valance clips to the
side of the headrail prior
to installing the blind.
• You will install the valance
slats after the blind is in
place.
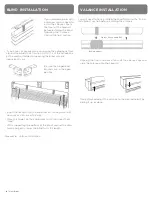
BLIND INSTALLATION
• If you have not already done so unwrap the cellophane from
around the blind stack. Caution: DO NOT cut the cellophane
as the cords or ladders supporting the blind may be
inadvertently cut.
• Be sure the hinged end
brackets are in the open
position.
• Insert the headrail into the end brackets, making sure that
no cords or slats are in the way.
• Close the hinges on the end brackets until you hear them
“snap.”
• While supporting the bottom of the blind, unwind the draw
cords and gently lower the blind to its full length.
Proceed to “Valance Installation.”


