


2N
- ISDN BRI GSM Enterprise Gateway
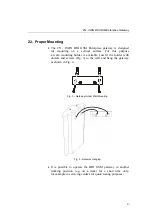
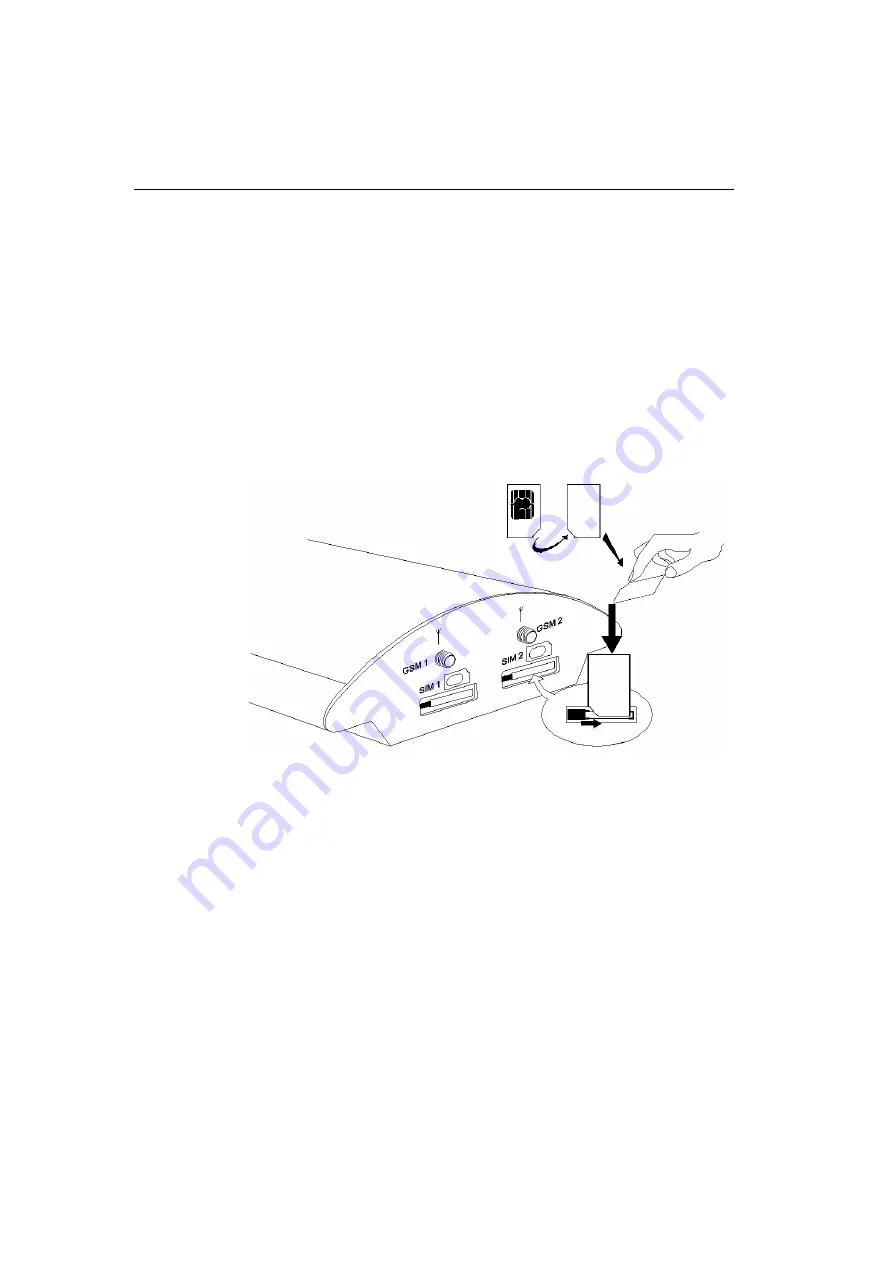
2.7. SIM Card Installation/Removal
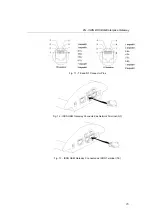
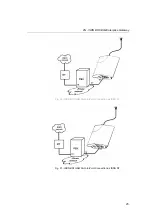
Insert the SIM card into the SIM card slots with your hand
as shown in Fig. 10. Please make sure that the SIM card contact
plates are on the side closer to the GSM gateway antenna
connectors. Having inserted the SIM card, push the card gently
until you hear a click signalling that the card has been snapped
by the push/pull holders. Secure the SIM card by shifting the latch
to the right in order to avoid incidental removal of the SIM card.
To remove the SIM card take the opposite steps. You can replace
a SIM card even with the gateway on.
Fig. 10 – SIM Card Inserting Procedure
Each SIM card inserted in the gateway has a unique set
of parameters. Their values are bound to the card Id, remain stored
in the gateway even if the SIM card has been removed and thus
need not be reset upon SIM card re-insertion.
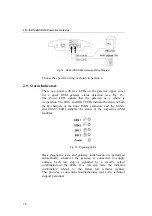
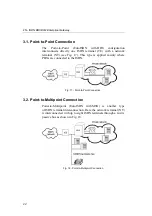
2.8. NT and TE Connection
ISDN terminals are connected to the NT and TE connectors
depending on the configuration of your telecommunication
equipment. They are connected using a 4-wire passive bus through
RJ-45 connectors. For NT or TE connections see Fig. 12 and
Fig. 13. The RJ-45 pins for TE and NT are shown in Fig. 11.
14
Содержание ISDN BRI GSM
Страница 1: ...2N ISDN BRI GSM Enterprise Gateway User Manual Version 1 1 ...
Страница 4: ......
Страница 8: ......
Страница 46: ...2N ISDN BRI GSM Enterprise Gateway Fig 28 Incoming Call Processing Procedure 36 ...
Страница 88: ...2N ISDN BRI GSM Enterprise Gateway 78 ...
Страница 106: ...2N ISDN BRI GSM Enterprise Gateway 96 ...
Страница 109: ...2N ISDN BRI GSM Enterprise Gateway 2005 2N TELEKOMUNIKACE a s Praha PB 1272 v 1 1 99 ...


