WCP SS Swerve (BLDC), User Manual
The WCP SS Swerve (BLDC) user manual is a comprehensive guide to operating and maintaining this innovative product. Available for free download on our website, it provides step-by-step instructions and valuable insights on optimizing performance. Get your manual today at manualshive.com and unlock the full potential of your WCP SS Swerve (BLDC).
Share
Download


Reviews:
No comments
Related manuals for SS Swerve (BLDC)

HK-DVDRW
Brand: HIKVISION Pages: 9

GVX9000
Brand: Eaton Pages: 208

MD40
Brand: UHVD Pages: 55

150-BSY+
Brand: D+H Pages: 8

Pocket CD-RW
Brand: LaCie Pages: 32
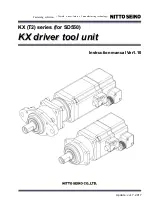
KX Series
Brand: Nitto Seiko Pages: 30

SDL10A
Brand: BONMET Pages: 85

Compax3H C3H050V4
Brand: Parker Pages: 44

EZ Writer II
Brand: Apricorn Pages: 18

GDB-5K50
Brand: Melec Pages: 54

LS 40
Brand: SOMFY Pages: 64

eDrive 3200 Series
Brand: Dorner Pages: 20

MECHATROLINK-III
Brand: YASKAWA Pages: 41

VLT 3032
Brand: Danfoss Pages: 43

Compax3 Fluid T40
Brand: Parker Pages: 40

DW-548DK
Brand: Teac Pages: 24

TVD3.2 bl Series
Brand: Unitek Pages: 40

ECOdrive Series
Brand: eldoLED Pages: 2


