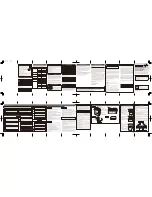
A) Go Warmer unit
B) USB Input (charges Go Warmer)
C) Flashlight Switch
D) Battery/Temperature Indicator Lights
E) USB Output (charges other devices)
F) Flashlight
G) Power Button
H) USB Charging Cable Output (large)
I) USB Charging Cable Input (small)
B
A
E
C
F
G
D
H
I
HOW TO USE:
1. With Go Warmer turned OFF, press the Power Button once to light the
Battery/Temperature Indicator Lights. If fully charged, all 3 lights will light
up. If only 1 light is lit, Go Warmer needs to be recharged.
2. To use Flashlight, locate the On/Off Switch next to the USB Output.
RECHARGING GO WARMER:
1. Use the USB Charging Cable and plug the Input (small) end into the USB
Input on Go Warmer.
2. Plug the Output (large) end into a suitable charging device or Listed/
Certified ITE Power Supply. Once fully charged, disconnect the
Charging Cable.
IMPORTANT:
Use ONLY the Charging Cable provided to avoid the potential for
leaking, overheating, or explosion.
HOW TO USE HAND WARMER FUNCTION:
1. Press and hold the Power Button for 5 seconds to turn Go Warmer ON.
This is the HIGH HEAT setting and 3 indicator lights will light up red.
2. Press the Power Button once more for the MEDIUM HEAT setting
(2 indicator lights should light up red).
3. Press the Power Button once more for LOW HEAT setting (1 indicator
light should light up red).
TO TURN OFF:
Press Power Button 2 times in a row until indicator lights turn off.
INSTRUCTIONS
READ CAREFULLY BEFORE USING
With Built In LED Flashlight
go warmer instructions 8.5x5 flashlight.qxp_Layout 1 10/28/20 11:16 AM Page 1