WELLS MANUFACTURING
265 Hobson Street, Smithville, Tennessee 37166
telephone: 314-678-6314
fax: 314-781-2714
www.wells
-mfg
.com
IMPORTANT: DO NOT DISCARD THIS MANUAL
This manual is considered to be part of the appliance and is to be given to the OWNER or
MANAGER of the restaurant, or to the person responsible for TRAINING OPERATORS of
this appliance. Additional manuals are available from your WELLS DEALER.
THIS MANUAL MUST BE READ AND UNDERSTOOD BY ALL PERSONS USING OR
INSTALLING THIS APPLIANCE.
Contact your WELLS DEALER if you have any
questions concerning installation, operation or maintenance of this equipment.
OWNERS MANUAL
BUILT-IN
HALF-SIZE
WARMERS
with
THERMOSTAT
CONTROL
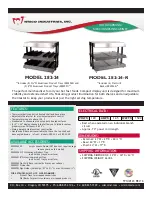
MODELS
HSW6
HSW6D
THIRD SIZE
with FIXED
THERMOSTAT
TSW6D
Includes
INSTALLATION
USE & CARE
EXPLODED VIEW
PARTS LIST
WIRING DIAGRAM
011A
p/n
2M-
308013 Rev.
B
03/18
Model HSW6