background image

3-874-363-

11

(1)

© 2008 Sony Corporation

RDR-HX780

DVD Recorder

Operating Instructions

Summary of Contents for RDR-HX780

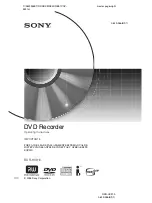
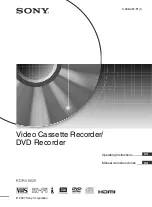
Page 1: ...3 874 363 11 1 2008 Sony Corporation RDR HX780 DVD Recorder Operating Instructions ...

Page 2: ...mpanying the appliance Precaution Install this system so that the AC power cord can be unplugged from the wall socket immediately in the event of trouble Precautions This equipment has been tested and found to comply with the limits set out in the EMC Directive using a connection cable shorter than 3 meters On safety Should any solid object or liquid fall into the cabinet unplug the recorder and h...

Page 3: ...ecorder from the wall outlet To disconnect the AC power cord grasp the plug itself never pull the cord On placement Place the recorder in a location with adequate ventilation to prevent heat build up in the recorder Do not place the recorder on a soft surface such as a rug that might block the ventilation holes Do not place the recorder in a confined space such as a bookshelf or similar unit Do no...

Page 4: ...mportant Safety Instructions 1 Read these instructions 2 Keep these instructions 3 Heed all warnings 4 Follow all instructions 5 Do not use this apparatus near water 6 Clean only with dry cloth 7 Do not block any ventilation openings Install in accordance with the manufacturer s instructions 8 Do not install near any heat sources such as radiators heat registers stoves or other apparatus including...

Page 5: ...manual In this manual the internal hard disk drive is written as HDD and disc is used as a general reference for the HDD DVDs or CDs unless otherwise specified by the text or illustrations Icons such as listed at the top of each explanation indicate what kind of media can be used with the function being explained For details see Recordable and Playable Discs on page 118 Instructions in this manual...

Page 6: ... with the remote 23 If you have a Sony DVD player or more than one Sony DVD recorder 24 Changing channels of the recorder using the remote 24 Step 6 Easy Setup 25 Connecting a VCR or Similar Device 27 Connecting to the LINE IN 1 or 3 jacks 27 Connecting to the LINE 2 IN jacks on the front panel 28 Connecting to a Satellite or Digital Tuner 29 1 Inserting a Disc 30 2 Recording a Program 30 Checking...

Page 7: ...gram you are recording Chase Play 54 Playing a previous recording while making another Simultaneous Rec and Play 54 Searching for a Time Title Chapter Track etc 55 Erasing and Editing 56 Before Editing 56 Erasing and Editing a Title 57 Editing multiple titles Multi Mode 57 Erasing a section of a title A B Erase 58 Dividing a title Divide 58 Erasing and Editing a Chapter 59 Dividing a chapter Divid...

Page 8: ...acks Using Jukebox USB Device 78 Adding audio tracks to a Playlist HDD only 79 Playback options 79 Playing repeatedly Repeat 79 Creating your own program Programme USB device only 80 Managing Audio Tracks on the Music Jukebox HDD only 81 Photo Album 82 About the Photo Album Function 82 Preparing for Using the Photo Album Function 82 Connecting the USB device 82 Copying JPEG image files to the HDD ...

Page 9: ...uage 103 Recording Settings Recording 104 Playback Settings Playback 106 HDMI Settings HDMI Output 108 Other Settings Options 109 Other Settings Options 2 110 Additional Information 111 Troubleshooting 111 Resetting the Recorder 117 Recordable and Playable Discs 118 Playable Discs 120 About Recording Dubbing Mode 121 Language Code List 125 Country Area Code 125 Notes About This Recorder 126 Notes ...

Page 10: ...as a tactile dot E Number buttons 55 The number 5 button has a tactile dot F INPUT input select 46 Selects an input source G AUDIO 50 The AUDIO button has a tactile dot H CLEAR 35 52 53 I PICTURE ADJUST 94 Enters or exits the Picture Adjustment menu J SUBTITLE 50 Selects a subtitle language ANGLE 50 88 Changes the angles or rotates an image during slideshow PLAY MODE 52 55 ZOOM 88 Zooms an image d...

Page 11: ...9 H PLAY 48 88 X PAUSE 31 50 79 88 x STOP 48 78 88 The H PLAY button has a tactile dot O DISC SETUP 36 38 40 Enters or exits the Disc Setup menu page 97 P z REC 30 x REC STOP 30 HDD DVD DUB 64 Starts dubbing the current playing title or cancels the dubbing REC MODE 30 Selects the recording mode Q TV 1 on standby 23 TV INPUT input select 23 TV VOL volume 23 TV CH channel 23 The button has a tactile...

Page 12: ...vice to these jacks N ONE TOUCH DUB 70 74 Starts dubbing from a connected digital video camera O DV IN jack 72 Connect a DV camcorder to this jack P USB jack type A 76 82 Connect a USB device to this jack Q PictBridge USB jack type B 92 Connect a PictBridge compatible printer to this jack Use the tactile dot as a reference when operating the recorder To lock the recorder Child Lock You can lock al...

Page 13: ...or DVD RW disc is loaded F Command Mode indicator 109 Displays the Command Mode of the remote When the Command Mode for the recorder is set to 3 Default setting either 1 or 2 does not appear G Recording status H Dubbing direction indicator I Playing status A VHF UHF IN OUT jacks 16 17 B LINE IN 1 3 R AUDIO L VIDEO jacks 15 27 29 C LINE IN 1 3 S VIDEO jacks 27 D LINE OUT R AUDIO L VIDEO jacks 18 21...

Page 14: ...a video input jack Be sure to disconnect the AC power cord of each component before connecting Step 1 Connecting the Antenna Cable Select one of the following antenna hookups b Notes If your antenna is a flat cable 300 ohm twin lead cable use an external antenna connector not supplied to connect the antenna to the recorder If you have separate cables for VHF and UHF antennas use a UHF VHF band mix...

Page 15: ...the input jack connected to the cable box or satellite receiver LINE IN 1 or 3 z Hint If your cable box or satellite receiver has an S video jack you can use an S video cord not supplied instead of the audio video cord A Cable box or satellite receiver with a video audio output to LINE IN 1 or 3 DVD recorder Audio video cord not supplied Signal flow Cable box satellite receiver Antenna cable suppl...

Page 16: ...corder 2ch 3ch or 4ch to the antenna output channel on the cable box 2ch 3ch or 4ch b Note When using this connection set Auto Channel Setting to Antenna in the Tuner setup page 99 B Cable box or satellite receiver with an antenna output only ANT IN TO TV to VHF UHF IN Wall to VHF UHF OUT to antenna input Antenna cable not supplied Signal flow TV DVD recorder Antenna cable supplied Cable box satel...

Page 17: ... if you are using a VHF UHF antenna or separate VHF and UHF antennas With this hookup you can record any channel by selecting the channel on the recorder C Cable without cable box or antenna only no cable TV DVD recorder TV to antenna input to VHF UHF IN to VHF UHF OUT Antenna cable supplied Signal flow Wall ...

Page 18: ...will enable you to view pictures C A D B Audio video cord supplied Component video cord not supplied yellow TV projector or audio component TV projector or audio component green S video cord not supplied TV projector or audio component red blue Signal flow to COMPONENT VIDEO OUT to LINE OUT S VIDEO to LINE OUT VIDEO DVD recorder HDMI cord not supplied TV projector or audio component to HDMI OUT gr...

Page 19: ...k Follow the steps below Improper handling may damage the HDMI jack and the connector 1 Carefully align the HDMI jack on the rear of the recorder and the HDMI connector by checking their shapes Make sure the connector is not upside down or tilted 2 Insert the HDMI connector straight into the HDMI jack Do not bend or apply pressure to the HDMI connector b Notes Be sure to disconnect the HDMI cord w...

Page 20: ...m Power Off When you turn the TV off using the power button on the TV s remote the recorder and components compatible with the Control for HDMI function turn off automatically However the recorder does not turn off while recording or dubbing even if you turn off the TV BRAVIA Sync display You can control the recorder by pressing the SYNC MENU button on the TV s remote b Notes Depending on the conn...

Page 21: ...onnection You can enjoy Dolby Digital 5 1ch DTS 5 1ch and MPEG audio 5 1ch surround effects If you connect a Sony audio component that is compatible with the Control for HDMI function refer to the operating instructions supplied with the audio component VIDEO AUDIO INPUT L R A B Audio component with a decoder white TV projector or audio component Audio videocord supplied Signal flow Coaxial digita...

Page 22: ...ge 102 Otherwise no sound or a loud noise will come from your speakers When you connect the recorder to an audio component using an HDMI cord you will need to do one of the following Connect the audio component to the TV with the HDMI cord or Connect the recorder to the TV with a video cord other than HDMI cord component video cord S video cord or audio video cord Step 4 Connecting the AC Power Co...

Page 23: ...urs wipe out any liquid inside the battery compartment and insert new batteries Do not expose the remote sensor marked on the front panel to strong light such as direct sunlight or a lighting apparatus The recorder may not respond to the remote When you replace the batteries of the remote the code number and Command Mode may be reset to the default setting Set the appropriate code number and Comma...

Page 24: ...ng the number buttons Example for channel 50 Press 5 0 then press ENTER Manufacturer Code number Sony 01 default Hitachi 02 04 LG Goldstar 04 Mitsubishi MGA 13 04 NEC 04 Panasonic 19 Philips 21 Pioneer 16 RCA 10 04 Samsung 20 04 Sharp 18 Toshiba 07 18 Buttons Operations TV 1 Turns your TV on or off TV VOL Adjusts the volume of your TV TV CH Selects the channel on your TV TVINPUT input select Switc...

Page 25: ...able channels and presets them To skip this setting select Do not set To set the channels manually see page 100 Clock Setting Select Auto when you use antenna hookup C page 17 The Auto Clock Setting display appears Select a channel that carries a time signal and then Start using m and press ENTER If a clock signal cannot be found press O RETURN and set the clock manually Select Manual to set the c...

Page 26: ...up using M m and press ENTER Easy Setup is completed To return to the previous step Press O RETURN z Hint If you want to run Easy Setup again select Easy Setup in the Basic setup from Initial Setup in the System Menu page 99 ...

Page 27: ...ls refer to the instruction manual supplied with the connected equipment To record on this recorder see Recording from Connected Equipment on page 46 Connect a VCR or similar recording device to the LINE IN 1 or 3 of this recorder If the equipment has an S video jack you can use an S video cord instead of an audio video cord Connecting to the LINE IN 1 or 3 jacks OUTPUT S VIDEO L R VIDEO AUDIO VCR...

Page 28: ...ead of an audio video cord z Hint When the connected equipment outputs only monaural sound connect to only the L MONO and VIDEO input jacks on the front of the recorder Do not connect the R input jack b Notes Do not connect the yellow LINE IN VIDEO jack when using an S video cord Do not connect the output jack of this recorder to another equipment s input jack with the other equipment s output jac...

Page 29: ...tion is necessary to use the Synchro Recording function See Recording from connected equipment with a timer Synchro Rec on page 46 b Notes Synchro Recording does not work with some tuners For details refer to the tuner s operating instructions If you disconnect the recorder s AC power cord you will not be able to view the signals from the connected tuner AUDIO OUTPUT L R VIDEO AUDIO INPUT L R VIDE...

Page 30: ...anually re format the disc to make a blank disc page 40 2 Recording a Program This section introduces the basic operation to record a current TV program to the hard disk HDD or to a disc DVD For an explanation of how to make timer recordings see page 42 1 Press HDD or DVD If you want to record to a DVD insert a recordable DVD 2 Press CH to select the channel or input source you want to record 3 Pr...

Page 31: ...hort while for recorder to stop or pause recording You cannot change the recording mode while recording Programs are recorded in the following aspect ratio In the original aspect ratio when recording to the HDD when HDD Recording Format is set to Video Mode Off in the Recording setup page 105 DVD RWs DVD Rs VR mode In 4 3 when recording to DVD RWs DVD Rs When recording to DVD R DLs Video mode the ...

Page 32: ...ppears when all of the titles do not fit on the list To view the hidden titles press M m E Title information Recording Indicates that the title is currently being recorded Indicates a protected title NEW Indicates that the title is newly recorded not played back HDD only Press DISPLAY to display indicates titles containing Copy Once copy protection signals HDD only page 124 Indicates that the titl...

Page 33: ...te scene for the thumbnail picture shown in the Title List 1 Press TITLE LIST For DVD RWs DVD Rs VR mode switch the Title List to show Original or Playlist titles if necessary 2 Select a title using M m and press The sub menu appears 3 Select Edit using M m and press ENTER 4 Select Set Thumbnail using M m and press ENTER The display for setting the thumbnail point appears and the title starts to p...

Page 34: ...utton to display the DVD s menu You can check the playing time of the current title chapter track or disc Also you can check the disc name recorded on the DVD CD Press DISPLAY repeatedly The displays differ depending on the disc type or playing status In stop mode Example DVD RW in VR mode During playback Example DVD R in Video mode A Playing status B Shows that the Resume Play is available page 4...

Page 35: ...correctly 4 Changing the Name of a Recorded Program You can label a DVD title or program by entering characters You can enter up to 64 characters for a title recorded in the HDD DVD RW DVD R VR mode 40 characters for a title recorded in the DVD RW DVD RW Video mode DVD R DVD R Video mode but the actual number of characters displayed in the menus such as the Title List will vary The steps below exp...

Page 36: ...t Space and press ENTER 8 Repeat steps 6 and 7 to enter the remaining characters To erase a character move the cursor to the character at the input row and press CLEAR or select Clear and press ENTER To insert a character move the cursor to the right of the point where you want to insert the character Then select the character and press ENTER To erase all of the characters press and hold CLEAR for...

Page 37: ...isplay the Disc Setup display by selecting Disc Setup from the System Menu b Note The disc name may not appear when the disc is played on other DVD equipment 1 Insert a disc See 1 Inserting a Disc on page 30 2 Press DISC SETUP 3 Select Basic and press ENTER 4 Select Protect Disc and press ENTER 5 Select On and press ENTER 6 Press DISC SETUP to exit To cancel the protection Select Off in step 5 z H...

Page 38: ...ecessary when playing a disc on VR format compatible equipment Even if your other DVD equipment is VR format compatible you may need to finalize the disc especially if the recording time is short You can edit or record on the disc even after finalizing Finalizing is necessary when playing on any equipment other than this recorder After finalizing you cannot edit or record on the disc If you want t...

Page 39: ... of the disc recording or the DVD equipment discs may not play even if the discs are finalized The recorder may not be able to finalize the disc if it was recorded on another recorder Inserting an unfinalized disc into other DVD equipment may damage the recorded contents When using a DVD RW you can edit or record on the disc even after finalizing However the title menu will not be displayed Finali...

Page 40: ...e System Menu 7 Reformatting a Disc New discs are automatically formatted when inserted If necessary you can manually re format a DVD RW DVD RW or DVD R disc to make a blank disc For DVD RWs or DVD Rs you can select a recording format VR mode or Video mode according to your needs 1 Insert a disc See 1 Inserting a Disc on page 30 2 Press DISC SETUP RW RWVR RWVideo RVR RVideo M m ENTER DISC SETUP ...

Page 41: ...ats DVD RWs DVD Rs in Video mode Format DVD RW Formats DVD RWs 5 Select Start and press ENTER All contents on the disc are erased z Hints By reformatting you can change the recording format on DVD RWs or record again on DVD RWs that have been finalized You can also display the Disc Setup display by selecting Disc Setup from the System Menu b Note You cannot reformat recorded DVD Rs ...

Page 42: ...d press ENTER 3 Select an item using and adjust using M m Then press ENTER The adjustable items are listed below Pr CH Sets the channel Date Sets the date up to 30 days later Select a recording pattern by pressing M repeatedly to set the timer for the same daily or weekly programs Start Sets the start time Stop Sets the stop time Extend Sets duration when a timer recording is in progress If the pr...

Page 43: ...set the following Set LINE IN 1 2 or 3 in Pr CH Select Dual Mono in External Audio in the Audio In setup page 101 Select one of the following settings Video Mode On in HDD Recording Format page 105 PCM in Recording Mode or DVD in Record to HDD Recording Format Sets the recording format of HDD page 105 To enter a title name Select Set Title Name in step 3 above and press ENTER page 35 Rec Mode Adju...

Page 44: ...d Audio Program When a SAP Second Audio Program is received the SAP indicator lights up on the front panel display z Hint If there is no SAP sound while playing the recorded SAP program even if the program is recorded on the HDD when HDD Recording Format is set to Video Mode Off in the Recording setup except in PCM recording mode page 105 or DVD RW DVD R formatted in VR mode except in PCM recordin...

Page 45: ...pears next to the timer setting in the Timer List To change or cancel the setting repeat steps 2 and 3 above When the timer settings overlap The program that starts first has priority and the entire program is recorded After finishing the previous recording the other recording starts with several tens of second s delay when the end time of one recording and the start time of another are the same W...

Page 46: ...o stand by for Synchro Recording by setting Synchro Rec of Timer Recording to Yes from the System Menu To cancel Synchro Rec before recording starts Press 1 The SYNCHRO REC indicator in the front panel display turns off To cancel Synchro Rec during recording Press down z REC for more than 3 seconds The Synchro Rec is canceled and the recording continues To stop recording Press x REC STOP Then sele...

Page 47: ...ut the recording mode see page 121 5 Insert the source tape into the connected equipment and set to playback pause 6 Press z REC This recorder starts recording 7 Press the pause or play button on the connected equipment to cancel the playback pause status The connected equipment starts playback and the playback image is recorded by this recorder To stop recording press x REC STOP on this recorder ...

Page 48: ...display the disc s menu by pressing TOP MENU or MENU b Note The H PLAY button is not available in the disc s menu To play VIDEO CDs Super VIDEO CDs with PBC functions PBC Playback Control allows you to play VIDEO CDs Super VIDEO CDs interactively using the menu on your TV screen When you start playing a VIDEO CD Super VIDEO CD with PBC functions the menu appears Select an item using the number but...

Page 49: ...le except HDD you start playback using the Title List except HDD you edit the title after stopping playback you change the settings on the recorder you make a recording except HDD you disconnect the AC power cord To play restricted DVDs Parental Control If you play a restricted DVD the display for entering your password appears on your TV screen Enter your four digit password using the number butt...

Page 50: ...stant replay instant advance DivX video file only Each time you press REPLAY replays the scene for the following duration 5 seconds t 15 seconds t 30 seconds t 1 minute t 2 minutes t 3 minutes t 5 minutes t 10 minutes t 20 minutes t advances the time in 10 minute increments t 2 hours Each time you press ADVANCE briefly fast forwards the current scene for the following duration 30 seconds t 1 minut...

Page 51: ...u play DTS sound tracks on a CD page 50 fast reverse fast forward Fast reverses fast forwards the disc when pressed during playback Search speed changes as follows fast reverse fast forward mFR1 1 T t MFF1 2 mFR2 T T t t MFF2 mFR3 3 T T T t t t MFF3 3 mFR4 3 T T T T t t t t MFF4 3 When you press and hold the button fast forward fast reverse continues at the selected speed until you release the but...

Page 52: ...s PLAY MODE during playback For audio tracks on a DATA DVD DATA CD CD press while the Title List is displayed and select Play Mode The Play Mode menu appears 2 Select Repeat and press ENTER 3 Select an item to be repeated using M m Repeat Title for HDD DVDs DATA DVDs 1 DATA CDs 1 repeats the current title Repeat Chapter for HDD DVDs repeats the current chapter Repeat Track for VIDEO CDs 2 CDs DATA...

Page 53: ...nd press ENTER The chapter or track is programed If you make a mistake select the step number example 01 using M m and press CLEAR 6 To program other chapters or tracks press M m to select a step number and repeat steps 4 and 5 7 Press H PLAY Program play starts To stop Program play Press x STOP To cancel Program play Press CLEAR during playback Or set Programme to Cancel Programme Play in the Pla...

Page 54: ...button While recording to a DVD Play a previously recorded program on the HDD by pressing the HDD button You can also play a DVD VIDEO VIDEO CD Super VIDEO CD DATA DVD or DATA CD while recording on the HDD Example Play another title on the HDD while recording to the HDD 1 While recording press TITLE LIST to display the HDD Title List 2 Select the title you want to play and press ENTER Playback sta...

Page 55: ...he time code Title Search for HDD DVDs DATA DVDs 1 DATA CDs 1 Chapter Search for HDD DVDs Track Search for VIDEO CDs 3 1 DivX video file only 2 Except Super VIDEO CDs 3 Available only when playing without PBC functions The display for entering the number appears 4 Press the number buttons to select the number of the title chapter time code etc you want For example Time Search To find a scene at 2 ...

Page 56: ... Editing a Title on page 57 For DVD Rs and DVD Rs the available disc space does not increase even if you erase titles To switch between the Playlist and Original Title List DVD RW DVD R in VR mode only You can display the Playlist titles in the Title List Playlist or the Original titles in the Title List Original 1 Press while the Title List is displayed 2 Select Play List using M m and press ENTE...

Page 57: ...Protects the title appears next to the protected title Move Changes the title s playing order page 61 Combine Combines two titles into one page 61 Genre Name Allows you to enter a genre name up to 12 characters page 35 Multi Mode Allows you to select and edit multiple titles at one time page 57 Create Creates a Playlist page 61 Undo Undoes the last edit you made z Hint You can label or re label DV...

Page 58: ...O RETURN The Title List appears z Hint A chapter mark is inserted after the scene is erased The chapter mark divides the title into separate chapters on either side of the mark b Notes Images or sound may be momentarily interrupted at the point where you erase a section of a title Sections shorter than five seconds may not be erased If you want to dub a long title to a disc but do not want to redu...

Page 59: ...al or Playlist if necessary 2 Select a title containing the chapter you want to edit and press The sub menu appears 3 Select Edit and press ENTER 4 Select Chapter Edit and press ENTER For the HDD select a type of editing and press ENTER For details see page 56 5 Select an option and press ENTER You can make the following edits to the chapter Divide Divides a chapter into two page 60 Erase Move Era...

Page 60: ... 2 Select a chapter using and press ENTER 3 For a Playlist chapter only Select Erase and press ENTER The display asks for confirmation 4 Select Yes and press ENTER The chapter is erased 1 After step 4 of Erasing and Editing a Chapter select Combine 2 Move the combining bar using and press ENTER The two adjacent chapters of the combining bar are combined b Note Chapters cannot be combined if they a...

Page 61: ...add to the Playlist 1 Press TITLE LIST and switch to the Playlist For details on switching to the Playlist see page 56 2 Select a Playlist title and press The sub menu appears 3 Select Edit and press ENTER 4 Select Move and press ENTER 5 Select a new location for the title using M m and press ENTER The title moves to the new location To move more titles repeat from step 2 1 Press TITLE LIST and sw...

Page 62: ...the chapter you want to edit and press The sub menu appears 3 Select Edit and press ENTER 4 Select Chapter Edit and press ENTER 5 Select Erase Move 6 Select a chapter using and press ENTER 7 Select Move and press ENTER 8 Select a new location for the chapter using and press ENTER The chapter moves to the new location Moving a chapter Move ...

Page 63: ...when dubbing from the HDD to a DVD RW DVD RW Video mode DVD R DVD R Video mode The chapter marks in the dubbing source are dubbed The position of chapter marks may be slightly changed from the original However the chapter marks in the dubbing source are not retained in the dubbed title when dubbing to a DVD RW DVD R Video mode DVD RW or DVD R at normal speed The chapter marks are automatically ins...

Page 64: ...e page 124 To convert the recording mode only when dubbing from a disc to the HDD Before step 1 press REC MODE to select the recording mode b Note You cannot use the HDD DVD DUB button in the following cases Dub the title using Dubbing List page 64 When dubbing the title recorded in MN6 mode or longer duration mode to a DVD RW DVD R When dubbing the title recorded in HQ mode to a DVD Dubbing Using...

Page 65: ...nges the dubbing mode of all selected titles at a time using M m page 121 Input Disc Name Changes the disc name page 35 Finalise Select Yes to finalize a disc automatically after dubbing DVD RW DVD R Video mode or DVD R 10Select Start Dubbing and press ENTER When you set Finalise to Yes in step 9 select the title menu style and press ENTER The recorder turns off automatically when you do not use t...

Page 66: ...ode Sets the picture quality of the dubbing Dual Mono Audio Changes the audio sound of a SAP or Dual Mono program page 63 Cancel Exits the sub menu 4 Repeat steps 2 and 3 to edit all of the titles 5 Go to step 8 of Dubbing Using Dubbing List on page 64 to dub edited titles b Notes The Dubbing List you created remains after dubbing To edit the existing Dubbing List select Use Previous Dubbing List ...

Page 67: ...e recorder starts High Speed dubbing the contents that were dubbed to the HDD in step 6 9 Select Cancel and press ENTER The disc is automatically finalized To make another backup disc replace discs select Start and press ENTER 10Select Yes or No and press ENTER To erase the backup data on the HDD select Yes To make another backup disc later select No The recorder turns off automatically when you d...

Page 68: ...l images and moving images only moving images can be dubbed to the recorder Playlist made with the HDD camcorder cannot be dubbed to the recorder You cannot set the recording mode for HDD camcorder dubbing When dubbing from the HDD camcorder the recorder recognizes and uses the shooting date and time information of the HDD camcorder If the HDD camcorder s clock is incorrect the recorder may not du...

Page 69: ...Options 2 setup page 110 b Notes Connect the HDD camcorder directly to the recorder Do not disconnect the USB cable while dubbing When signal input to the USB jack type A on the front panel or recorder operation cannot be performed correctly when using an HDD camcorder connect the HDD camcorder to the LINE IN jacks and follow the instructions of Recording from Connected Equipment on page 46 The re...

Page 70: ...the HDD camcorder see Dubbing from HDD Camcorder Using the On Screen Display HDD Cam Dubbing on page 70 Data about the dubbed contents are all cleared when you reset the recorder page 117 If the USB jack and the DV IN jack on the recorder are both connected to a compatible digital video camera One Touch Dubbing is performed via the USB jack Dubbing from HDD Camcorder Using the On Screen Display HD...

Page 71: ...s off automatically if you do not use the recorder for more than 20 minutes after the dubbing has finished To stop dubbing Press x REC STOP Or select Exit in step 6 and press ENTER b Note With Incremental Dubbing the contents that have already been dubbed to the recorder are not dubbed again even after you erase them from the recorder You can dub only newly shot contents ...

Page 72: ...e Operation is straightforward because the recorder will fast forward and rewind the tape for you you do not need to operate your DV camcorder Refer as well to the instruction manual supplied with the DV camcorder before connecting z Hint If you plan to do additional editing on a disc after the initial dub use the DV IN jack and record on a DVD RW DVD R VR mode or HDD b Notes You cannot make a rec...

Page 73: ...o the recorder You cannot control the recorder using another device or another recorder of the same model You cannot record date time or the contents of the cassette memory onto the disc If you record from a DV Digital8 format tape that is recorded in multiple sound tracks such as a tape with multiple sampling frequencies 48 kHz 44 1 kHz or 32 kHz no sound or an unnatural sound will be output when...

Page 74: ...canceled if a timer recording starts except for DVD RW DVD R VR mode DV One Touch Dubbing ends automatically when there are images containing copy protection signals at the beginning of the tape When connecting digital video cameras to both DV IN jack and USB jack pressing the ONE TOUCH DUB button starts dubbing from the HDD camcorder Disconnect the HDD camcorder from the USB jack to dub from the ...

Page 75: ...nect your DV camcorder to the DV IN jack on the front panel 2 Press SYSTEM MENU The System Menu appears 3 Select HDD Cam DV and press ENTER 4 Select DV Playback and press ENTER 5 Start playback on the DV camcorder Images from the DV camcorder appear on your TV screen To cancel playback Press SYSTEM MENU z Hint You can dub the playing tape contents During playback press HDD or DVD to select the dub...

Page 76: ...usic Jukebox list page 78 No other operations are available when copying audio tracks While copying audio tracks timer recordings are unavailable If the timer is set during copying the recorder starts the timer recording after copying is finished Copy protected CDs cannot be copied to the HDD Preparing for Using Jukebox Connect a USB device to the USB jack on the recorder or copy audio tracks from...

Page 77: ...Title List DVD CD page 49 1 Press SYSTEM MENU The System Menu appears 2 Select Music Jukebox and press ENTER 3 Select Listen to Music Edit and press ENTER The Music Jukebox HDD appears 4 Select an artist using M m and press ENTER 5 Select an album using M m and press ENTER If you want to copy the album press instead of ENTER then go to step 7 6 Select a track to copy using M m and press The sub me...

Page 78: ...us ANGLE next while the Music Jukebox list is displayed Each time you press SUBTITLE previous ANGLE next the Music Jukebox list changes to the previous next page of the list To change the play information HDD only Press DISPLAY repeatedly Each time you press the button information below the artist album track list is changed About the Playlist and Original list HDD only You can switch the Music Ju...

Page 79: ... an item using M m Repeat Artist HDD only repeats tracks of the current artist Repeat Album repeats the current album Repeat Track repeats the current track Repeat Play List HDD only repeats the current Playlist Repeat Programme USB device only repeats the current program page 80 5 Press ENTER Repeat play starts To cancel Repeat play Set Repeat to Repeat Off in step 4 b Note You can select Repeat ...

Page 80: ... mistake select the step number example 01 using M m and press CLEAR 7 To program other tracks press M m to select a step number and repeat steps 5 and 6 8 Press H PLAY Program play starts To stop Program play Press x STOP To cancel Program play Set Programme to Cancel Programme Play in the Play Mode menu during playback To erase the program Set Programme to Erase Programme List in the Play Mode m...

Page 81: ...NTER Erase Erases the selected artist album track Select Yes when asked for confirmation Edit Allows you to make the following edits Artist Name Allows you to enter or re enter an artist name page 35 Album Name Allows you to enter or re enter an album name page 35 Track Name Allows you to enter or re enter a track name page 35 Copy Album Allows you to copy an album page 77 Copy Track Allows you to...

Page 82: ...y JPEG image files from DATA CDs DATA DVDs or the connected USB device to the HDD You can connect a USB device digital still camera Memory card reader and USB memory to the USB jack on the recorder to view JPEG image files or copy to the HDD Refer to the operating instructions supplied with the USB device before connecting b Note Some USB devices may not work with this recorder 1 Insert a disc tha...

Page 83: ...Single Mode from the sub menu 8 Repeat step 7 to select all of the albums or JPEG image files you want to copy 9 Press The sub menu appears 10Select Copy to HDD and press ENTER The display asks for confirmation 11Select Yes and press ENTER To cancel select No 1 Connect the USB device to the USB jack on the recorder 2 Insert a blank DVD RW DVD R Video mode 3 Press SYSTEM MENU The System Menu appear...

Page 84: ...ppears 11Select Copy and press ENTER 12Select the destination album using M m and press ENTER The display asks for confirmation 13Select Yes and press ENTER To cancel select No b Note Albums or JPEG image files are not copied to the HDD in the following cases when the HDD disc space is insufficient for copying when there are already the maximum number of files and or albums on the HDD You can copy...

Page 85: ...ows to a disc When copying an album containing more than 99 JPEG image files to a disc slideshows will be created with every 99 JPEG image files and recorded to a disc For DVDs the available disc space does not increase even if you erase slideshows You can copy the edited JPEG image files to a DVD RW DVD R Video mode A slideshow is also recorded to the disc as a video file You can play the slidesh...

Page 86: ... depending on DVD equipment You cannot copy JPEG image files to a recordable DVD which has been recorded using other recorders devices DATA DVDs finalized on this recorder may not be able to play on other equipment You can record up to 99 slideshows to a disc For DVDs the available disc space does not increase even if you erase slideshows Using the Photo Album List You can play JPEG image files on...

Page 87: ...croll bar Appears when all of the JPEG image files do not fit on the list To view the hidden JPEG image files press M m E Album and JPEG image file information Displays the image JPEG image file number recording date and time JPEG image file name and JPEG image file size appears for protected JPEG image files F Remaining space on the HDD To scroll the list display by page Page mode Press PREV NEXT...

Page 88: ...d files or folders b Note The thumbnail for a file that cannot be playable on the recorder is displayed as 1 Follow steps 1 to 4 of Using the Photo Album List The Photo Album list appears Switch between the album list and JPEG image file list if necessary 2 Select an album or JPEG image file using M m and press H PLAY The slideshow starts z Hint You can start a slideshow by selecting Start Slidesh...

Page 89: ...wing Zoom rotate skip or pause an image Display information on the screen by pressing DISPLAY If there is no audio track in the selected Music Playlist the slideshow is played back with no sound Creating a Slideshow with Your Favorite Music and Graphic Effects x Pict Story HDD only You can easily create and play your own slideshow with your favorite music in Music Playlist and graphic effects usin...

Page 90: ...ct Story was created An x Pict Story is created in the HQ mode To edit x Pict Story titles see Erasing and Editing on page 56 b Notes You cannot make a recording while creating an x Pict Story If there is no JPEG image file in the selected folder you cannot create an x Pict Story If there is no audio track in the selected Music Playlist the x Pict Story is created with no sound The selected Music ...

Page 91: ...e HDD page 84 Rename Album Changes the selected album name page 35 Protect Album Contents Protects all JPEG image files in the selected album Cancel Protection Cancels protection of all JPEG image files in the selected album Copy to DVD Copies the selected album or JPEG image file to a DVD page 84 Multi Mode Selects multiple albums or JPEG image files to edit Copy all to HDD Copies all the albums ...

Page 92: ...ATA DVD DATA CD select View Photos on a DVD CD To print JPEG image files from the connected USB device select View Photos on a USB Device The Photo Album list appears 6 Select an album and press ENTER 7 Select a file using M m and press The sub menu appears 8 Select the item and press ENTER To print two or more files select Multi Mode To print the file selected in step 7 only go to step 12 9 Selec...

Page 93: ...Printer of USB in the Options 2 setup page 110 To restart the connected USB device Select Restart USB Device of USB in the Options 2 setup page 110 z Hint Printing options such as paper size or layout differ depending on the printer For details refer to the instructions supplied with the printer ...

Page 94: ...r Memory3 in step 2 2 Select Detailed Settings and press ENTER The display for adjusting detailed settings appears 3 Select an item using M m and adjust settings using For explanation of each setting see the tables below 4 Press SYSTEM MENU to exit The setting is automatically stored as the setting you selected in step 1 z Hint You can also select the Picture Adjustment menu in the System Menu Tun...

Page 95: ...minance element of the video signal CNR chroma noise reduction Reduces noise contained in the chroma element of the video signal Detail Adjusts the sharpness of images outlines White AGC Turn on for automatic white level adjustment White Enhancer Adjusts the intensity of white Black Enhancer Adjusts the intensity of black Black Level Selects the black level setup level for the video signals Select...

Page 96: ...round the outlines of the images The noise reduction effects are automatically adjusted within each setting range according to the video bit rate and other factors Sharpness Sharpens the outlines of the images Detail Adjusts the sharpness of images outlines White Enhancer Adjusts the intensity of white Black Enhancer Adjusts the intensity of black Black Level Selects the black level setup level fo...

Page 97: ...just DVD related settings Input Disc Name You can label a disc For details see page 36 Protect Disc You can protect a disc against erasure For details see page 37 Format DVD RW DVD RW only The recorder automatically starts formatting in VR mode or Video mode whichever is selected below when a new unformatted DVD RW is inserted You can manually re format a DVD RW DVD RW or DVD R disc to make a blan...

Page 98: ...ake clock and other recorder related settings Auto Auto Clock Set Turns on the Auto Clock Set function when a channel in your local area broadcasts a time signal 1 Press repeatedly until the channel of the station that carries a time signal appears 2 Press m to select Start and press ENTER If the recorder does not receive a time signal from any station press O RETURN and set the clock manually If ...

Page 99: ...14 to 69 and unscrambled CATV channels 1 to 125 Select Antenna or Cable and press ENTER Antenna Default Presets VHF and UHF channels Cable Presets cable TV channels The channel order will be set If any channels are unused or contain unwanted channels you can disable them page 100 b Note You cannot preset channels for the connected cable box or satellite receiver HELP Setting On Displays Help infor...

Page 100: ...rding to the type of TV or tuner connected to the recorder Selects the signal format in which the recorder outputs video signals interlace or progressive from the COMPONENT VIDEO OUT jacks b Notes When picture noise appears after you set the recorder to progressive format hold down x stop on the recorder and press Z open close on the recorder No video signals are output when using the HDMI connect...

Page 101: ... Mono and you want to record the left channel audio on the HDD when HDD Recording Format is set to Video Mode On page 105 or in PCM recording mode or DVDs in Video mode or in PCM recording mode Select the setting for the audio input when DV camcorder dubbing Select Mix Stereo 1 75 Mix Stereo 1 50 Mix Stereo 1 25 or Stereo 2 only if you have added a second audio when recording with your digital vid...

Page 102: ...d to equipment not compatible with 96 kHz signals 48 kHz PCM will be automatically output even when you select 96 kHz Selects the type of MPEG audio signal Dolby Digital Output HDD DVDs only Dolby Digital Select this when the recorder is connected to an audio component with a built in Dolby Digital decoder Dolby Digital PCM Select this when the recorder is connected to an audio component lacking a...

Page 103: ...und track Switches the language of the subtitles recorded on the disc The Auto Language function is available when Audio Language and Subtitle Language are set to the same language and Subtitle Display is set to On Audio DRC Dynamic Range Control DVDs only On Makes low sounds clear even if you turn the volume down Off Normally select this position OSD Language Audio Language DVD VIDEO only Subtitl...

Page 104: ...the different DVD types in each recording mode on page 122 1 Select On go to setup using M m and press ENTER 2 Select a recording mode using and press ENTER To easily select a manual recording mode press REC MODE repeatedly to display MN and select a manual recording mode using Selects a scene for the thumbnail picture shown in the Title List DVD Menu Language DVD VIDEO only Subtitle Display On Di...

Page 105: ...to 99 chapters for one title recorded on the HDD Off No chapter mark is inserted Auto Chapter Video DVD RW DVD R in Video mode only No Separation No chapter mark is inserted 10 minutes Inserts chapter marks at approximately 10 minute intervals 15 minutes Inserts chapter marks at approximately 15 minute intervals Auto Chapter DVD R RW DVD RW DVD R only No Separation No chapter mark is inserted 10 m...

Page 106: ...w password appears TV Type 4 3 Letter Box Select this when connecting to a 4 3 screen TV Displays a wide picture with bands on the upper and lower portions of the screen 4 3 Pan Scan Select this when connecting to a 4 3 screen TV Automatically displays a wide picture on the entire screen and cuts off the portions that do not fit 16 9 Select this when connecting to a wide screen TV or TV with a wid...

Page 107: ...level will be restricted 10 Press ENTER The Parental Control setting is complete To cancel the Parental Control setting for the disc select Off in step 9 Change Password 1 Select Parental Control in Playback and press ENTER 2 Select Change Password and press ENTER 3 Enter your four digit password in the Current Password row using the number buttons and press ENTER 4 Enter a new password in the New...

Page 108: ... ratio signals If you can change the aspect ratio on your TV change the setting on your TV not this recorder Note that this setting is effective only for HDMI connection Selects the method of outputting video signals for the HDMI jack Screen Resolution 1920 x 1080p Sends 1920 1080p video signals 1920 x 1080i Sends 1920 1080i video signals 1280 x 720p Sends 1280 720p video signals 720 x 480p Sends ...

Page 109: ...recorder or player 1 Select a Command Mode 1 2 or 3 Default setting and press ENTER Audio Output Auto Outputs Dolby Digital MPEG and DTS audio signals as a bitstream signal Normally select this position PCM Converts all audio signals except for DTS signals to PCM Bitstream Priority Select this if the connected device is compatible with bitstream audio Control for HDMI On Allows you to use the Cont...

Page 110: ... DivX video files for this recorder For more information go to http www divx com vod on the Internet Selects the thumbnail type shown in the Title List Other Settings Options 2 You can make other operation settings Restart USB Device Restarts the connected USB device if it does not respond to the recorder If the connected USB device still does not work properly try following Turn the connected USB...

Page 111: ...cture output signal from your recorder passes through your VCR to get to your TV or if you are connected to a combination TV VIDEO player the copy protection signal applied to some DVD programs could affect picture quality If you still experience this problem even when you connect your recorder directly to your TV try connecting your recorder to your TV s S VIDEO input You have set the recorder to...

Page 112: ...he picture refer to the TV s instruction manual Place the recorder and TV farther apart Place the TV and any bunched antenna cables farther apart The antenna cable is connected to the VHF UHF OUT jack on the recorder Connect the cable to the VHF UHF IN jack TV channels cannot be changed The channel is skipped page 100 A timer recording started which changed the channels The picture from equipment ...

Page 113: ...nd volume may improve if you set Audio DRC in the Audio Out setup to On page 103 An alternate audio track cannot be recorded or played Second Audio Program SAP is not available for all programs The program you are recording does not have a second audio program page 44 When recording from connected equipment set External Audio to Dual Mono in the Audio In setup page 101 Multilingual tracks main and...

Page 114: ...or more than 1 hour reset the clock page 98 Another timer setting overlapped the timer setting page 45 Disc space was not sufficient Contents previously recorded were erased Data that is not playable on this recorder but was recorded on a DVD with a PC will be erased from the disc when the disc is inserted The recorder does not play any type of disc except HDD The disc is upside down Insert the di...

Page 115: ...l 2 Romeo Joliet or UDF Universal Disk Format 1 02 1 50 2 00 or 2 01 The DivX video file format is larger than 720 width 576 height The MP3 audio tracks do not play The MP3 audio tracks are not recorded in a format that the recorder can play page 127 The JPEG image files do not play The JPEG image files are not recorded in a format that the recorder can play page 127 Progressive JPEG images cannot...

Page 116: ...e Options setup page 109 The remote does not function Different command modes are set for the recorder and remote Set the same command mode page 109 The default command mode setting for this recorder and the supplied remote is 3 Default setting You can check the current command mode in the front panel display page 109 The batteries are weak The remote is too far from the recorder The remote s manu...

Page 117: ...rder s repair function is activated to repair the hard disk drive or disc Leave the recorder on until REPAIR disappears from the front panel display Some data may be lost even if the repair function is activated E01 appears in the front panel display There is a problem in the HDD Contact your nearest Sony dealer Note that contents on the HDD may be erased when servicing this unit E02 appears in th...

Page 118: ...W compatible players automatically finalized DVD RW VR mode Format in VR mode page 30 Playable only on VR mode compatible players finalization unnecessary Video mode Format in Video mode page 30 Playable on most DVD players finalization necessary page 38 DVD R Automatically formatted in VR mode DVD R VIDEO Playable on most DVD players finalization necessary page 38 DVD R DL DVD R VR mode Format in...

Page 119: ...nge the disc s format reformat the disc page 40 Note that the disc s contents will be erased after reformatting You cannot shorten the time required for recording even with high speed discs It is recommended that you use discs with For Video printed on their packaging You cannot add new recordings to DVD Rs DVD Rs or DVD RWs Video mode that contain recordings made on other DVD equipment In some ca...

Page 120: ...ferent recorder and not correctly finalized Note on playback operations of DVD VIDEOs VIDEO CDs Some playback operations of DVD VIDEOs VIDEO CDs may be intentionally set by software producers Since this recorder plays DVD VIDEOs VIDEO CDs according to the disc contents the software producers designed some playback features may not be available Refer to the instructions supplied with the DVD VIDEOs...

Page 121: ...his recorder due to the recording quality or physical condition of the disc or the characteristics of the recording device and authoring software The disc will not play if it has not been correctly finalized For more information refer to the operating instructions for the recording device If the disc contains PC data unrecognizable by this recorder the data may be erased Do not insert any discs th...

Page 122: ...hr 30 min 2 hr 41 min MN25 53 1 hr 35 min 2 hr 50 min MN24 56 1 hr 40 min 2 hr 59 min MN23 59 1 hr 45 min 3 hr 8 min MN22 62 1 hr 50 min 3 hr 17 min SP MN21 68 2 3 hr 35 min MN20 73 2 hr 10 min 3 hr 53 min MN19 79 2 hr 20 min 4 hr 11 min LSP MN18 84 2 hr 30 min 4 hr 29 min MN17 90 2 hr 40 min 4 hr 47 min MN16 96 2 hr 50 min 5 hr 5 min ESP MN15 100 3 5 hr 23 min MN14 105 3 hr 10 min 5 hr 41 min MN1...

Page 123: ...DVD RW VR mode DVD R VR mode HQ PCM MN32 to MN16 720 480 MN15 to MN12 544 480 MN11 to MN9 480 480 MN8 and MN7 352 480 MN6 to MN1 352 240 For the HDD HDD Recording Format is set to Video Mode On DVD RW DVD RW Video mode DVD R DVD R Video mode PCM MN32 to MN9 720 480 MN8 and MN7 352 480 MN6 to MN1 352 240 z Hint Audio signals are recorded in Dolby Digital 2 ch format except for PCM mode b Notes The ...

Page 124: ... Titles containing Copy Once copy protection signals are indicated with Discs that can be used for protected signals CPRM compatible DVD RWs DVD Rs VR mode only The recorded disc can be played only on CPRM compatible equipment page 119 CPRM Content Protection for Recordable Media is a coding technology that protects copyrights for images b Notes Protected titles in the HDD cannot be moved The Move...

Page 125: ...zil br 0301 Canada ca 0312 Chile cl 0314 China cn 0411 Denmark dk 0609 Finland fi 0618 France fr 0405 Germany de 0811 Hong Kong hk 0914 India in 0904 Indonesia id 0920 Italy it 1016 Japan jp 1118 Korea kr 1325 Malaysia my 1324 Mexico mx 1412 Netherlands nl 1426 New Zealand nz 1415 Norway no 1611 Pakistan pk 1608 Philippines ph 1620 Portugal pt 1821 Russia ru 1907 Singapore sg 0519 Spain es 1905 Sw...

Page 126: ... powder or solvent such as alcohol or benzine On cleaning discs disc lens cleaners Do not use cleaning discs or disc lens cleaners including wet or spray types These may cause the recorder to malfunction Notes about the discs To keep the disc clean handle the disc by its edge Do not touch the surface Dust fingerprints or scratches on the disc may cause it to malfunction Do not expose the disc to d...

Page 127: ...n Music CD format or Video CD format are recorded in the first session border only the first session border will be played back The recorder can play the following tracks and files MP3 audio tracks with the extension mp3 JPEG image files with the extension jpeg or jpg Baseline JPEG image files that conform to the Exif 2 2 image files format and Y CB CR is 4 4 4 4 2 2 or 4 2 0 DivX video files with...

Page 128: ... devices If a warning message indicating that the HDD is full appears erase several albums or files to make space For details on erasing tracks or files see page 81 or 91 The DV IN jack on this recorder is i LINK compliant for digital video cameras i LINK is a more familiar term for IEEE 1394 data transport bus proposed by SONY and is a trademark approved by many corporations IEEE 1394 is an inter...

Page 129: ...s more than 22 kilohms VIDEO Phono jack 1 0 Vp p S VIDEO 4 pin mini DIN Y 1 0 Vp p C 0 286 Vp p NTSC DV IN 4 pin i LINK S100 DIGITAL OUT COAXIAL Phono jack 0 5 Vp p 75 ohms COMPONENT VIDEO OUT Y PB PR Phono jack Y 1 0 Vp p PB 0 7 Vp p PR 0 7 Vp p HDMI OUT HDMI Connector USB USB jack Type A For connecting digital still camera Memory card reader USB memory and HDD camcorder USB jack Type B For conne...

Page 130: ... COMPONENT VIDEO OUT 19 Component Video Out 100 Confirm Printer 110 Connecting a printer 92 the antenna cable 14 the audio cords 21 the HDMI cord 18 21 the USB device 76 82 the video cords 18 Controlling TVs with the remote 23 Copy 84 Copy Album 77 Copy Album Contents 84 Copy all to HDD 82 Copy Photos from a Digital Camera 83 Copy protection signals 124 Copy to DVD 84 85 Copy to HDD 82 Copy Track ...

Page 131: ...0 One Touch Dubbing 70 HDD Recording Format 105 HDD Cam Dubbing 70 HDMI 4 3 Video Output 108 Audio Output 109 Colour 108 Control for HDMI 109 Screen Resolution 108 HDMI cord 18 21 HDMI OUT 19 21 HDMI Output 108 HELP Setting 99 I i LINK 128 INPUT 47 J Jukebox 76 L Labeling 36 Language 103 LINE 2 IN 28 LINE IN 1 3 27 M Main sound 44 101 Making a backup disc 67 Managing audio tracks on the Music Juke...

Page 132: ...cs 118 Recording 104 Recording 42 picture adjustment 94 recording format 118 recording mode 31 121 recording time 31 121 while watching another program 31 Recording mode 31 121 Recording time 31 121 Recovery Recording 43 Region code 121 Remaining time 34 Remote 10 23 Rename Album 91 Rename File 91 Repeat 52 79 Repeat Album 52 79 Repeat Artist 79 Repeat Chapter 52 Repeat Disc 52 Repeat Play List 79...

Page 133: ...itle Name 57 Title number 34 Title Search 55 TOP MENU 48 Track Name 81 Track Search 55 Troubleshooting 111 Tuner 99 TV INPUT 23 31 TV Type 25 106 U Undo 57 Unfinalise 39 Unfinalizing 39 Unprotected 57 Usable discs 118 120 USB 69 Using the setup menus 97 V VIDEO CD 120 Video cord 18 Video input 19 Video mode 118 Video Mode Compatible Editing 56 Video Out 100 VR mode 118 X x Pict Story 89 Play List ...

Page 134: ...134 ...

Page 135: ...135 ...

Page 136: ...Sony Corporation Printed in Malaysia ...

Reviews: