background image

3-096-487-

11

(1)

© 2007 Sony Corporation

Video Cassette Recorder/
DVD Recorder

RDR-VX525

Operating Instructions 

Manual de instrucciones 

US

ES

Summary of Contents for RDR-VX525 - DVDr/ VCR Combo

Page 1: ...3 096 487 11 1 2007 Sony Corporation Video Cassette Recorder DVD Recorder RDR VX525 Operating Instructions Manual de instrucciones US ES ...

Page 2: ...se the separation between the equipment and receiver Connect the equipment into an outlet on a circuit different from that to which the receiver is connected Consult the dealer or an experienced radio TV technician for help Precautions On safety Should any solid object or liquid fall into the cabinet unplug the recorder and have it checked by qualified personnel before operating it any further On ...

Page 3: ... SAFETY INSTRUCTIONS 1 Read these instructions 2 Keep these instructions 3 Heed all warnings 4 Follow all instructions 5 Do not use this apparatus near water 6 Clean only with dry cloth 7 Do not block any ventilation openings Install in accordance with the manufacturer s instructions 8 Do not install near any heat sources such as radiators heat registers stoves or other apparatus including amplifi...

Page 4: ...aning Functions available for DVD RWs Functions available for DVD RWs in VR Video Recording mode Functions available for DVD RWs in video mode Functions available for DVD Rs Functions available for DVD Rs in VR Video Recording mode Functions available for DVD Rs in video mode Functions available for DVD VIDEOs Functions available for DVD RAMs Functions available for VIDEO CDs or CD Rs CD RWs in vi...

Page 5: ...5 ...

Page 6: ...le Discs 33 DVD Operation DVD Playback 35 Playing Discs 35 Playback Options 36 Playing a Title From the Title List 39 Searching for a Title Chapter Track etc 40 Playing MP3 Audio Tracks and JPEG Image Files 41 Displaying the Playing Time and Play Information 44 DVD Recording 46 Before Recording 46 DVD Recording From Connected Equipment Without the Timer 47 DVD Timer Recording From Connected Equipm...

Page 7: ...m a DVD to a VHS Tape 85 Finalizing a Disc Preparing a Disc for Playback on Other Equipment 88 DV D8 Dubbing DV D8 t DVD 90 Before DV D8 Dubbing 90 Connecting a Digital Video Camera to the DV IN Jack 90 Dubbing From a DV D8 Format Tape to a DVD 91 Settings and Adjustments 94 Using the Setup Displays 94 Clock Setting Clock Set 95 Video Settings Video 96 Audio Settings Audio 98 Recording Set Top Box...

Page 8: ...y selection between DVD and VCR Simply press the DVD or VIDEO button to select the media format you want to use One Touch Dubbing DVD y VHS Dub in either direction between a DVD disc and VHS tape with the simple press of a button Note that copy protected signals will not be recorded Control your cable box or satellite receiver Set top box control Connect the supplied set top box controller to have...

Page 9: ...at tape over to a disc Operation restrictions 1 When pressing DVD VCR playback stops 2 When pressing VIDEO DVD playback stops 3 Only for timer recording You can also record from LINE1 and LINE2 at the same time 10 10 AM LINE 1 08 00 PM May 02 2007 T No 1 4 01 02 03 04 Title Length Edit LINE 1 01 29 03 LINE 1 00 31 23 LINE 1 01 59 00 LINE 1 00 58 56 Title List Original Original Playlist ONE TOUCH D...

Page 10: ...ll as change or cancel the timer recordings you set C Edit Used to create or edit a Playlist unfinalized DVD RWs VR mode DVD Rs VR mode only D Dubbing Used to dub from a disc to a VHS tape and vice versa and also dub from a DV D8 format tape to a disc E Disc Setting Used to rename protect format or finalize a disc or erase all titles on the disc Also displays the disc information F Setup Displays ...

Page 11: ...options on the System Menu differ depending on the media type disc condition and operating status Example When a disc or a VHS tape is stopped 1 Unfinalized disc only 2 With a disc inserted To return to the previous display Press O RETURN Notes The OPTIONS menu may not appear during DVD recording The System Menu does not appear when recording on a DVD or dubbing from VHS tape to a DVD You cannot u...

Page 12: ...n this way you will be able to record TV programs You cannot record on this recorder if you have a cable box or satellite receiver without audio video outputs cable with no cable box antenna only no cable TV In the cases above contact your cable service or satellite service company to see if they can provide you with a compatible cable box or satellite receiver Using the cable box satellite receiv...

Page 13: ...through This recorder automatically sends the input signal from the LINE 1 IN jacks to the LINE OUT VIDEO AUDIO jacks without turning itself on When you connect a cable box or satellite receiver to the LINE 1 IN jacks and your TV to the LINE OUT VIDEO AUDIO L R jacks page 15 you can watch programs from a cable box or satellite receiver on the TV even when the recorder is turned off L R VIDEO AUDIO...

Page 14: ...oes not work with some tuners For details see the tuner s operating instructions AV path through function does not work for Input signals from the LINE 2 IN jacks Output signals to S VIDEO OUT COMPONENT VIDEO OUT or HDMI OUT jacks ...

Page 15: ...he same time During DVD recording you cannot watch VHS pictures by pressing VIDEO as the S VIDEO OUT jack will output DVD video signals only Do not connect your TV s audio output jacks to the LINE IN AUDIO L R jacks at the same time This will cause unwanted noise to come from your TV s speakers L R VIDEO AUDIO LINE OUT VIDEO Y L PB R PR AUDIO LINE 1 IN AUDIO OUT SVIDEO OUT COMPONENT VIDEO OUT DIGI...

Page 16: ...I logo and High Definition Multimedia Interface are trademarks or registered trademarks of HDMI Licensing LLC Notes You cannot connect the HDMI OUT jack to DVI jacks that are not HDCP compliant e g DVI jacks on PC displays During DVD recording you cannot watch VHS pictures by pressing VIDEO as the HDMI OUT jack will output DVD video signals only L R VIDEO AUDIO LINE OUT VIDEO Y L PB R PR AUDIO LIN...

Page 17: ...e to connect the audio cord to the LINE OUT AUDIO L R jacks Note During DVD recording you cannot watch VHS pictures by pressing VIDEO as the COMPONENT VIDEO OUT jacks will output DVD video signals only L R VIDEO AUDIO LINE OUT VIDEO Y L PB R PR AUDIO LINE 1 IN AUDIO OUT SVIDEO OUT COMPONENT VIDEO OUT DIGITAL AUDIO OUT OPTICAL COAXIAL HDMI OUT SETTOP BOX CONTROL Y PB PR COMPONENT VIDEO OUT COMPONEN...

Page 18: ...ITAL AUDIO OUT OPTICAL COAXIAL HDMI OUT SETTOP BOX CONTROL AUDIO INPUT L R L R AUDIO OUT B A DIGITAL AUDIO OUT OPTICAL COAXIAL HDMI OUT Signal flow AV amplifier receiver red white Audio cord not supplied white red VCR DVD recorder to AUDIO OUT L R to DIGITAL AUDIO OUT COAXIAL or OPTICAL Optical digital cord not supplied Coaxial digital cord not supplied Speakers Rear L Front L Center to coaxial or...

Page 19: ... z Hints For correct speaker location see the operating instructions supplied with the connected components During VHS playback the DIGITAL AUDIO OUT jacks can also output digital audio signals Notes During DVD recording the DIGITAL AUDIO OUT jacks or HDMI OUT jack output DVD audio signals only You cannot hear VHS sound by pressing VIDEO After you have completed the connection make the appropriate...

Page 20: ...the recorder You can operate the recorder only after the front panel display lights up and the recorder enters standby mode If you connect additional equipment to this recorder page 27 be sure to connect the power cord only after all connections are complete Y L PB R PR AUDIO OUT COMPONENT VIDEO OUT DIGITAL AUDIO OUT OPTICAL COAXIAL HDMI OUT SETTOP BOX CONTROL to AC outlet ...

Page 21: ... batteries If battery leakage occurs wipe out any liquid inside the battery compartment and insert new batteries Do not expose the remote sensor marked on the front panel to strong light such as direct sunlight or lighting apparatus The recorder may not respond to the remote With normal use the batteries should last about three to six months Do not leave the remote in an extremely hot or humid pla...

Page 22: ...mmand mode for the remote so it matches the command mode for the recorder you set above Follow the steps below to set the command mode on the remote A Hold down ENTER B While holding down ENTER enter the command mode code number using the number buttons C Hold down both the number buttons and ENTER at the same time for more than three seconds 1 1 2 2 3 3 4 4 5 5 6 6 7 7 8 8 0 0 9 9 SYSTEM MENU M m...

Page 23: ...Easy Setup it will appear each time you turn on your recorder Settings are made in the following order m m m m m 1 Turn on the TV 2 Press 1 The recorder turns on If the command mode for the recorder has not been changed set the command mode for the remote to the default setting of DVD3 If the command mode for the remote is changed to DVD1 or DVD2 you will be unable to operate this recorder OSD Lan...

Page 24: ...Satellite Receiver Brand Code page 121 To re enter the code number select Cancel and return to step 6 8 Select OK and press ENTER 9 Select the recorder s audio video input Line1 or Line2 that is connected to the cable box satellite receiver and press ENTER The setup display for clock setting appears 10Press M m to set the month and press Set the day year hour minutes and AM PM in the same way then...

Page 25: ...ENTER The setup display for selecting the type of DTS signal appears 15Select whether or not you want to send a DTS signal to your amplifier receiver and press ENTER If your AV amplifier receiver has a DTS decoder select On Otherwise select Off 16Press ENTER when Finish appears Easy Setup is finished All connections and setup operations are complete If you use the cable box satellite receiver cont...

Page 26: ...page 101 Check the connection and place the set top box controller near the cable box satellite receiver page 12 If your cable box or satellite receiver still does not operate with this recorder contact your cable or satellite company to see if they can provide you with a compatible cable box or satellite receiver To fix the set top box controller to your cable box satellite receiver Once you have...

Page 27: ...e to the LINE 2 IN jacks of this recorder If the equipment has an S video jack you can use an S video cord not supplied instead of the yellow video plug of the audio video cord Do not connect to the S VIDEO and yellow VIDEO jacks at the same time You can connect a second DVD player and record DVDs z Hints When the connected equipment outputs only monaural sound connect an audio cord to the white L...

Page 28: ...corder to another equipment s input jack with the other equipment s output jack connected to the input jack of this recorder Noise feedback may result If you pass the recorder signals via the VCR you may not receive a clear image on your TV screen Be sure to connect your VCR to the VCR DVD recorder and your TV in the order shown below To watch video tapes watch the tapes through a second line inpu...

Page 29: ...29 Hookups and Settings ...

Page 30: ...cally formatted Playable on DVD RW compatible players automatically finalized DVD RW VR mode Format in VR mode 2 page 47 Playable only on VR mode compatible players finalization unnecessary page 88 Video mode Format in Video mode 2 page 47 Playable on most DVD players finalization necessary page 88 DVD R Automatically formatted Playable on DVD R compatible players finalization necessary page 88 DV...

Page 31: ...ers frees up disc space 5 Erasing titles or chapters does not free up disc space 6 When using DVD R DL Double Layer discs see the instructions supplied with the discs Recording Features Editing Features Rewrite page 67 Auto Chapter page 49 Change Title Name page 60 Erase Title Chapter page 57 A B Erase page 58 Divide Title page 59 Playlist page 61 Yes Yes Yes Yes No 3 Yes Yes No Yes Yes Yes Yes Ye...

Page 32: ...ot be recorded on 8 cm discs DVD RAMs Disc Type 12 cm 8 cm Playback Recording Playback Recording DVD RW Yes Yes Yes No DVD RW VR mode Yes Yes Yes No Video mode Yes Yes Yes No DVD R VR mode Yes Yes Video mode Yes Yes Yes No DVD R Yes Yes ...

Page 33: ... Disc Type Disc Logo Icon Used in This Manual Characteristics DVD VIDEO Discs such as movies that can be purchased or rented DVD RAM DVD RAMs recorded by another recording device 12 cm discs without cartridges or removable from their cartridges can be played VIDEO CD VIDEO CDs or CD Rs CD RWs in VIDEO CD format with PBC function CD Music CDs or CD Rs CD RWs in music CD format that can be purchased...

Page 34: ...CD standard Recently various music discs encoded with copyright protection technologies are being marketed by some record companies Please be aware that among those discs there are some that do not conform to the CD standard and may not be playable by this product Note on DVD RWs DVD Rs DVD RWs DVD Rs or CD RWs CD Rs recorded on other equipment Some DVD RWs DVD Rs DVD RWs DVD Rs or CD RWs CD Rs ca...

Page 35: ...DVD RW DVD RW DVD R DVD R and DVD RAM you can select the title from the Title List menu page 39 When using a DVD RAM with a cartridge remove the disc from the cartridge Notes To play a disc recorded with other equipment on this recorder finalize the disc on the recording equipment first For simultaneous VHS and DVD operation see page 9 Using the DVD s Menu When you play a DVD VIDEO or a finalized ...

Page 36: ...display REPLAY ADVANCE Replays or briefly fast forwards a scene when pressed during playback Goes to the previous or next frame when pressed during pause mode PREV NEXT Goes to the beginning of the current or next title chapter scene track and starts playback when pressed during playback Goes to the beginning of the previous title chapter scene track when PREV is pressed within three seconds after...

Page 37: ...ternal 5 1 channel decoder system must be connected to the digital jack of the recorder Notes on playing DVDs with a DTS soundtrack DTS audio signals are output only through the DIGITAL AUDIO OUT COAXIAL or OPTICAL HDMI OUT jack When you play a DVD with DTS soundtracks set Digital Out DTS to On of Audio in the Setup display page 98 If you connect the recorder to audio equipment without a DTS decod...

Page 38: ...d when you open the disc tray you play another title you switch the Title List menu to original or Playlist DVD RW VR mode DVD R VR mode DVD RAM only you edit the title after stopping playback you make a recording Playing restricted DVDs Parental Control If you play a restricted DVD a message appears asking whether you want to override the restriction 1 Select OK and press ENTER The display for en...

Page 39: ... Title List to show an original or Playlist While the Title List menu is turned on press ORIGINAL PLAYLIST repeatedly to select either Title List Original or Playlist For details see Edit options for DVD RWs VR mode DVD Rs VR mode on page 56 To turn off the Title List Press TITLE LIST z Hint You can also switch the Title List of DVD RAMs to show an original or Playlist Notes The Title List does no...

Page 40: ...ber of the title chapter track etc you want or press the number buttons to enter the time code For example Time To find a scene at 2 hours 5 minutes and 20 seconds enter 20520 If you make a mistake wait a moment until the display returns to the elapsed playing time display then select another number 4 Press ENTER The recorder starts playback from the selected point To turn off the display press OP...

Page 41: ...ic and press ENTER The Music display appears 4 Select an album and press ENTER 5 Select a track and press ENTER Playback starts from the selected track When a track or album is being played the title is shown in a box To stop playback Press x STOP To pause playback Press X PAUSE To restart playback press H PLAY or X PAUSE To return to the previous display Press O RETURN To switch between MP3 audio...

Page 42: ...TIONS to turn on off the menu icons To play the slide show 1 Press to select and press ENTER The Slideshow Speed menu appears Slow Normal Fast 2 Press to select the desired play speed and press ENTER The slide show starts from the selected image To stop playing press x STOP To rotate the selected image Press to select and press ENTER Each time you press ENTER the image turns clockwise by 90 To zoo...

Page 43: ... tracks and JPEG image files MP3 is audio compression technology that satisfies the ISO IEC MPEG regulations JPEG is image compression technology You can play back DATA CDs CD ROMs CD Rs CD RWs or DATA DVDs DVD ROMs DVD RWs DVD RWs DVD Rs DVD Rs recorded in MP3 MPEG1 Audio Layer 3 and JPEG format However this recorder only plays DATA CDs whose logical format is ISO9660 Level 1 Level 2 or Joliet an...

Page 44: ...JPEG image files within a single folder The recorder may not recognize some discs depending on the recording device used for recording or the disc condition Progressive and lossless compression JPEG image files are not supported The image size that the recorder can display is limited to width 32 7680 pixels by height 32 8192 pixels JPEG image files that conform to the DCF image file format are not...

Page 45: ... on the front panel display Press TIME TEXT repeatedly The displays differ depending on the disc type or playing status Example When playing a DVD Example When a DVD is stopped Example When playing a CD Playing time of the current title Current title number and current chapter number Clock Clock m Current title and chapter number m Remaining disc space m Input source Playing time of the current tr...

Page 46: ...The approximate recording time for DVD R DL Double Layer discs is as follows HQ 1 hour 48 minutes HSP 2 hours 42 minutes SP 3 hours 37 minutes LSP 4 hours 31 minutes ESP 5 hours 25 minutes LP 7 hours 14 minutes EP 10 hours 51 minutes SLP 14 hours 28 minutes Notes When in a recording mode other than HQ the recorder compresses the audio video data before recording Since the compression rate needs to...

Page 47: ...change the recording format using the Disc Setting display page 67 Notes You cannot mix VR mode and Video mode on the same DVD RW or DVD R You can change the recording format on DVD RWs by reformatting page 67 You cannot change the recording format on used DVD Rs The recorder records on new DVD Rs in Video mode unless you first format the discs in VR mode DVD Recording From Connected Equipment Wit...

Page 48: ...ress VIDEO to operate the VCR insert a tape then press H PLAY z Hints To play a disc recorded with this recorder on other equipment finalize the disc page 88 You can turn off the TV during recording Notes Recording may not start immediately after z REC is pressed You cannot change the recording mode during recording or recording pause If there is a power failure the program you are recording may b...

Page 49: ...in in DVD Auto Chapter of Features in the Setup display page 100 If you do not want to divide titles select Off DVD Timer Recording From Connected Equipment You can set the timer for a total of 12 programs together with DVD and VCR timer recording up to one month in advance Note that the maximum continuous recording time for a single title is 12 hours Contents beyond this time will not be recorded...

Page 50: ...lay and the recorder is ready to start recording If the c indicator flashes in the front panel display check that a recordable disc is inserted and that there is enough disc space for the recording If timer settings overlap a message appears To change or cancel a timer recording select Edit from the Timer List page 53 7 Press SYSTEM MENU to turn off the menu There is no need to turn off the record...

Page 51: ...zed timer setting overlaps Before the timer recording starts TIMER REC flashes in the front panel display The recorder automatically turns off when a timer recording finishes even if the recording started with the recorder turned on The recorder does not record programs with Copy Never signals Such recordings stop after a few seconds Recording From Connected Equipment With a Timer Synchro Rec You ...

Page 52: ...nother timer recording overlap Regardless of whether or not the program is a Synchro Rec program the program that starts first has priority The recorder starts recording the second program about ten seconds after the first program has finished If the end time of one setting and the start time of another timer setting is the same the beginning of the program that starts later will be cut Notes The ...

Page 53: ...y Press O RETURN Notes Even when correctly set the program may not be recorded if another recording is underway or other prioritized timer setting overlaps For priority see page 50 RW R RWVR RWVideo RVR RVideo 1 1 2 2 3 3 4 4 5 5 6 6 7 7 8 8 0 0 9 9 SYSTEM MENU M m ENTER O RETURN 01 DVD 04 15 09 00PM 10 00PM Line1 04 05 06 03 02 DVD 04 30 09 15PM 09 45PM Line1 10 10 AM SP SP Timer List No Media Da...

Page 54: ...ar Device on page 27 Use the DV IN jack on the front panel if the equipment has a DV D8 output jack i LINK jack To record from a digital video camera connected to the DV IN jack see page 90 1 Press DVD to operate the DVD recorder 2 Insert a recordable disc 3 Press INPUT repeatedly to select an input source according to the connection you made The front panel display changes as follows RW R RWVR RW...

Page 55: ... connected equipment and set to playback pause 7 Press z REC on this recorder and the pause or play button on the connected equipment at the same time Recording starts To stop recording press x STOP on this recorder Notes A video game image may not be recorded clearly The recorder does not record programs with Copy Never signals Such recordings stop after a few seconds During recording or recordin...

Page 56: ...ve two options for a DVD RW VR mode and DVD R VR mode editing either the original recording called the original or the playback information created from the original called a Playlist Since each is different in nature and offers different merits read the following and select the one that better suits your needs To edit original titles Edits made to the original titles are final If you plan to reta...

Page 57: ...ssary titles You cannot create or edit Playlist titles on a finalized disc When you want to edit or record on the DVD RW VR mode again unfinalize the disc page 88 Editing a Title This section explains the basic edit functions Note that editing is irreversible To edit a DVD RW VR mode or DVD R VR mode without changing the original recordings create a Playlist title page 61 1 Press DVD to operate th...

Page 58: ...otected title If you erase an original title used in a Playlist that Playlist is also erased Erasing a chapter Chapter Erase You can select a chapter within a title and erase it Note that erasing chapters from original titles cannot be undone 1 Press TITLE LIST Press ORIGINAL PLAYLIST to switch to the Title List Original if necessary 2 Select a title and press ENTER The sub menu appears 3 Select C...

Page 59: ... may be momentarily interrupted at the point where you erase a section of a title Sections shorter than five seconds may not be erased The start and end points of a title may be different from what you have set The total playing time of the title does not change even if a scene was erased If you erase an original title used in a Playlist that Playlist is also erased Dividing a title into two Divid...

Page 60: ... title name of up to 32 characters Since the displayed number of characters is limited their appearance in menus such as Title List may be different When the display for entering characters appears follow the steps below 1 Press DVD to operate the DVD recorder 2 Press TITLE LIST When editing a DVD RW VR mode or DVD R VR mode press ORIGINAL PLAYLIST to switch to the Title List Original if necessary...

Page 61: ...itle press O RETURN 7 Select Finish and press ENTER z Hint You can also rename a disc page 67 Follow steps 5 to 7 above when the Disc Name display appears Creating a Playlist Playlist titles allow you to edit without changing the original recordings see Edit options for DVD RWs VR mode DVD Rs VR mode on page 56 You can create a Playlist title by combining up to 99 sections scenes from original tit...

Page 62: ...s TITLE LIST 2 Press ORIGINAL PLAYLIST to switch to the Playlist Title List 3 Select a Playlist title and press ENTER The sub menu appears 4 Select Play and press ENTER z Hint When a Playlist title is created the start and end points will become chapter marks and each scene will become a chapter Notes The picture may pause when an edited scene is played The start and end points in a title may be d...

Page 63: ...tle Divides the title in two at a desired point page 59 Combine Titles Allows you to combine two titles into one page 64 7 Select Edit Scene and press ENTER The display for editing scenes appears Check Allows you to preview a scene Starts playback of the selected scene when you press ENTER The display returns to the Edit Scene display when the playback finishes or when you press O RETURN Erase Era...

Page 64: ...e display asks whether to rename the title To use the same name as before select No and press ENTER to finish 6 Select Yes and press ENTER The Title Name display appears 7 Follow steps 5 to 7 of Changing the Name of a Title page 60 to complete renaming The two Playlist titles become one Playlist title with the new name Erasing a scene Erase You can erase a selected scene 1 Follow steps 1 to 7 of E...

Page 65: ... page 63 The Edit Scene display appears 2 Select the scene you want to move and press ENTER 3 Select Move and press ENTER 4 Select a new location using and press ENTER The selected scene moves to the new location To move other scenes repeat from step 2 Adding a scene Add You can add a scene before the selected scene 1 Follow steps 1 to 7 of Editing a Playlist page 63 The Edit Scene display appears...

Page 66: ...lected scene 1 Follow steps 1 to 7 of Editing a Playlist page 63 The Edit Scene display appears 2 Select the scene you want to copy and press ENTER 3 Select Copy and press ENTER 4 Select a location to copy to using and press ENTER The scene is copied to the selected location To copy other scenes repeat from step 2 Add 10 10 AM T 00 00 07 Playlist No 01 Scene No 01 Add Cancel End 00 00 00 Start 00 ...

Page 67: ...n OK D Disc Finalize Finalizes a disc See page 88 for details E Disc Information Displays the following information Disc name Disc type and recording format for a DVD RW VR mode DVD R VR mode Total number of titles Protect setting The oldest and most recent recording date The total available recording time in each recording mode F Erase All Titles DVD RWs DVD RWs DVD Rs VR mode only Erases all tit...

Page 68: ...inalized Notes You can label a disc using up to 32 characters however the name may not display on other DVD equipment You cannot label an unused DVD R Video mode disc Label the disc after you first record on it You cannot mix VR mode and Video mode on the same DVD RW or DVD R You cannot change the recording format on used DVD Rs The recorder records on new DVD Rs in Video mode unless you first for...

Page 69: ... mode SP or EP from the tape LP mode recordings made on other equipment will play but picture quality is not guaranteed The counter resets to 0 00 00 whenever a tape is reinserted The counter stops counting when it comes to a portion with no recording The counter resets to 0 00 00 after ten hours and starts recounting When playback does not start even if you insert a tape with its safety tab remov...

Page 70: ...ic tracking a tracking meter appears during the automatic tracking Press TRACKING The tracking meter appears Press TRACKING repeatedly until the distortion disappears To resume automatic tracking Press TRACKING and TRACKING on the recorder at the same time for more than ten seconds Or eject the tape and reinsert it Tracking Tracking meter ...

Page 71: ...high speed when briefly pressed during playback When you hold down the button during playback the high speed play continues until you release the button slow Plays in slow motion when pressed in pause mode ADVANCE Advances one frame for each press in pause mode Fast forwards the current scene for 30 seconds when pressed during playback 1 REPLAY Replays the previous scene when pressed during playba...

Page 72: ...e tape will reach the end Forward Intro Scan Reverse Intro Scan Searches for an index mark and plays back for about five seconds at that point Press H PLAY to view that program If you do not press H PLAY the VCR automatically searches for the next index mark or until it reaches the end of the tape Notes The VCR may not recognize the end of a blank space depending on its length No index signal is m...

Page 73: ...s B Time counter elapsed time C Recording mode D Remaining tape length E Input source F Date and time Viewing information on the front panel display You can view the information on the front panel display Press TIME TEXT repeatedly The displays differ depending on the status Example When playing a tape Example When a tape is in stop mode Clock m Elapsed time m Remaining tape length m Input source ...

Page 74: ...rded onto the normal audio track along the edge of the tape Notes To play a tape in stereo you must use the A V connections When you play a tape recorded in monaural the sound is heard in monaural regardless of the AUDIO setting To listen to On screen display Front panel display Stereo Hi Fi STEREO Left channel Left STEREO Right channel Right STEREO Monaural sound on the normal audio track Mono ST...

Page 75: ...a Copy Never copy guard signal cannot be correctly recorded on the VCR To save a recording To prevent accidental erasure break off the safety tab as illustrated To record on the tape again cover the tab hole with adhesive tape Recording mode EP Extended Play and SP Standard Play is available for recording mode tape speed EP provides recording time three times as long as SP However SP produces bett...

Page 76: ...EC appears in the front panel display and recording starts Leave the cable box satellite receiver turned on and do not change the channel you are recording To stop recording Press x STOP To pause recording Press X PAUSE To restart recording press X PAUSE again If you pause recording for more than five minutes recording stops automatically To watch a DVD while recording Press DVD to operate the DVD...

Page 77: ...nformation display appears Press the button repeatedly to change the display page 73 A Recording status B Time counter C Recording mode D Remaining tape length E Input source To check the remaining tape length set VCR Function Tape Length of Features in the Setup display correctly page 101 z Hint You can view the information also in the front panel display Press TIME TEXT repeatedly to change the ...

Page 78: ...y Monday y y Sat every Saturday y 1 month later y y Today C Start Sets the start time D End Sets the stop time E Ch Selects the channel or input source When using the cable box satellite receiver control select the channel When not using the cable box satellite receiver control select the input LINE1 or LINE2 Select the channel on the connected cable box satellite receiver s side before the timer ...

Page 79: ...celing VCR Timer Settings Timer List on page 81 To use the Rec Mode Adjust function If the remaining tape length is too short for the current recording the VCR automatically changes the recording mode from SP to EP When setting the timer select AUTO in Mode and check that the Tape Length setting is correct for the inserted tape VCR Function Tape Length of Features in the Setup display page 101 z H...

Page 80: ...YNCHRO REC indicator lights up on the front panel and the recorder stands by for Synchro Rec The recorder starts recording when a signal is received from the connected equipment When the connected equipment turns off the recording stops and the recorder turns off To stop recording Press x STOP twice To cancel Synchro Rec function Press SYNCHRO REC before recording starts The SYNCHRO REC indicator ...

Page 81: ...hro Rec standby mode until the SYNCHRO REC indicator turns off You cannot record on a tape with its safety tab removed If Synchro Rec starts with the recorder turned on the recorder will turn off when the recording ends Changing or Canceling VCR Timer Settings Timer List You can change or cancel timer settings using the Timer List menu 1 Press SYSTEM MENU The System Menu appears 2 Select Timer and...

Page 82: ...r setting overlaps For priority see page 79 You cannot change the timer settings for a recording currently underway The Timer List displays both the DVD recorder and VCR timer settings 01 VCR 04 15 09 00PM 10 00PM Line1 04 05 06 03 02 VCR 04 30 09 15PM 09 45PM Line1 10 10 AM Timer List No Media Date Start End Ch Mode Edit Erase Edit 01 DVD 04 15 09 00PM 10 00PM CH8 04 05 06 03 02 DVD 04 30 09 15PM...

Page 83: ...tedly to select the recording mode SP or EP 5 Insert the source tape into the connected equipment and set to playback pause 6 Press z REC on this recorder and the pause or play button on the connected equipment at the same time Recording starts To stop recording press x STOP on this recorder Notes A video game image may not be recorded clearly You cannot record on a tape with its safety tab remove...

Page 84: ... to start dubbing To select VCR sound press AUDIO during playback see page 74 5 Press T VIDEO on the recorder Dubbing starts To stop dubbing Press x STOP Note that it may take a few seconds for the recorder to stop dubbing To play discs recorded with this recorder on other DVD equipment Finalize the disc see page 88 To dub using the on screen menu 1 After step 4 above press SYSTEM MENU 2 Select Du...

Page 85: ...gs made from VHS tapes and other copyrighted material are solely for individual enjoyment and other unauthorized use is prohibited under copyright law Unauthorized editing of copyrighted material is prohibited under copyright law Dubbing From a DVD to a VHS Tape You can record dub a DVD title to a VHS tape Note that when you record copy protected software to a tape picture may appear disrupted whe...

Page 86: ...s Dubbing stops when the DVD is played back to the end and stops the DVD deck or the VHS video deck is stopped the tape remaining time runs out The System Menu OPTIONS menu and information display are not displayed during dubbing Copyrights Recordings made from discs and other copyrighted material are solely for individual enjoyment and other unauthorized use is prohibited under copyright law Unau...

Page 87: ...lect Finish and press ENTER The Program Dubbing List appears with the selected scene 13Select an option and press ENTER if necessary To add other titles or scenes select Addition and press ENTER and repeat from step 7 To cancel the selected title or scene select Erase and press ENTER When asked for confirmation select OK and press ENTER To view the selected title or scene select Check and press EN...

Page 88: ...nalizing check the differences between the disc types in the table below Differences between the disc types Discs are automatically finalized when removed from the recorder If you want to record on it again reformat the disc page 67 Note however that reformatting a disc erases all its contents Finalizing is unnecessary when playing a disc on VR format compatible equipment Even if your other DVD eq...

Page 89: ...z Hints You can check whether the disc has been finalized or not If you cannot select Finalize in step 6 above the disc has already been finalized To check the disc information select Disc Information in the Disc Setting display and press ENTER See page 67 for details Notes Depending on the condition of the disc the recording or the DVD equipment discs may not play even if the discs are finalized ...

Page 90: ...l Video Camera to the DV IN Jack You can connect a digital video camera to the DV IN jack on the recorder to record or edit from a DV D8 format tape Operation is straightforward because the DVD recorder will fast forward and rewind the tape for you you do not need to operate your digital video camera Do the following to start using the DV D8 Edit functions of this recorder See the instruction manu...

Page 91: ...For the DVD RW DVD R s recording format VR mode or Video mode see Formatting a new disc on page 47 4 Insert the source DV D8 format tape into your digital video camera For the recorder to record or edit your digital video camera must be set to video playback mode 5 Press INPUT repeatedly to select DV 6 Press REC MODE repeatedly to select the recording mode For details about the recording mode see ...

Page 92: ... DV D8 dubbing Press INPUT z Hint If DV Camera Mode appears on the screen you can use z on the TV screen to record the camera image directly on the recorder Notes If you want to play the disc on other DVD equipment finalize the disc page 88 You cannot connect more than one piece of digital video equipment to the recorder You cannot record the date time or contents of a DV D8 format tape onto the d...

Page 93: ...off the display 2 Press ONE TOUCH DUBBING on the recorder The recorder rewinds the tape in the digital video camera and then starts recording the tape contents from the beginning When playback of the tape stops One Touch Dubbing ends automatically To stop recording Press x stop Note that it may take a few seconds for the recorder to stop recording z Hint You can also perform One Touch Dubbing when...

Page 94: ...mple Video setup 4 Select the item you want to set up and press ENTER Available options for the item appear Example TV Type M m ENTER 1 1 2 2 3 3 4 4 5 5 6 6 7 7 8 8 0 0 9 9 SYSTEM MENU O RETURN 10 10 AM Title List Original Press ENTER Title Menu for DVD Title List Setup Disc Setting Edit Title List Timer Dubbing 10 10 AM Clock Set Video Audio Features Options Easy Setup Setup Disc Setting Edit Ti...

Page 95: ...ress ENTER 3 Select Clock Set and press ENTER The clock setting display appears 4 Press M m to set the month and press Set the day year hour minutes and AM PM in sequence Press to select the item to be set then press M m to set the item The day of the week is set automatically 5 Press ENTER to start the clock 10 10 AM Create the password Create the password Setup Disc Setting Edit Title List Timer...

Page 96: ...ual supplied with the TV projector etc The setting is effective only when you connect a HDMI equipped TV to the HDMI OUT jack Video HDMI Selects the type of output from the HDMI OUT jack The setting is effective only when you connect a HDMI equipped TV to the HDMI OUT jack 16 9 Select this when connecting to a wide screen TV or TV with a wide mode function 4 3 Letter Box Select this when connectin...

Page 97: ...ccept the signal in progressive format the image quality will deteriorate In this case set Progressive to Off Or press DVD in stop mode to operate the DVD recorder and then hold down X PAUSE on the recorder for five seconds or more When you connect your TV using an HDMI cable the Progressive setting is set to On On Raises the standard black level Select this when the picture appears too dark Off S...

Page 98: ...ignals D PCM signals will be automatically output even when Dolby Digital is selected DTS DVD VIDEOs only Selects whether or not to output DTS signals Note If the HDMI OUT jack is connected to equipment not compatible with DTS signals no signal will be output regardless of the DTS setting Audio 10 10 AM Digital Out Downmix Audio DRC Audio HDMI Scan Audio Surround DV D8 Audio Input Line Audio Input...

Page 99: ...an Audio Surround Turns on the surround function to create virtual rear speakers from a stereo TV or two separate front speakers page 19 Notes When the playback signal does not contain a signal for the surround speakers the surround effects will be difficult to hear When you select one of the surround modes turn off the surround settings of the connected TV or amplifier receiver Dolby Surround Nor...

Page 100: ...ed DVD Auto Chapter Automatically divides a recording a title into chapters by inserting chapter markings at specified intervals The markings are inserted while the recording is being made Note Actual intervals may differ depending on the size of the recording The selected setting should be regarded as an approximate chapter interval Stereo 1 Records original sound only Normally select this when d...

Page 101: ...lly formats the disc in Video mode T120 For T 120 or shorter length tapes T160 For T 160 length tapes T180 For T 180 or longer length tapes On Starts playback automatically when you insert a tape with its safety tab removed Off Turns off the function You need to press H PLAY to start playback even if you insert a tape with its safety tab removed On Plays back a tape repeatedly The VCR rewinds the ...

Page 102: ...lay language on the screen Disc Menu DVD VIDEOs only Switches the language for the DVD menu Audio DVD VIDEOs only Switches the language of the soundtrack When you select Original the language given priority in the disc is selected Subtitle DVD VIDEOs only Switches the language of the subtitles recorded on the disc When you select Auto the subtitle language changes according to the language you sel...

Page 103: ...r digit password using the number buttons z Hint If you enter a wrong number press or CLEAR and re enter Notes If you forget your password select Factory Setting of Options in the Setup display Playback of discs without the Parental Control function cannot be limited on this recorder Depending on the disc you may be asked to change the Parental Control level while playing the disc In this case ent...

Page 104: ...matically turns off and then on again and the recorder is reset to the factory settings When the Easy Setup display appears follow the instructions for Easy Setup page 23 from step 4 Easy Setup Resetting the Recorder Select this to run the Easy Setup program 1 Press SYSTEM MENU while the recorder is in stop mode 2 Select Setup and press ENTER 3 Select Easy Setup and press ENTER 4 Select Start and ...

Page 105: ... recorder to progressive format In this case set Progressive to Off in Video setup page 97 or press DVD in stop mode to operate the DVD recorder and then hold down X PAUSE on the recorder for five seconds or more There is no picture or the picture noise appears when connected to the DV IN jack Try the following 1Turn the recorder off and on again 2Turn the connected equipment off and on again 3Dis...

Page 106: ...rm to the audio signal format Sound is noisy When playing a CD with DTS soundtracks noise will come from the LINE OUT AUDIO L R or AUDIO OUT L R jacks page 37 The sound volume is low The sound volume is low on some DVDs The sound volume may improve if you set Audio DRC in Audio setup to Wide Range page 99 An alternate audio track cannot be recorded or played If you have connected an AV amplifier t...

Page 107: ... cannot play audio tracks in MP3PRO format When playing a disc containing JPEG image files Photo is selected page 41 The JPEG image file cannot be played The DATA CD is not recorded in a JPEG format that conforms to ISO9660 Level 1 Level 2 The JPEG image file does not have the extension JPG or JPEG The data is not formatted in JPEG even though it has the extension JPG or JPEG The length or width o...

Page 108: ... Contents previously recorded were erased Data that has been recorded on a DVD with a PC will be erased from the disc when the disc is inserted VCR Playback The playback picture does not appear on the TV screen Make sure the TV is set to the channel for the VCR If a monitor is used set it to video input The picture is not clear Adjust the tracking by the TRACKING button The video heads are dirty s...

Page 109: ... display Set the clock again page 95 The c indicator is flashing The disc does not have any space for recording Insert a recordable disc or a tape with its safety tab in place inside the recorder The recording mode indication is incorrect Since the recording mode for recorded titles is calculated after sampling the recorded data during playback it may be displayed differently from the mode you sel...

Page 110: ...with a soft cloth slightly moistened with a mild detergent solution Do not use any type of abrasive pad scouring powder or solvent such as alcohol or benzine On cleaning discs disc lens cleaners Do not use cleaning discs or disc lens cleaners including wet or spray types These may cause the apparatus to malfunction On replacement of parts In the event that this unit is repaired repaired parts may ...

Page 111: ...ilable liquid type cleaning cassette as it may damage the video heads Specifications System DVD recorder section Laser Semiconductor laser Audio recording format Dolby Digital Video recording format MPEG Video VCR section Format VHS NTSC standard Video recording system Rotary head helical scanning FM system Video heads Double azimuth four heads Video signal NTSC color EIA standards Tape speed SP 3...

Page 112: ...ono jack Output signal 0 5 Vp p 75 ohms COMPONENT VIDEO OUT Y PB PR Phono jack Y 1 0 Vp p PB PR 0 7 Vp p 75 ohms S VIDEO OUT 4 pin mini DIN jack Y 1 0 Vp p unbalanced sync negative C 0 286 Vp p load impedance 75 ohms SET TOP BOX CONTROL Mini jack HDMI HDMI 19 pin Standard Connector General Power requirements 120 V AC 60 Hz Power consumption 31 W Power back up Back up duration 30 min Operating temp...

Page 113: ... 1394 data transport bus proposed by SONY and is a trademark approved by many corporations IEEE 1394 is an international standard standardized by the Institute of Electrical and Electronics Engineers i LINK baud rate i LINK s maximum baud rate varies according to the equipment Three maximum baud rates are defined S100 approx 100 Mbps S200 approx 200 Mbps S400 approx 400 Mbps The baud rate is liste...

Page 114: ...47 76 H m M rewind fast forward buttons 37 I H play button 35 69 X pause button 36 47 71 76 x stop button 35 47 69 76 J SELECT DVD VIDEO buttons 35 47 69 76 K remote sensor 21 L Front panel display 45 73 M HDMI indicator 16 N SYNCHRO REC indicator 51 80 O CHANNEL TRACKING buttons 1 2 47 70 76 P ONE TOUCH DUBBING button 93 Q DV IN jack 90 R LINE 2 IN S VIDEO VIDEO AUDIO L MONO R jacks 27 1 The CHAN...

Page 115: ...47 Q INPUT button 47 54 91 R TIME TEXT button 45 S AUDIO button 1 36 SUBTITLE button 36 T SYSTEM MENU button 10 TITLE LIST button 39 57 TIMER button 49 U ORIGINAL PLAYLIST button 39 57 V OPTIONS button 40 W H PLAY button 1 35 X x STOP button 35 47 Y REC MODE button 47 91 Z SYNCHRO REC button 51 wj TV buttons 1 on standby switch 21 INPUT button 21 CH channel button 1 21 VOL volume button 21 DIGITAL...

Page 116: ...on 76 O TIME TEXT button 73 P AUDIO button 1 74 Q TIMER button 78 R M m ENTER button 23 S OPTIONS button 72 T REPLAY ADVANCE buttons 71 U H PLAY button 1 69 V x STOP button 69 76 W REC MODE button 76 X SYNCHRO REC button 80 Y TV buttons 1 on standby switch 21 INPUT button 21 CH channel button 1 21 VOL volume button 21 DIGITAL ANALOG button 21 1 Number 5 AUDIO CH and H PLAY buttons have a tactile d...

Page 117: ...ing time recording mode Clock Channel I angle indicator 36 J Disc indicator Rear panel A AUDIO OUT L R jacks 18 B SET TOP BOX CONTROL jack 13 C HDMI OUT jack 16 D DIGITAL AUDIO OUT COAXIAL OPTICAL jacks 18 E COMPONENT VIDEO OUT Y PB PR jacks 17 F S VIDEO OUT jack 15 G LINE 1 IN VIDEO AUDIO L R jacks 13 H LINE OUT VIDEO AUDIO L R jacks 15 17 DVD RW VR VCD VIDEO STEREO L R VIDEO AUDIO LINE OUT VIDEO...

Page 118: ... rewritable disc that is the same size as a DVD VIDEO The DVD RW has two different modes VR mode and Video mode DVDs created in Video mode have the same format as a DVD VIDEO while discs created in VR Video Recording mode allow the contents to be programmed or edited DVD R page 30 A DVD R read plus R is a recordable disc that is the same size as a DVD VIDEO Contents can be recorded only once to a ...

Page 119: ...y recorded on a DVD RW VR mode or DVD R VR mode Erasing original titles frees up disc space on DVD RWs Playlist page 56 Playback information created from the actual recordings on a DVD RW VR mode or DVD R VR mode A Playlist leaves the original titles as they are and contains only the information needed to control playback A Playlist title takes up very little disc space Progressive format page 97 ...

Page 120: ...Language ARA Arabic BUL Bulgarian CHI Chinese CRO Croatian CZE Czech DAN Danish DEU German ENG English ESP Spanish FIN Finish FRA French GRE Greek HUN Hungarian IDN Indonesian IND Hindi ISL Icelandic ITA Italian IWR Hebrew JPN Japanese KOR Korean MAL Malay NLD Dutch NOR Norwegian POL Polish POR Portuguese RUS Russian SVE Swedish THA Thai TUR Turkish VIE Vietnamese ZAF Afrikaans Abbreviation Langua...

Page 121: ...e 0770 Arbatron 0014 0011 0003 0476 Archer 0153 0022 0207 0039 0797 0237 0260 ASE 1080 Auna 1269 BBT 0267 BCC 0276 Belcor 0056 0022 Bell Howell 0014 Bell Atlantic 0641 Bell South 0899 Bestlink 0303 Betavue 0022 British Telecom 0003 BVS 0641 Cable Healthcare 0769 0058 Cable Star 0056 Cabletenna 0022 0039 Cableview 0022 Century 0153 0618 0008 0315 Citation 0017 Citizen 0153 0315 0078 0242 Clearmaste...

Page 122: ...ng Yu 0024 Leon 0069 0015 LG 0040 0144 Linsay 0440 Macom 0033 Cable box brand Code number Maestro 0812 Magnavox 0797 0027 0032 0334 0069 Millennium 0618 0153 Memorex 0000 Mitsubishi 0003 Motorola 0476 0276 1476 0810 1376 1254 0400 1106 Movie Time 0156 0078 0063 0203 MS 0069 0015 1018 0303 MultiVision 0012 Myrio 1117 NET 0274 Next Level 0764 1316 1315 1314 Nexus 0770 Northcoast 0671 0314 Nova Visio...

Page 123: ...nal 0040 0015 0011 0035 Signature 0011 SkyCable 0112 Skygiant 1091 SL Marx 0040 Cable box brand Code number Sony 1006 Spectradyne 0769 0058 Spectravision 0058 Sprucer 0021 0307 0010 0144 Standard Components 0203 0096 0155 Starcom 0003 0015 0047 0014 0098 0305 Stargate 0015 0040 0770 0865 0797 0305 0014 Starquest 0015 StarSight 0542 0422 Stealth 0274 Stellar One 0807 Storm 1018 0637 Suena Madritel ...

Page 124: ...nd Code number Satellite receiver brand Code number AlphaStar 0772 Atlantic Telephone 1333 Bell ExpressVu 0775 Century 0856 Chaparral 0216 Crossdigital 1109 DirecTV 0749 0566 0392 1749 0099 1109 1076 1442 1856 0247 1142 1639 0724 0639 0819 Dish Network System 0775 1005 1170 Dishpro 0775 1005 Echostar 0775 1170 1005 Expressvu 0775 Galaxis 0863 GE 0566 General Instrument 0361 0869 0627 GOI 0775 Grad...

Page 125: ...oscan 0392 0566 QNS 1367 RadioShack 0869 RCA 0566 0392 0143 0855 Samsung 1109 1276 Sky 0856 0099 1856 Sony 0639 1639 Star Choice 0869 Star Trak 0869 0772 Thomson 0566 0392 Tivo 1142 1442 Toshiba 0790 0749 1749 1285 UEC 1333 1358 Uniden 0724 0722 Video Cipher II Plus 0361 Zenith 0856 1856 Satellite receiver brand Code number ...

Page 126: ...69 CPRM 30 Create Dubbing List 87 Create Playlist 62 Creating chapters 49 D Digital Out 98 Disc Finalize 67 89 Disc Format 67 Disc Information 67 Disc Menu 102 Disc Name 67 Disc Protect 67 Disc Setting 67 89 Disc types 30 Display front panel display 117 Setup Display 94 Divide Title 59 63 Dolby Digital 25 98 118 Downmix 99 DTS 25 37 98 118 Dubbing 84 86 DV D8 Audio Input 92 100 DV D8 Dubbing 92 DV...

Page 127: ...eed 75 Recording mode 46 75 Recording time 46 49 Region code 34 Remaining time 44 77 Remote 21 115 REPLAY 36 71 Resetting 104 Resume Play 38 Rotate 42 S Safety tab 75 Satellite receiver 13 Satellite receiver brand code 124 Scan Audio 38 99 Scene Dubbing 87 Searching for Chapter 40 for Title 40 for Track 40 Time Search 40 Set top box control 12 24 101 Set top box controller 12 26 Settings 94 Setup ...

Page 128: ... Reproducción de DVD 13 Reproducción de discos 13 Opciones de reproducción 14 Reproducción de un título de la Lista títulos 16 Grabación de DVD 17 Antes de grabar 17 Grabación de DVD desde un equipo conectado que no tiene temporizador 18 Grabación con temporizador de DVD desde un equipo conectado 20 Reproducción de la videograbadora 22 Reproducción de una cinta VHS 22 Opciones de reproducción 23 G...

Page 129: ...abar programas de televisión No es posible grabar en esta grabadora si tiene un decodificador de cable o un receptor vía satélite sin salidas de audio video cable sin decodificador de cable sólo antena sin cable de televisión En los casos mencionados anteriormente póngase en contacto con la empresa suministradora para consultar si podrían proporcionarle un decodificador de cable o un receptor vía ...

Page 130: ...dificador de cable o receptor vía satélite LINE 1 IN Coloque el controlador del decodificador cerca del sensor remoto del decodificador de cable receptor vía satélite L R VIDEO AUDIO LINE OUT VIDEO Y L PB R PR AUDIO LINE 1 IN AUDIO OUT SVIDEO OUT COMPONENT VIDEO OUT DIGITAL AUDIO OUT OPTICAL COAXIAL HDMI OUT SETTOP BOX CONTROL ANT IN R L AUDIO OUT VIDEO OUT TO TV VIDEO LINE 1 IN AUDIO SETTOP BOX C...

Page 131: ...diante la pulsación de VIDEO ya que la toma S VIDEO OUT sólo emitirá señales de DVD video No conecte las tomas de salida de audio del televisor a las tomas LINE IN AUDIO L R a la vez De lo contrario se producirá ruido no deseado en los altavoces del televisor L R VIDEO AUDIO LINE OUT VIDEO Y L PB R PR AUDIO LINE 1 IN AUDIO OUT SVIDEO OUT COMPONENT VIDEO OUT DIGITAL AUDIO OUT OPTICAL COAXIAL HDMI O...

Page 132: ...timedia Interface son marcas comerciales o marcas comerciales registradas de HDMI Licensing LLC Notas No es posible conectar la toma de salida HDMI OUT a tomas DVI que no sean compatibles con HDCP por ejemplo tomas DVI en pantallas de PC Durante la grabación de discos DVD no es posible visualizar imágenes en VHS mediante la pulsación de VIDEO ya que la toma de salida HDMI OUT sólo emitirán señales...

Page 133: ...DVD no es posible visualizar imágenes en VHS mediante la pulsación de VIDEO ya que las tomas COMPONENT VIDEO OUT sólo emitirán señales de DVD video L R VIDEO AUDIO LINE OUT VIDEO Y L PB R PR AUDIO LINE 1 IN AUDIO OUT SVIDEO OUT COMPONENT VIDEO OUT DIGITAL AUDIO OUT OPTICAL COAXIAL HDMI OUT SETTOP BOX CONTROL Y PB PR COMPONENT VIDEO OUT COMPONENT VIDEO IN PB PR Y AUDIO L R INPUT L R VIDEO AUDIO LIN...

Page 134: ...mente con las manos si se produjera alguna fuga Respete las indicaciones siguientes No utilice una pila nueva con otra usada ni pilas de distintos fabricantes No intente cargar las pilas Si no tiene intención de utilizar el mando a distancia durante un periodo de tiempo prolongado extraiga las pilas Si se produce una fuga de las pilas seque todo líquido que haya en el compartimiento de las pilas e...

Page 135: ...para ejecutar la Configuración fácil 4 Presione ENTER Aparece la pantalla de configuración que le permite seleccionar el idioma utilizado en las indicaciones en pantalla 5 Seleccione un idioma y presione ENTER Aparecerá la pantalla de configuración para el control del decodificador de cable receptor vía satélite 6 Seleccione si se utiliza o no el control del decodificador de cable receptor vía sat...

Page 136: ...panorámica o televisores estándar con modo panorámico 4 3 Tipo buzón para televisores estándar Muestra imágenes panorámicas con franjas en las secciones superior e inferior de la pantalla 4 3 Explo pan para televisores estándar Muestra automáticamente imágenes panorámicas que ocupan toda la pantalla y corta las secciones que no caben 12Presione ENTER Aparece la pantalla de configuración para selec...

Page 137: ...acia el decodificador de cable receptor vía satélite 3 Presione CH y compruebe que el canal cambia en la ventana del decodificador de cable receptor vía satélite 4 Presione los botones numéricos y compruebe que el canal cambia en la ventana del decodificador de cable receptor vía satélite Si no consigue que la grabadora controle el decodificador de cable receptor vía satélite Vuelva a ejecutar la ...

Page 138: ...12ES 2 Colóquelo de manera que el controlador del decodificador esté cerca del sensor de control remoto del decodificador de cable receptor vía satélite ...

Page 139: ...eproducción se iniciará automáticamente en función del disco Al reproducir un DVD RW DVD RW DVD R DVD R y DVD RAM podrá seleccionar el título del menú Lista títulos página 16 Cuando utilice un DVD RAM con un cartucho extraiga el disco del mismo Nota Para reproducir un disco grabado con otro equipo en esta grabadora primero finalice el disco en el equipo de grabación Utilización del menú del DVD Cu...

Page 140: ...os subtítulos cuando se presiona varias veces ANGLE Selecciona un ángulo cuando se presiona varias veces Si se grabaron varios ángulos multiángulo de una escena en el disco aparece en la pantalla del panel frontal REPLAY ADVANCE Vuelve a reproducir o avanza rápidamente una escena si se presiona durante la reproducción Se desplaza al fotograma anterior o siguiente si se presiona en el modo de pausa...

Page 141: ...d de búsqueda cambia cada vez que presiona el botón retroceso rápido avance rápido FR1 T t FF1 1 FR2 2 T T t t FF2 2 FR3 3 T T T t t t FF3 3 Todos los discos 1 FF1 con sonido Explorar audio está disponible para DVD con pistas de sonido Dolby Digital 2 FR2 y FF2 no están disponibles para MP3 3 FR3 y FF3 sólo están disponibles para DVD y VIDEO CD lento Reproduce a cámara lenta cuando se presiona en ...

Page 142: ...ra DVD RW Modo VR y DVD R Modo VR Es posible cambiar la lista de títulos para que se muestre un título original o una Playlist Presione ORIGINAL PLAYLIST varias veces mientras se muestra el menú Lista títulos para seleccionar Lista títulos Original o Playlist Para quitar la lista de títulos Presione TITLE LIST z Observación También es posible cambiar la lista de títulos de DVD RAM para mostrar un ...

Page 143: ...s y 51 minutos SLP 14 horas y 28 minutos Notas En modos de grabación distintos a HQ la grabadora comprime los datos de audio video antes de la grabación Dado que las escenas de movimientos rápidos o la existencia de ruido en la imagen requieren que las tasas de compresión disminuyan el tamaño de los datos grabados aumenta y el tiempo de grabación disponible se acorta En la grabación de estas imáge...

Page 144: ...nda la grabadora y el decodificador de cable receptor vía satélite 2 Presione DVD para utilizar la grabadora de DVD 3 Presione Z OPEN CLOSE y coloque un disco grabable en la bandeja de discos 4 Presione Z OPEN CLOSE para cerrar la bandeja de discos Espere hasta que LOAD desaparezca de la pantalla del panel frontal Señales de control de copias Discos grabables Copy Free Copy Once Ver 1 1 Ver 1 2 co...

Page 145: ...resione X PAUSE de nuevo Para ver una cinta VHS durante la grabación Presione VIDEO para utilizar la videograbadora inserte una cinta y a continuación presione H PLAY Notas Es posible que la grabación no se inicie inmediatamente después de presionar z REC No se puede cambiar el modo de grabación mientras graba o durante una pausa de grabación Si se produce un corte en el suministro eléctrico se el...

Page 146: ... M Para grabar el mismo programa todos los días o el mismo día todas las semanas presione m El elemento cambia de la siguiente manera Hoy y Dom Sáb de domingo a sábado y Lun Sáb de lunes a sábado y Lun Vie de lunes a viernes y Dom todos los domingos y Lun todos los lunes y y Sáb todos los sábados y 1 mes más tarde y y Hoy C Inicio establece la hora de inicio D Fin establece la hora de finalización...

Page 147: ... la grabadora finalice la grabación con temporizador Para detener la grabación Presione x STOP dos veces Tenga en cuenta que la grabadora demora algunos segundos en detener la grabación Para utilizar la función Ajustar modo grab Si el espacio restante en el disco no es suficiente para realizar la grabación actual la grabadora ajustará el modo de grabación automáticamente Seleccione AUTO en Modo al...

Page 148: ...a videograbadora detecta automáticamente el sistema de grabación S VHS VHS y el modo de grabación SP o EP de la cinta Las grabaciones en modo LP realizadas en otros equipos se reproducirán pero no se garantiza una buena calidad de la imagen El contador se restablecerá a 0 00 00 siempre que se vuelva a insertar una cinta El contador deja de contar cuando llega a una parte sin grabación El contador ...

Page 149: ...ando se presiona brevemente durante la reproducción Si mantiene presionado el botón durante la reproducción ésta continúa a alta velocidad hasta que se suelta el botón lento Reproduce a cámara lenta cuando se presiona en el modo de pausa ADVANCE Avanza un fotograma cada vez que se presiona en modo de pausa Avanza rápidamente la escena actual durante 30 segundos cuando se presiona durante la reprod...

Page 150: ...grabar en la cinta cubra el orificio de la lengüeta con cinta adhesiva Modo de grabación Los modos EP reproducción extendida y SP reproducción estándar están disponibles en el modo de grabación velocidad de cinta El modo EP proporciona un tiempo de grabación tres veces superior a la duración del modo SP No obstante se obtiene una mejor calidad de imagen y sonido con el modo SP Tiempo máximo de gra...

Page 151: ...ctada LINE1 o LINE2 presionando INPUT y a continuación seleccione el canal en el decodificador de cable receptor vía satélite 5 Presione REC MODE varias veces para seleccionar el modo de grabación SP o EP Para obtener más detalles sobre el modo de grabación consulte la página 24 6 Presione z REC Aparece REC en la pantalla del panel frontal y se inicia la grabación Deje el decodificador de cable re...

Page 152: ... detiene la grabación y se apaga Para cancelar el Quick Timer Presione z REC varias veces hasta que aparezca el contador en la pantalla del panel frontal La grabadora vuelve al modo de grabación normal Para detener la grabación Presione x STOP dos veces Grabación con temporizador de videograbadora desde un equipo conectado Puede ajustar el temporizador para un total de 12 programas utilizando la g...

Page 153: ...la del panel frontal compruebe que ha insertado una cinta con la lengüeta de seguridad intacta 6 Presione SYSTEM MENU para quitar el menú No es necesario apagar la grabadora antes de que empiece la grabación con temporizador Deje el decodificador de cable receptor vía satélite encendido y no cambie el canal seleccionado hasta que la grabadora finalice la grabación con temporizador Para detener la ...

Page 154: ...Presione T VIDEO en la grabadora Comienza el copiado Para detener el copiado Presione x STOP Tenga en cuenta que la grabadora demora algunos segundos en detener el copiado Para copiar mediante el menú en pantalla 1 Después de realizar el paso 4 descrito anteriormente presione SYSTEM MENU 2 Seleccione Copiado del menú del sistema y presione ENTER 3 Seleccione Copiado sencillo y presione ENTER RWVR ...

Page 155: ...OPTIONS y la pantalla de información no se muestran durante el proceso de copiado Derechos de autor Las grabaciones realizadas de cintas VHS y otros materiales con derechos de autor son únicamente para disfrute individual y cualquier otro uso no autorizado está prohibido por las leyes de los derechos de autor La edición no autorizada de material protegido por los derechos de autor está prohibida p...

Page 156: ...quedará grabado hasta que la cinta llegue al final z Observaciones Es posible que el brillo de la imagen de reproducción varíe del de la reproducción de DVD normal Es posible que el tiempo de reproducción del DVD difiera ligeramente de la lectura del contador de la cinta VHS El sonido que se reproduce principal secundario etc es el sonido copiado Notas El copiado se detiene cuando el DVD se reprod...

Page 157: ......

Page 158: ......

Page 159: ......

Page 160: ...Sony Corporation Printed in China AK68 01328A ...
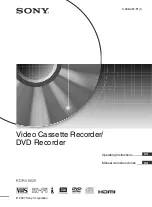
Reviews: