Sony RDR-HXD890, Operating Instructions Manual
The Sony RDR-HXD890 is a state-of-the-art digital video recorder that combines advanced functionality with intuitive controls. Unlock the full potential of this device with the comprehensive Operating Instructions Manual, available for free download from manualshive.com. Get started today and explore the endless possibilities of this incredible product.
Share
Download


Reviews:
No comments
Related manuals for RDR-HXD890

17.2740
Brand: Monacor Pages: 20

PV-1000TOUCH5U
Brand: Lawmate Pages: 1

TR-74Ui
Brand: T&D Pages: 35

Memory Stick ICD-MS515
Brand: Sony Pages: 2

M2020A - M Microcassette Transcriber
Brand: Sony Pages: 2

ICD-UX300 - Digital Flash Voice Recorder
Brand: Sony Pages: 2

ICD-UX200WHT - Digital Flash Voice Recorder
Brand: Sony Pages: 3

ICD-UX200RED - Digital Flash Voice Recorder
Brand: Sony Pages: 3

ICD-UX502
Brand: Sony Pages: 106

ICD-UX512
Brand: Sony Pages: 128

ICD-UX200 - Digital Flash Voice Recorder
Brand: Sony Pages: 124

D-RW2SU
Brand: Toshiba Pages: 38

D-KR10KU
Brand: Toshiba Pages: 53
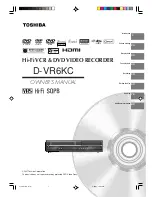
D-VR6KC
Brand: Toshiba Pages: 92

VN-701PC
Brand: Olympus Pages: 45

DS-5000
Brand: Olympus Pages: 3

fs2
Brand: forus Pages: 18

MD-185X
Brand: Onkyo Pages: 36


