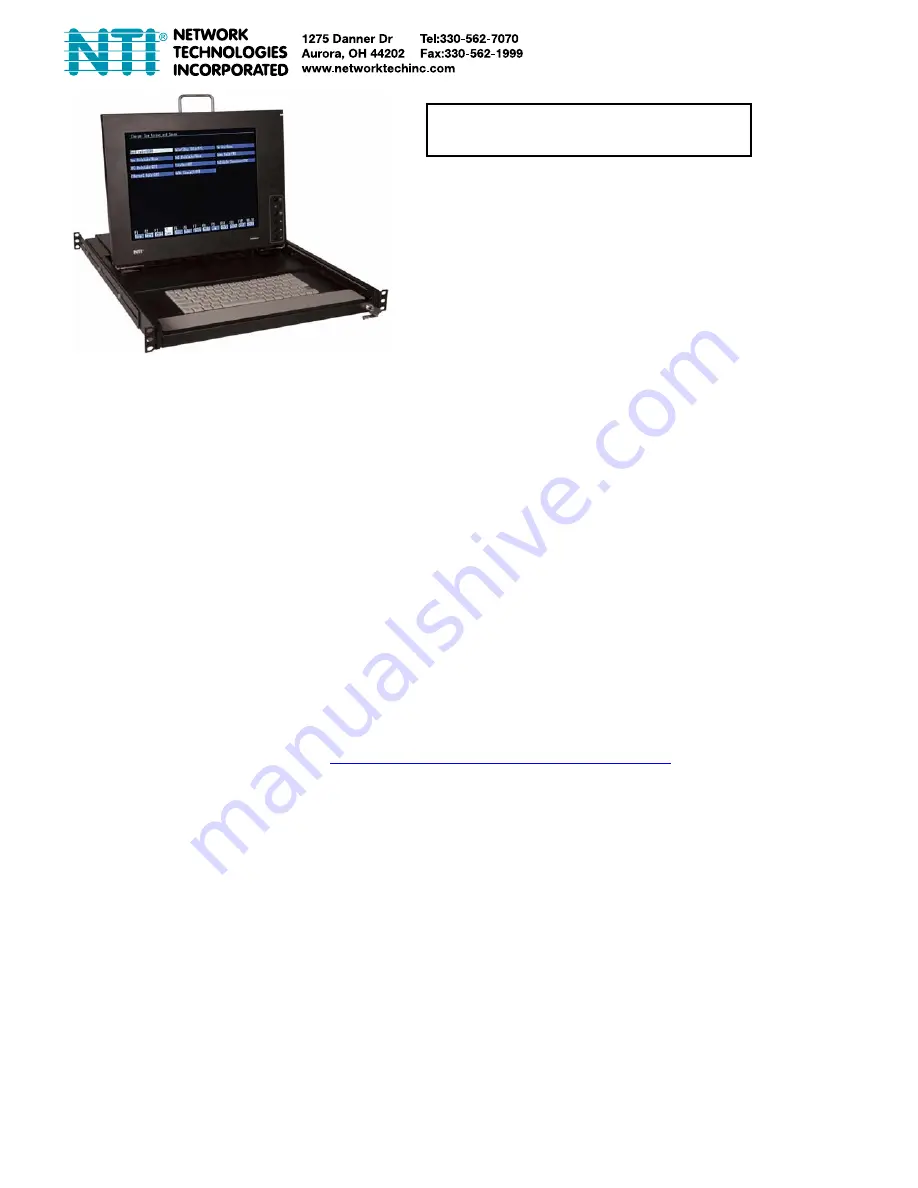
background image


RACKMUX-T15-N-Sx 

                     Rack Mount Terminal  

                           Drawer with Secure SSH  

            Console Switch 


                                    Quick Start Setup Guide


Introduction 

The RACKMUX® Terminal Drawer with Secure SSH Console Switch combines a Terminal Drawer and an integrated SSH 
Console Switch delivering secure management of up to 32 serial devices via the Internet, TCP/IP network, or dial-up modem 
connections in only 1RU of space.   
 
The main purpose of the Console Switch is to provide secure management of several serial devices from local or remote locations 
(using Ethernet or external modems).  Devices include routers, DSU's, servers, switches or any other equipment allowing serial 
operation using RS232 interface. Users can work locally using the integrated Terminal Drawer or from remote locations via 
Ethernet connection (Web Interface, SSH, Telnet).  
 
Each SERIMUX port has to be configured for serial communication (baud rate, parity, etc) within the specifications of the attached 
serial device, but the configurations of the two devices linked by the SERIMUX do not need to match.   Various parameters 
(communication speed, hardware and/or software flow control, timeout, etc) can be selected for each SERIMUX port. Devices 
may be either locally connected or connected through attached modems. 
 
Each SERIMUX port can be configured as either a host or user port. Serial hosts (such as servers, switches etc.) are connected to 
host ports, while serial user devices (such as a terminal or serial console) are connected to user ports. 
 

This guide describes the basic installation and configuration procedure. For further details, please see the SERIMUX-S-x 
Installation and Operation Manual (go to 

http://www.networktechinc.com/pdf/man107.pdf

).  


RACKMUX

Series


Summary of Contents for RACKMUX-T15-N-Sx

Page 1: ...locations via Ethernet connection Web Interface SSH Telnet Each SERIMUX port has to be configured for serial communication baud rate parity etc within the specifications of the attached serial device but the configurations of the two devices linked by the SERIMUX do not need to match Various parameters communication speed hardware and or software flow control timeout etc can be selected for each S...

Page 2: ... any serial port 1 4 8 16 24 32 using a serial cable with an RJ45 male connector image below It may be necessary to add one of the cable adapters supplied detailed in Appendix C of the manual between the device port on the user device or host device and the RJ45 connector 2 Connect the power cord to the IEC connector 3 Connect the Console Switch to the Ethernet for remote system management using t...

Page 3: ... Off ANSI Reverse Off Display LCD F2 General SETUP Menu Personality VT 100 Enhance On Status Line Standard Scroll Speed Jump Auto Scroll On End of Line Wrap On Rcvd CR CR Monitor Off Attribute Char F3 Keybd SETUP Menu Keyclick Off Key Repeat 5 Xmt Limit None Margin Bell Off Language US Keycode ASCII NRC Off Bell Volume 2 NUM Start Off DEL Keypad Dot Del F4 Comm SETUP Menu Baud rate 9600 Data Stop ...

Page 4: ...on with a serial device Note To connect to a host the host must first be configured with the same communication settings as the port default serial settings 9600 baud 8 bits no parity 1 stop bit no flow control If needed see Serial Settings on page 16 of the SERIMUX S x manual to change the SERIMUX port serial settings For more details specifications and troubleshooting tips see the SERIMUX S x In...

Page 5: ...tem for selection Once an item is highlighted pressing the Menu button will select it OSD Controls The Select button is used to make selections within the OSD menus when the OSD menu is ON When the OSD menu is OFF the Select button will act as an Auto Adjust button to keep the user from having to use the menus to adjust the quality of the image on the monitor OSD Control Menu The OSD On Screen Dis...

Page 6: ...UE sections highlighted use the Up or Down arrow to move between them press the Select button to choose the option to adjust Then use the Up or Down Arrow to adjust the setting Select EXIT when finished to return to the Main Menu Position Menu Selecting the Position menu will bring up a screen in which the user can select AUTO ADJUST to automatically adjust the horizontal and vertical position of ...

Page 7: ...enu automatically exits adjustable from 10 to 60 seconds LANGUAGE the language that the OSD menus will be presented in With the item highlighted use the Up or Down arrow to move between them press the Select button to choose the option to adjust Then use the Up or Down Arrow to adjust the setting as needed Select EXIT when finished to return to the Main Menu OSD Image can be moved to different poi...

Page 8: ...tness auto adjust color temperature Brightness 250cd m2 Nits Contrast 500 1 typical Viewing Angle 140 H 125 V Keyboard Specifications Type 104 key Terminal Emulation Emulations VT52 VT100 VT220 Console ANSI PC TERM TVI910 925 WY 50 WY 60 WY 100 WY 120 WY 325 PCG Alpha Character matrix 7x12 dot matrix in 10x16 cell with 3 dot descenders Screen size 80x25 Page length 1 2 or 4 screens Cursor Blink or...

Reviews: