http://www.loopcomm.com
Step1
Step3
Step4
Step8
Step9
http://setup.loopcomm.com
Step2
Step5
Step6
Step7
SMART REPEATER
Smart Repeater
Loopcomm_Repeater
loopcomm
Side and Bottom Panel Description
Antenna : Two 2dBi fix external Antenna.
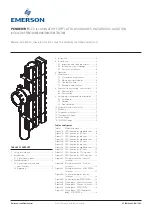
Connect the Cable RJ-45 to Smart Repeater
and to computer or Notebook Port
Plug the Smart Repeater to Power Plug
1.Click on the wireless icon to see available wireless networks
(For vista, click start> Connect To)
2.Select your current Wireless Network and click
Disconnect
3.Press WPS button for 5Seconds to restart the Smart Repeater
and wait for 60Seconds and try
http://setup.loopcomm.com again.
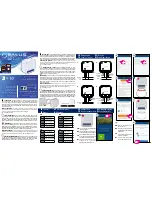
Find an optimal setup location between your Wireless Router and
your wireless dead zone
Normal Power 100mW Compact Wi-Fi Range Extender
LP-8696P
Indoor 802.11B/G/N 2.4G Wireless Smart Repeater
READ FIRST
Quick Install Guide 1.0.0
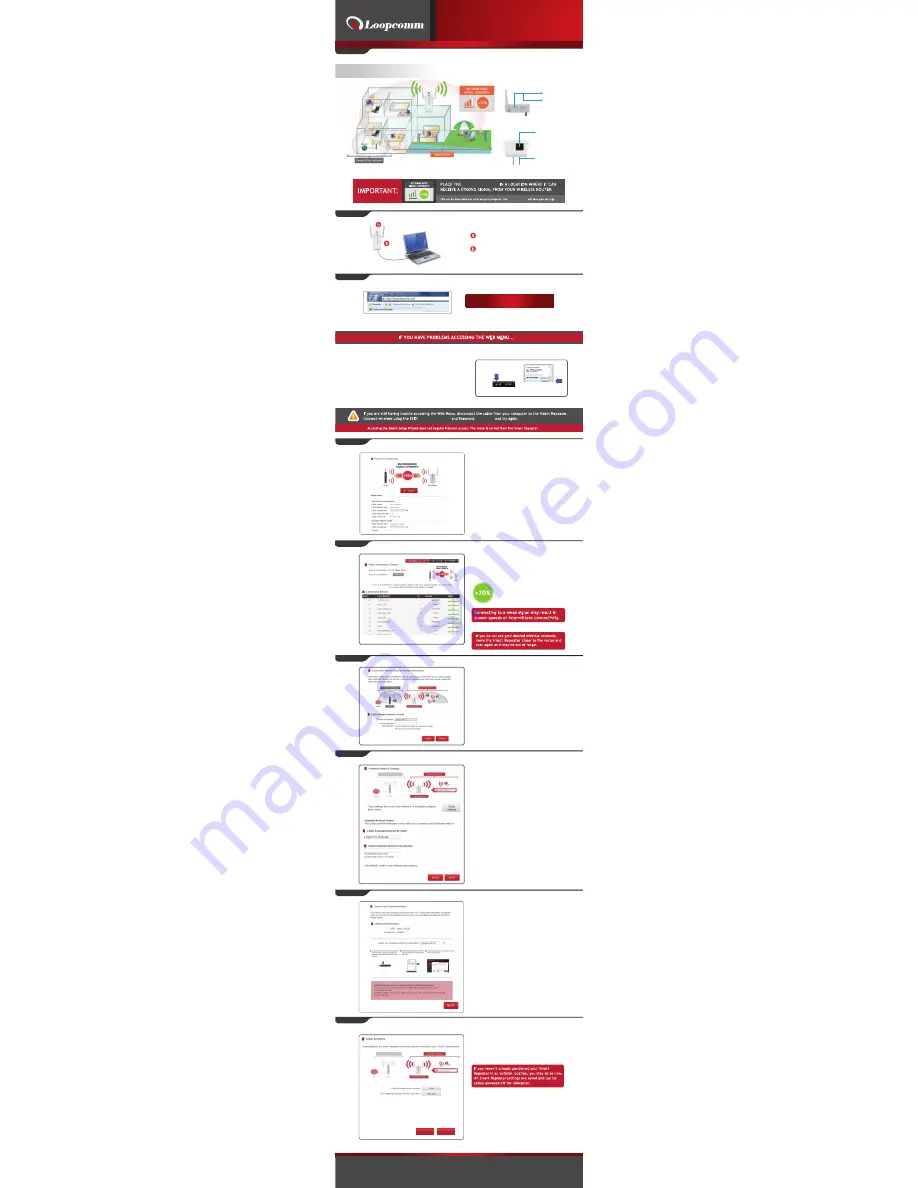
Connect your PC or Tablet to the Smart Repeater
Open your Web Browser
Enter the setup web address into your browser:
If the URL fails to open, then try http://192.168.1.250
Recommended browsers: Google Chrome, Safari or Internet Explorer (8.0 or up) Do not use Firefox
Disconnect your PC from wireless networks, open your browser and try again.
Windows 7 & Vista
(example)
Welcome to Dashboard
Scan for a wireless Network
The Dashboard will provide you with the current
status of the Smart Repeater.
Click
Scan
to find available networks to extend
Click
Scan
to begin scanning for nearby wireless
networks.
Highlight and select the wireless network(S) that
you wish to repeat.
Recommended signal
Select the wireless network with
a signal strength greater than 70%
for the most reliable connection
Click
Next
to Continue.
Home Network Security Settings (If necessary)
Enter your password and then click
next
.
If your wireless home network(s) does not have
security enabled, leave the security field blank.
Click
Next
to Continue.
Configure Settings for your Extended Network
The ID of your extended network is:
Loopcomm_Repeater
To change it, enter a new name in the SSID Field.
Wireless Users connecting to the range extender
can use this ID to identify the extended network.
Enter a new key in the security key field. The key
must be at least 8 characters long.
Click
Next
to apply your settings. The smart Repeater
will reboot. This process may take up to 150seconds.
Don’t refresh the web page.
The page will automatically reload with the connection
status.
Connect to the New Extended Network
During the countdown process, the Range extender
will reboot and disconnect the Wi-Fi connection. At
this point, you need to reconnect your PC or tablet to
the new extended network. Follow the instruction on
the screen to connect to the extended network.
Once you have connected, click the check box to
confirm.The
Next
button will appear allowing you to
complete the setup process.
If there are problems with your configuration, the
setup wizard will inform you to rescan for a network
to extend.
If there are no problems, you will see the setup
summary page below.
Congratulations, the smart repeater is now
successfully configured. Your settings are now
saved. You may now detach the Ethernet cable
from your computer and connect to wireless
smart repeater.
You may also attach any wired network
devices to the wired ports on the back
of the smart repeater.
Press Finish to complete the process.
If there is a problem with your configuration,
then the smart setup wizard will inform you to
restart the wizard and select another network
to repeat.
Setup Summary
Finish
Refesh
Press 3Seconds for
WPS configuration
Press above 5Seconds
to reset
RJ-45 Port for connecting
to computer
Power Plug