background image

Page 1

06/09

*2P0609*

505,187M

*P505187M*

RETAIN THESE INSTRUCTIONS

FOR FUTURE REFERENCE

E

 2006 Lennox Industries Inc.

Dallas, Texas, USA

INSTALLATION
INSTRUCTIONS

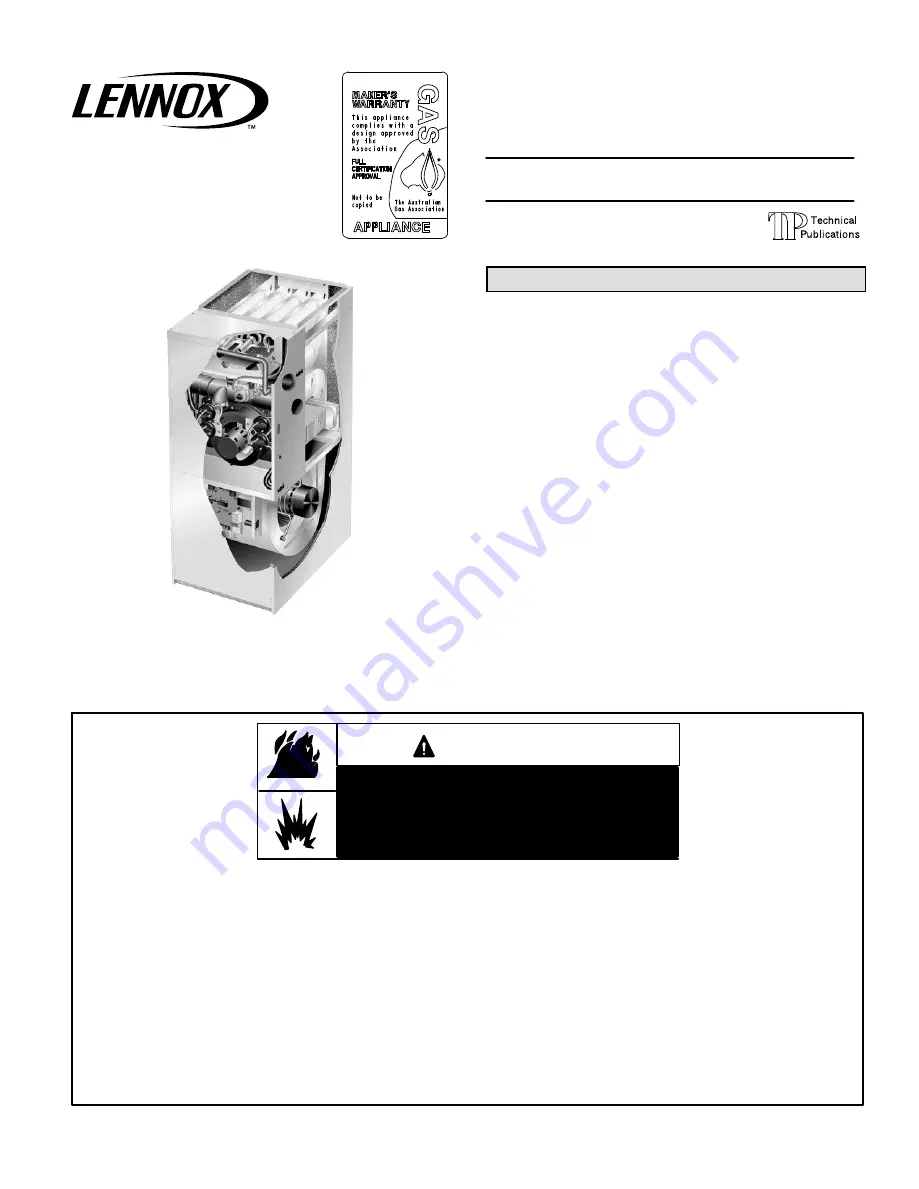
G61MPVT SERIES UNITS

GAS UNITS

505,187M
06/2009

Table of Contents

Unit Dimensions

2

. . . . . . . . . . . . . . . . . . . . . . . . . . . . . . . 

G61MPVT Parts Arrangement

3

. . . . . . . . . . . . . . . . . . . 

Shipping and Packing List

4

. . . . . . . . . . . . . . . . . . . . . . . 

Safety Information

4

. . . . . . . . . . . . . . . . . . . . . . . . . . . . . . 

Installation − Setting Equipment

5

. . . . . . . . . . . . . . . . . . 

Filters

9

. . . . . . . . . . . . . . . . . . . . . . . . . . . . . . . . . . . . . . . . . 

Duct System

9

. . . . . . . . . . . . . . . . . . . . . . . . . . . . . . . . . . . 

Pipe & Fittings Specifications

10

. . . . . . . . . . . . . . . . . . . 

Vent Piping Guidelines

11

. . . . . . . . . . . . . . . . . . . . . . . . . 

Joint Cementing Procedure

12

. . . . . . . . . . . . . . . . . . . . . 

Venting Practices

13

. . . . . . . . . . . . . . . . . . . . . . . . . . . . . . 

Gas Piping

21

. . . . . . . . . . . . . . . . . . . . . . . . . . . . . . . . . . . 

Electrical

23

. . . . . . . . . . . . . . . . . . . . . . . . . . . . . . . . . . . . . 

Integrated Control Board

27

. . . . . . . . . . . . . . . . . . . . . . . 

Unit Start−Up

34

. . . . . . . . . . . . . . . . . . . . . . . . . . . . . . . . . . 

Gas Pressure Adjustment

35

. . . . . . . . . . . . . . . . . . . . . . 

Manifold Pressure & High Altitude Information

35

. . . . 

Other Unit Adjustments

36

. . . . . . . . . . . . . . . . . . . . . . . . 

Heating Sequence of Operation

37

. . . . . . . . . . . . . . . . . 

Service

38

. . . . . . . . . . . . . . . . . . . . . . . . . . . . . . . . . . . . . . 

Requirements

40

. . . . . . . . . . . . . . . . . . . . . . . . . . . . . . . . . 

General

40

. . . . . . . . . . . . . . . . . . . . . . . . . . . . . . . . . . . . . . 

Combustion, Dilution & Ventilation Air

41

. . . . . . . . . . . . 

Ignition Control Board Diagnostic Codes

44

. . . . . . . . . 

Troubleshooting

45

. . . . . . . . . . . . . . . . . . . . . . . . . . . . . . . 

Repair Parts List

51

. . . . . . . . . . . . . . . . . . . . . . . . . . . . . . 

Vent Pipe Sizing Worksheet

51

. . . . . . . . . . . . . . . . . . . . 

Start−Up & Performance Check List

52

. . . . . . . . . . . . . . 

WHAT TO DO IF YOU SMELL GAS:

Do not store or use gasoline or other
flammable vapors and liquids in the
vicinity of this or any other ap-
pliance.

Installation and service must be
performed by a qualified installer,
service agency or the gas supplier.

D

Do not try to light any appliance.

D

Do not touch any electrical switch; do not
use any phone in your building.

D

Immediately call your gas supplier from a
neighbor’s phone. Follow the gas supplier’s
instructions.

D

If you cannot reach your gas supplier, call
the fire department.

FIRE OR EXPLOSION HAZARD.

Failure to follow safety warnings exact-
ly could result in serious injury, death,
or property damage.

WARNING

D

Leave the building immediately.

Litho U.S.A.

Summary of Contents for G61MPVT-36B-070

Page 1: ...rements 40 General 40 Combustion Dilution Ventilation Air 41 Ignition Control Board Diagnostic Codes 44 Troubleshooting 45 Repair Parts List 51 Vent Pipe Sizing Worksheet 51 Start Up Performance Check List 52 WHAT TO DO IF YOU SMELL GAS Do not store or use gasoline or other flammable vapors and liquids in the vicinity of this or any other ap pliance Installation and service must be performed by a ...

Page 2: ...Either Side 60C and 60D size units installed in upflow applications that require air volumes over 1800 cfm 850 L s must have one of the following 1 Single side return air with transition to accommodate 20 x 25 x 1 in 508 x 635 x 25 mm air filter Required to maintain proper air velocity 2 Single side return 3 Bottom return air 4 Return air from both sides 5 Bottom and one side return air Refer to E...

Page 3: ...R COIL DOOR INTERLOCK SWITCH COLD HEADER COLLECTOR BOX COMBUSTION AIR INDUCER BLOWER ACCESS PANEL BURNER ACCESS PANEL FLUE COLLAR COMBUSTION AIR PRESSURE PROVE SWITCHES PRIMARY LIMIT WARM HEADER COLLECTOR BOX GAS VALVE AND MANIFOLD SECONDARY LIMITS 2 BLOWER MOTOR CONTROL BOX Two Stage Variable Speed Integrated Control Board TRANSFORMER ...

Page 4: ...tion FIGURE 2 DIRECT VENT INSTALLATION NON DIRECT VENT INSTALLATION EXHAUST OUTLET COMBUSTION AIR INTAKE OUTSIDE OF HOUSE CONDENSATE DRAIN EXHAUST OUTLET G61MPVT COMBUSTION AIR INTAKE INSIDE OF HOUSE G61MPVT CONDENSATE DRAIN Shipping and Packing List Package 1 of 1 contains 1 Assembled G61MPVT unit 1 Bag assembly containing the following 3 Screws 3 Wire nuts 1 Snap bushing 1 Snap plug 1 Wire tie 1...

Page 5: ...e num A door must never be used as a portion of the return air duct system The base must provide a stable support and an airtight seal to the furnace Al low absolutely no sagging cracks gaps etc For no reason should return and supply air duct sys tems ever be connected to or from other heating de vices such as a fireplace or stove etc Fire explo sion carbon monoxide poisoning personal injury and o...

Page 6: ...lications with right hand air discharge Refer to figure 6 for clearances in horizontal applications Horizontal Application Installation Clearances Top Left End Right End Right Hand Discharge Left Hand Discharge Top Bottom Floor Bottom Floor Left End Right End Top 0 Front 0 Back 0 Ends 0 Vent 0 Floor 0 Front clearance in alcove installation must be 610 mm 24 inch es Maintain a minimum of 610mm 24 i...

Page 7: ...water draining from this outlet will be easily noticed by the homeowner 4 Set unit in drain pan if used as shown in figure 7 Unit must be level to ensure proper coil drainage Leave 140mm 5 1 2 inches for service clearance below unit for condensate trap 5 Continue with exhaust condensate and intake piping installation according to instructions Platform Installation of Horizontal Unit Installed Unde...

Page 8: ...ze 2 Flange warm air plenum and lower the plenum into the opening 3 Set the unit over the plenum and seal the plenum to the unit 4 Ensure that the seal is adequate TABLE 1 NON COMBUSTIBLE FLOOR OPENING SIZE Model No Front to Rear Side to Side in mm in mm B Cabinet 445mm 19 3 4 502 16 5 8 422 C Cabinet 533mm 19 3 4 502 20 1 8 511 D Cabinet 622mm 19 3 4 502 23 5 8 600 NOTE Floor opening dimensions l...

Page 9: ...t be in place when the unit is operating NOTE In upflow applications where side return air fil ter is installed on same side as the condensate trap fil ter rack must be installed beyond condensate trap to avoid interference TABLE 3 Furnace Cabinet Size Filter Size mm Side Return Bottom Return 445mm 406 X 635 X 25 1 406 X 635 X 25 1 533mm 406 X 635 X 25 1 508 X 635 X 25 1 622mm 406 X 635 X 25 2 610...

Page 10: ... when making joints Good ventilation should be maintained to reduce fire hazard and to minimize breathing of solvent vapors Avoid contact of cement with skin and eyes Table 4 lists the available exhaust termination kits as well as vent pipe equivalencies which must be used when sizing vent pipe All Lennox vent terminations are PVC or ABS TABLE 4 OUTDOOR TERMINATION KITS AND CORRESPONDING EQUIVALEN...

Page 11: ...oplets being released from the exhaust termination The mini mum exhaust vent length is 4 5m 15 feet Shorter exhaust vent lengths may result in the discharge of water droplets from the exhaust termination in spite of the 305mm 12 inch vertical offset Each 90 elbow including those provided with the furnace of any diameter is equivalent to 1 5m 5 feet of vent pipe of the same diameter Two 45 elbows a...

Page 12: ...to unit flue colla and 50mm to 80mm reducer sup plied must be installed on the 50mm ell NOTE All 90 elbows used in configuration of vent must be sweep el bows IMPORTANT The G61MPVT unit is not suitable for use at eleva tions over 610m Joint Cementing Procedure All cementing of joints should be done according to the relevant local authority WARNING DANGER OF EXPLOSION Fumes from PVC glue may ignite...

Page 13: ...positions Exhaust piping exits from the top of the unit in horizontal air discharge applications Glue the field provided exhaust vent pipe or provided street ell or reducing ell in upflow or downflow applica tions to the flue collar Refer to pipe and fittings speci fications and gluing procedures IMPORTANT Exhaust piping and condensate trap must be installed on the same side of the unit in upflow ...

Page 14: ...The G61MPVT 60D 135 can only be installed as a Direct Vent two pipe gas central furnace In non direct vent ap plications when intake air will be drawn into the furnace from the surrounding space the indoor air quality must be considered and guidelines listed in Combustion Dilution and Ventilation Air section must be followed The G61MPVT unit is designed for either left side or right side air intak...

Page 15: ...ion Shown 50mm 50mm 50mm TRANSITION TRANSITION 50mm 80mm Limit pipe length to 50mm in G61MPVT 110 and 135 applications G61MPVT 36B 070 G61MPVT 60C 090 G61MPVT 60C 110 G61MPVT 60D 135 G61MPVT 36B 070 G61MPVT 60C 090 G61MPVT 60C 110 G61MPVT 36B 070 G61MPVT 60C 090 50mm 50mm 50mm 80mm Follow the next three steps when installing the unit in Non Direct Vent applications where combustion air is taken fr...

Page 16: ...ownflow evaporator coil the intake air routing should be modi fied as shown in figure 20 2 Use a sheet metal screw to secure the intake pipe to the connector if desired A pilot indentation is provided in the slip connector to assist in locating and starting the fasten er 3 Glue the provided 50mm plug into the unused air intake connector on the opposite side of the cabinet Testing for Proper Ventin...

Page 17: ...plications combustion air is taken from indoors and the flue gases are discharged to the out doors The G61MPVT is then classified as a non direct vent gas furnace In Non Direct Vent applications the vent termination is limited by local building codes Position termination end according to location given in fig ure 21 In addition position termination end so it is free from any obstructions and above...

Page 18: ... through an outside wall or vertically through the roof In at tic or closet installations vertical termination through the roof is preferred Figures 22 through 25 show typical ter minations 1 Exhaust and intake exits must be in same pressure zone Do not exit one through the roof and one on the side Also do not exit the intake on one side and the exhaust on another side of the house or structure 2 ...

Page 19: ...ON INTAKE TERMINATION INTAKE 305mm Min above ground level DIRECT VENT CONCENTRIC WALL TERMINATION 71M80 69M29 or 60L46 FIELD PROVIDED REDUCER MAY BE REQUIRED TO ADAPT LARGER VENT PIPE SIZE TO TERMINATION Details of Exhaust Piping Terminations for Non Direct Vent Applications Exhaust pipes may be routed either horizontally through an outside wall or vertically through the roof In attic or closet in...

Page 20: ... flange to side of unit See figure 27 NOTE In upflow and downflow applications con densate trap must be installed on the same side as exhaust piping 3 Glue the field provided coupling or pipe to the trap Install a tee and vent pipe near the trap NOTE The condensate trap drain stubs both sides have an outer diameter which will accept a standard 19mm 3 4 PVC coupling The inner diameter of each stub ...

Page 21: ...n must be of the ground joint type IMPORTANT Compounds used on threaded joints of gas piping must be resistant to the actions of liquified petro leum gases FIGURE 28 MANUAL MAIN SHUT OFF VALVE WILL NOT HOLD NORMAL TEST PRESSURE CAP FURNACE ISOLATE GAS VALVE Leak Check After gas piping is completed carefully check all piping connections factory and field installed for gas leaks Use a leak detecting...

Page 22: ...1 151 4 28 138 3 91 125 3 54 118 3 34 110 3 11 103 2 92 1 25 4 1 049 26 645 680 19 25 465 13 17 375 10 62 320 9 06 285 8 07 260 7 36 240 6 80 220 6 23 205 5 80 195 5 52 1 1 4 31 75 1 380 35 052 1400 39 64 950 26 90 770 21 80 660 18 69 580 16 42 530 15 01 490 13 87 460 13 03 430 12 18 400 11 33 1 1 2 38 1 1 610 40 894 2100 59 46 460 41 34 1180 33 41 990 28 03 900 25 48 810 22 94 750 21 24 690 19 54...

Page 23: ...trically ground the unit according to local codes NOTE The G61MPVT furnace contains electronic components that are polarity sensitive Make sure that the furnace is wired correctly and is properly grounded 6 One line voltage EAC spade terminal is provided on the furnace control board Any electronic air cleaner rated up to one amp can be connected to this terminal with the neutral leg of the circuit...

Page 24: ...Page 24 TYPICAL G61MPVT FIELD WIRING DIAGRAM FIGURE 31 FIELD INSTALLED CLASS II 24V FIELD INSTALLED LINE VOLTAGE USE COPPER CONDUCTORS ONLY ...

Page 25: ...mps 1Heat 1 Cool NOTE Use heat staging jumper to set second stage heat ON delay No delay None 10 minutes or 15 minutes 15 Minutes Intact Intact Intact S1 T STAT CONTROL TERM STRIP OUTDOOR UNIT 2 Heat 1 Cool NOTE Use heat staging jumper to set second stage heat ON delay No delay None 10 minutes or 15 minutes 10 Minutes Intact Intact Intact S1 T STAT CONTROL TERM STRIP OUTDOOR UNIT ...

Page 26: ...Page 26 TYPICAL G61MPVT WIRING DIAGRAM FIGURE 32 ...

Page 27: ...single stage thermostat is to be used the jumper must be repositioned When the G61MPVT unit is used with single stage ther mostat The heat staging jumper is used to determine the second stage on delay The jumper may be positioned to provide either a 10 minute or a 15 minute delay before sec ond stage heat is initiated Blower Off Delay Jumper The heating mode blower on delay of 45 seconds is not ad...

Page 28: ...pprox Off On Switches 3 and 4 Cooling Mode Blower Speed Switches 3 and 4 are used to select cooling blower motor speed The unit is shipped from the factory with the DIP switches positioned for high speed 4 indoor blower motor operation during the cooling mode The table below pro vides the cooling mode blower speeds that will result from different switch settings Refer to tables 14 through NO TAG f...

Page 29: ...Switch Positions Second Stage HEAT Speed Second Stage COOL Speed 1 2 3 4 1 2 3 4 cfm L s cfm L s cfm L s cfm L s cfm L s cfm L s cfm L s cfm L s 895 420 1025 485 1290 610 1340 630 1015 480 1190 560 1280 605 1395 660 NORM 820 385 940 445 1155 545 1210 570 930 440 1065 505 1155 545 1270 600 N A N A 840 395 1020 480 1055 495 830 390 950 450 1010 475 1105 520 ADJUST Switch Positions First Stage HEAT S...

Page 30: ...n minimum 500 cfm 235 L s TABLE 16 G61MPVT 60C 090 BLOWER MOTOR PERFORMANCE LESS FILTER 0 0 to 0 8 w g 0 through 200 Pa External Static Pressure Range Factory Settings Heating Speed 2 Cooling Speed 4 Speed Adjust NORM Return Air Options Single side return air Bold volumes require field fabricated transition to accommodate 20 x 25 x 1 in 508 x 635 x 25 mm cleanable air filter in order to maintain p...

Page 31: ...tinuous Fan Only speed is approximately 38 of the same second stage COOL speed position minimum 500 cfm 235 L s TABLE 18 G61MPVT 60C 110 BLOWER MOTOR PERFORMANCE LESS FILTER 0 0 to 0 8 w g 0 through 200 Pa External Static Pressure Range Factory Settings Heating Speed 2 Cooling Speed 4 Speed Adjust NORM Return Air Options Bottom both sides or bottom and one side ADJUST Switch Positions Speed Switch...

Page 32: ...ition Continuous Fan Only speed is approximately 38 of the same second stage COOL speed position minimum 500 cfm 235 L s TABLE 20 G61MPVT 60C 110 BLOWER MOTOR PERFORMANCE LESS FILTER 0 0 to 0 8 w g 0 through 200 Pa External Static Pressure Range Factory Settings Heating Speed 2 Cooling Speed 4 Speed Adjust NORM Return Air Options Single side return air with optional RAB return base 20 x 25 x 1 in ...

Page 33: ...305 615 1400 660 1600 755 1780 840 ADJUST Switch Positions First Stage HEAT Speed First Stage COOL Speed 1 2 3 4 1 2 3 4 cfm L s cfm L s cfm L s cfm L s cfm L s cfm L s cfm L s cfm L s 1385 655 1570 740 1760 830 1930 910 1135 535 1205 570 1365 645 1540 725 NORM 1250 590 1425 670 1595 755 1775 835 1025 485 1105 520 1235 580 1390 655 1135 535 1265 595 1430 675 1585 750 915 430 985 465 1115 525 1235 ...

Page 34: ...area for gas Be sure to smell next to the floor be cause some gas is heavier than air and will settle on the floor The gas valve on the G61MPVT is equipped with a gas control knob Use only your hand to turn the gas control knob Never use tools If the knob will not push in or turn by hand do not try to repair it Call a qualified service technician Force or attempted repair may result in a fire or e...

Page 35: ...urement Adjustment NOTE Pressure test adapter kit 10L34 is available from Lennox to facilitate manifold pressure measurement 1 Connect test gauge to outlet tap on gas valve 2 Disconnect pressure sensing hose from barbed fitting on gas valve Use an obstruction to plug the hose 3 Start unit on low heat and allow 5 minutes for unit to reach steady state 4 While waiting for the unit to stabilize notic...

Page 36: ...overheating due to indoor blower motor failure If tripped check for proper blower operation before resetting Temperature Rise After the furnace has been started and supply and return air temperatures have been allowed to stabilize check the temperature rise If necessary adjust the blower speed to maintain the temperature rise within the range shown on the unit nameplate Increase the blower speed t...

Page 37: ...s operation The indoor blower motor is switched to the low fire heating speed 8 When the thermostat demand for low fire first stage heat is satisfied the gas valve is de energized and the field selected indoor blower off delay begins The combustion air inducer begins a 5 second post purge period 9 When the combustion air post purge period is com plete the inducer and humidifier terminal are de ene...

Page 38: ...m the ignitor 6 Disconnect wires from flame roll out switches 7 Remove burner box cover and remove four burner box screws at the vestibule panel and remove burner box Set burner box assembly aside NOTE G61MPVT 135 units are secured to the vesti bule panel by two additional screws These screws must be removed for servicing however it is not nec essary to replace the screws NOTE If necessary clean b...

Page 39: ...manifold assembly Reconnect gas supply line to gas valve 40 Reinstall burner box cover 41 Reconnect wires to gas valve 42 Replace the blower compartment access panel 43 Refer to instruction on verifying gas and electrical con nections when re establishing supplies 44 Follow lighting instructions to light and operate fur nace for 5 minutes to ensure that heat exchanger is clean and dry and that fur...

Page 40: ...ections using a commercially available soap solution made specifically for leak detection Lennox does not recommend the use of G61MPVT units as a construction heater during any phase of construction Very low return air temperatures harmful vapors and op eration of the unit with clogged or misplaced filters will dam age the unit G61MPVT units may be used for heating of buildings or structures under...

Page 41: ...side for combustion Take into account that exhaust fans ap pliance vents chimneys and fireplaces force additional air that could be used for combustion out of the house Unless outside air is brought into the house for combus tion negative pressure outside pressure is greater than inside pressure will build to the point that a downdraft can occur in the furnace vent pipe or chimney As a result comb...

Page 42: ...nside the building or from outside Air from Inside If the confined space that houses the furnace adjoins a space categorized as unconfined air can be brought in by providing two permanent openings between the two spaces Each opening must have a minimum free area of 645 mm2 per 29 kW 1 square inch per 1 000Btu per hour of total input rating of all gas fired equipment in the con fined space Each ope...

Page 43: ...ON LOUVERS For unheated crawl space G61MPV T ROOF TERMINATED EXHAUST PIPE VENTILATION LOUVERS Each end of attic SIDE WALL TERMINATED EXHAUST PIPE ALTERNATE LOCATION FIGURE 37 EQUIPMENT IN CONFINED SPACE ALL AIR FROM OUTSIDE All Air Through Ventilated Attic OUTLET AIR VENTILATION LOUVERS Each end of attic INLET AIR Ends 12 above bottom G61MPVT ROOF TERMINATED EXHAUST PIPE SIDE WALL TERMINATED EXHAU...

Page 44: ... switch failed closed 2 7 Low pressure switch opened during ignition trial or heating demand LIMIT CODE 3 1 Limit switch open WATCHGUARD CODES 4 1 Watchguard Exceeded maximum number of retries 4 2 Watchguard Exceeded maximum number of retries or last retry was due to pressure switch opening 4 3 Watchguard Exceeded maximum number of retries or last retry was due to flame failure 4 5 Watchguard Limi...

Page 45: ...F COMBUSTION AIR INDUCER ON INDOOR BLOWER ON STATUS ERROR CODE 5 1 SEQUENCE HOLDS UNTIL ROLLOUT SWITCH IS RESET AND MAIN POWER IS INTERRUPTED OR T STAT IS CYCLED OFF ON FOR 3 SEC MINIMUM NO YES FIRST LOW STAGE PRESSURE SWITCH CONTACTS OPEN NO GAS VALVE OFF COMBUSTION AIR INDUCER OFF INDOOR BLOWER OFF CONTROL REMAINS UNTIL PRESSURE SWITCH IS DETECTED OPEN STATUS ERROR CODE 2 4 YES GAS VALVE OFF COM...

Page 46: ...ECONNECTED STATUS ERROR CODE 4 7 YES AT END OF IGNITOR 20 SECOND WARM UP PERIOD 4 SECOND TRIAL FOR IGNITION GAS VALVE OPENS IGNITOR ENERGIZED DURING 4 SECOND TRIAL UNTIL FLAME SENSED YES 4 SECOND FLAME STABILIZATION PERIOD FLAME RECTIFICATION CURRENT CHECK CAN FLAME BE PROVEN WITHIN 4 SECONDS AFTER GAS VALVE OPENS u0 20 microamps GAS VALVE OFF COMBUSTION AIR INDUCER ON INDOOR BLOWER OFF STATUS LED...

Page 47: ...INUTES NO YES FIRST STAGE HEAT DEMAND SATISFIED GAS VALVE OFF COMBUSTION AIR INDUCER OFF FOLLOWING POST PURGE INDOOR BLOWER OFF WITH DELAY STATUS LED PULSE YES SECOND STAGE HEAT DEMAND SECOND STAGE HEAT DEMAND REQUIRED NO SECOND STAGE PRESSURE SWITCH CLOSED ABNORMAL FLASH CODE NOTE IF SECOND STAGE PRESSURE SWITCH WAS ORIGINALLY FOUND CLOSED ABNORMAL CODE WILL FLASH SECOND STAGE PRESSURE SWITCH CLO...

Page 48: ...Heat staging jumper on 10 or 15 minutes YES YES FIRST AND SECOND STAGE HEAT DEMAND SATISFIED SIMULTANEOUSLY STATUS LED HEARTBEAT YES GAS VALVE OFF COMBUSTION AIR INDUCER OFF AFTER 5 SECOND LOW SPEED POST PURGE PERIOD INDOOR BLOWER OFF DELAY INITIATED ON LOW HEAT SPEED STATUS LED HEARTBEAT DEMAND FOR HEAT SATISFIED POWER ON STAND BY STATUS LED PULSE YES SECOND STAGE HEAT DEMAND SASTISFIED STATUS LE...

Page 49: ...THERE PROPER GROUND YES NO INDOOR BLOWER ENERGIZED ON FIRST STAGE COOL SPEED AFTER 2 SECOND DELAY FIRST STAGE DEMAND FOR COOL SATISFIED NO THERMOSTAT CALLS FOR SECOND STAGE COOL COMPRESSOR AND CONDENSER FAN DE ENERGIZED INDOOR BLOWER DE ENERGIZED AFTER 45 SECOND DELAY YES INDOOR BLOWER RAMPS UP TO SECOND STAGE COOL SPEED SECOND STAGE DEMAND FOR COOL SATISFIED YES UNIT RETURNS TO FIRST STAGE COOL S...

Page 50: ...R SWITCHES TO LOW HEAT SPEED FIRST STAGE HEAT DEMAND SATISFIED YES NO THERMOSTAT CALLS FOR SECOND STAGE HEAT YES INDOOR BLOWER SWITCHES TO HIGH HEAT SPEED AFTER 30 SECONDS SECOND STAGE HEAT DEMAND SATISFIED YES YES INDOOR BLOWER RAMPS DOWN TO LOW HEAT SPEED INDOOR BLOWER RAMPS TO FIRST STAGE COOLING SPEED AFTER A 2 SECOND DELAY FIRST STAGE COOL DEMAND SATISFIED YES NO SECOND STAGE COOL DEMAND SATI...

Page 51: ...___________ Vent pipe equivalency value from table 6 ______ Total number of 90 elbows required indoors and outdoors ______ X 1 5 ______ equivalent meters of pipe Total number of 45 elbows required indoors and outdoors ______ X 76 ______ equivalent meters of pipe Linear feet of straight pipe required ______ Add equivalent meters of vent pipe listed in steps 2 through 5 Step 1 Step 2 Step 3 Step 4 S...

Page 52: ...No Date State Technician Flue Connections Tight Heating Section Thermostat Calibrated Heat Anticipator Properly Set Level Fuel Type Natural Gas Blower Motor Amps Blower Motor H P Gas Piping Connections Tight Leak Tested Proper Draft Vent Clear State Temperature Rise Fan Control Off Setting Fan Control Setting 45 Seconds Fixed On Regulator Pressure w c Nat LP Propane Gas Combustion Gas Tested CO2 C...

Reviews: