manualshive.com logo in svg
background image

Wireless Bird Box Camera Kit

Quick Start Guide

Please read me before you start!

Содержание NC701G

Страница 1: ...Wireless Bird Box Camera Kit Quick Start Guide Please read me before you start ...

Страница 2: ...2 ...

Страница 3: ...e a read through this booklet before you get started Not only are there some helpful hints and tips but we also have some guidelines to help you plan the installation of your camera With just a bit of time a cup of tea and a friend you ll be up and running in no time We hope you enjoy your camera Contents 1 Camera setup 2 Connect to yourTV 3 Physical installation 4 Accessories 5 Troubleshooting Vi...

Страница 4: ...ply Info Circle Note that the camera does not emit a visible glow even when the night vision is active Power up the receiver and check the channel number indicated by the red light matches the number on the Wireless Channel Stick on the rear of the camera Antenna Lens Power in IR LEDs Bracket Insert the yellow AV cable plug into VIDEO1 and the white one into AUDIO1 This will take the output of the...

Страница 5: ...5 1 Wireless Channel Sticker 1 2 3 4 Television Recorde 1 2 3 4 Channel Selector Switch To TV Recorder ...

Страница 6: ... TV RCA AV From Receiver USB Power In A Direct Connection If your TV has RCA phono connections you can connect the AV cable directly to your TV Simply plug in the yellow and white plug into corresponding ports on your TV Select the correct source on your TV This is often called AV1 or similar Consult your TV user manual ...

Страница 7: ...V cable plugs into the input side of the converter power it up via the USB socket and use an HDMI cable to connect to your TV monitor Select the correct source on your TV that corresponds to the HDMI input Direct connection to TV RCA AV RCA to HDMI Converter Sold Separately From Receiver From Receiver HDMI Cable to TV Sold Separately USB Power In Need a converter search Search on our website for R...

Страница 8: ...and receiver before you install the camera into the bird box Take the camera to the location where you want to place it and power it up Make sure that you are receiving a good signal to the receiver by monitoring the image on your TV See page 14 for troubleshooting Focussing your camera lens Place a small bird sized object in your bird box You can gently twist the camera s lens to adjust the focal...

Страница 9: ...ti slip bracket design will hold the camera in place against the wood There is a gap in the eaves of the box through which to pass your cables B If you do not have one of our bird boxes Following the diagram right drill a 6mm hole at or above 210mm from the base of your box Then follow the A instructions above M Check the angle of the camera by looking at the image on the TV and make any adjustmen...

Страница 10: ...nlight and strong winds Tilting the box slightly forward will also help to prevent rain from coming straight into the nesting area For blackbirds robins and wrens you should place your bird box 1 5 to 2 metres high well surrounded by planting For sparrows starlings tits and spotted flycatchers you should place your bird box 2 to 4 metres high and slightly covered with a clear entrance For woodpeck...

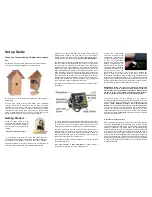
Страница 11: ...11 11 2 metres Robins Wrens 3 metres Sparrows Tits Starlings 5 metres Woodpeckers Owls ...

Страница 12: ...ne of our USB Capture Devices to view and record your camera on your computer you can connect the RCA plugs into the yellow and white connectors on the device itself Then you need to install the Driver and Software on your Windows Apple computer The installation will prompt you to connect your USB device when it is ready 4 Accessories Now it s time to install your accessories sold separately ...

Страница 13: ...D lamps to help with this Our daylight lamps automatically switch off at night to ensure the birds are not disturbed and get a good night s sleep They provide extra light during the day to boost your camera image s vibrancy and exposure When using this camera kit you need to run a separate power supply for the lamp Need a Daylight LED Lamp search Search on our website for BBLED3GB Lamp Light senso...

Страница 14: ...rough to your camera from your receiver How many windows walls floors and or large objects is your signal going through Please be mindful that thick materials and windows can signifcantly reduce signal strength Can this be improved by moving your receiver or camera s location Broadcast tower Are you receiving interference on your picture such as black horizontal lines or a herringbone pattern This...

Страница 15: ... bung on the back of your camera as shown to the right Inside are two white switches which change the camera s channel Flick the switches to the arrangements on the right to set the camera to use channel 1 2 3 or 4 Remember to switch the receiver to the corresponding channel You should see the change immediately on your TV 1 2 3 4 2 3 3 Changing theWireless Channel of your Camera ...

Страница 16: ...assistance setting up your bird box camera or you need further support then please head to our Help website where you ll be able to find all our support guides and videos Find more help online Go to Mouse Pointer green feathers co uk help and search NC701G ...

Страница 17: ... to the appropriate standards to achieve CE To find out more information on the conformity of this product please visit our website and search for your product code or use the link below https bit ly NC701DoC Signed Chris Barrell Operations Director Importer s address Open 24 Seven Ltd Unit 3 Netham View Road Netham Road Bristol BS5 9PQ Signed ...

Страница 18: ...e enjoyable and most of all cheap Types of Container Yoghurt pots Coconut shells Small plant pots String Lollipop sticks or twigs Ingredients Lard or suet Bird seed Porridge oats Peanuts suitable for birds Raisins Kitchen scraps Equipment Mixing bowl Saucepan Mixing spoon Cling film Bowl of cold water Rubber gloves optional ...

Страница 19: ...p too small such that it won t fit over the branch hook etc 4 Press the soft mixture into the yoghurt pot chosen container and around the string making it as compact as possible so that the string doesn t escape 5 Once filled to the top of the yoghurt pot leave the mixture to cool Storing in a cold shed or garage would be ideal you could just as easily store them in the fridge 6 After the mixture ...

Страница 20: ...For more help visit green feathers co uk help Ver 2008NC7 ...

Отзывы: