


Digital Energy
Multilin
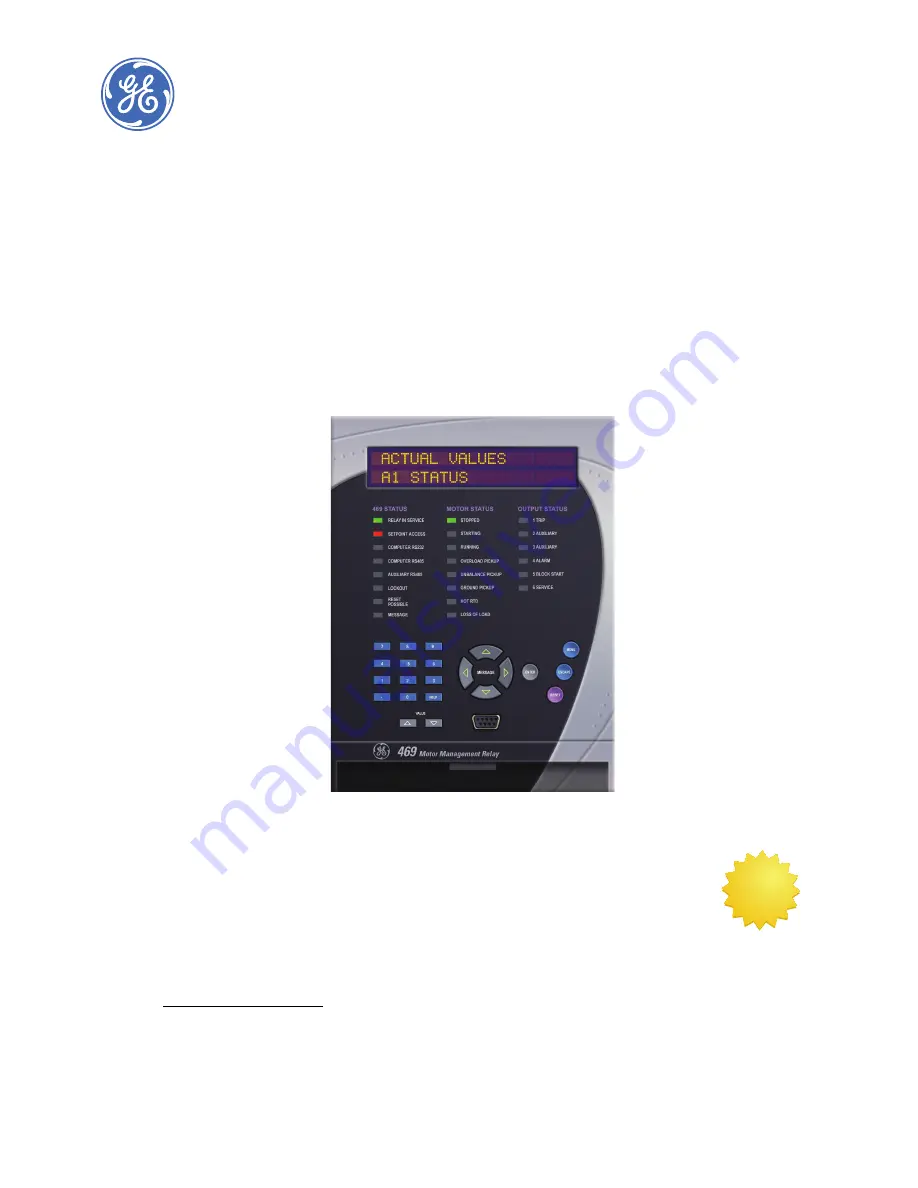
469 Motor Management
Relay
QUICK REFERENCE GUIDE
Software Revision: 5.0x
Manual P/N: 1601-0153-A5
Manual Order Code: GEK-106493D
Copyright © 2009 GE Multilin
GE Multilin
215 Anderson Avenue, Markham, Ontario
Canada L6E 1B3
Tel: (905) 294-6222 Fax: (905) 201-2098
Internet: http://www.GEmultilin.com
IISO9001:2000
GE
M
U LT
I LI
N
RE
GISTERED
GE Multilin's Quality
Management System is
registered to
ISO9001:2000
QMI # 005094
UL # A3775
*1601-0153-A5*


