CalDigit Tuff, User Manual
The CalDigit Tuff is a robust, portable external drive designed for ultimate durability. Ideal for users needing dependable storage on-the-go, it withstands tough conditions. For detailed usage, download the free user manual from manualshive.com. Ensure optimal performance of your CalDigit Tuff by accessing the manual today.
Share
Download


Reviews:
No comments
Related manuals for Tuff
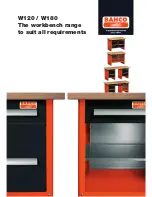
W120
Brand: Bahco Pages: 4

Garage Gator GGR125
Brand: V-Bro Products Pages: 17

ST8000VX0002
Brand: Seagate Pages: 28

totalstorage 200
Brand: IBM Pages: 180

DR550
Brand: IBM Pages: 258

USOTL4
Brand: B&B Electronics Pages: 2

CSMD2-B440
Brand: Convex Pages: 19

H-Post Shelving
Brand: Hallowell Pages: 7

EXOS ENTERPRISE ST10000NM001G
Brand: Seagate Pages: 56

S-HD-100
Brand: Olympus Pages: 4

GLWB173
Brand: Newpo Pages: 5

Laeta Twin
Brand: Hama Pages: 5

Werkbank
Brand: myToys Pages: 4

65088
Brand: Craftsman Pages: 56

ST8000NE0001
Brand: Seagate Pages: 32

Store 'n' Go Pro
Brand: Verbatim Pages: 16

Store'n'Go Professional
Brand: Verbatim Pages: 88

8013ADELUXE
Brand: Sunex Pages: 4


