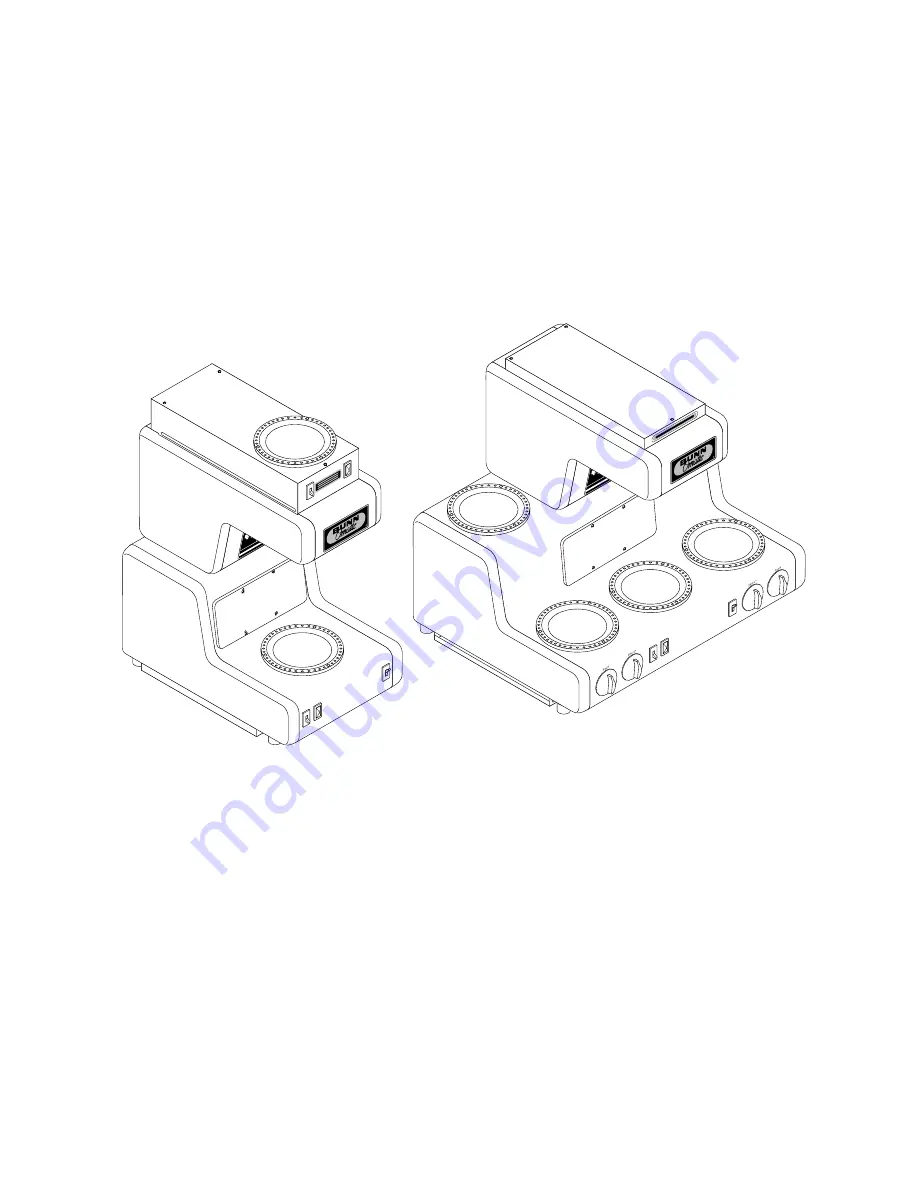
background image

OT & RT

10021.0000G    7/00   ©   1989   BUNN-O-MATIC CORPORATION

BUNN-O-MATIC CORPORATION

POST OFFICE BOX 3227

SPRINGFIELD, ILLINOIS 62708-3227

PHONE: (217) 529-6601   FAX: (217) 529-6644

BUNN

®

OPERATING & SERVICE MANUAL

WA

RN

IN

G

!

HIGH HEA

T W

ARMER

DO

 N

OT

 B

OIL

 D

EC

AN

TE

R D

RY

KE

EP

 C

OM

BU

ST

IB

LE

S A

WA

Y

FA

ILURE 

TO

 COMPL

Y RISKS

GLASS F

AILURE/HO

T LIQ

UID

BU

RNS AND FIRE H

AZARD

CAUTION

DIS

CA

RD

 DE

CA

NT

ER

IF:

. C

RA

CK

ED

. S

CR

AT

CH

ED

. B

OIL

ED

 DR

. H

EA

TE

D W

HE

N E

MP

TY

. U

SE

D O

N H

IGH

 FL

AM

E

. O

R E

XP

OS

ED

 EL

EC

TR

IC

  E

LE

ME

NT

S

FA

ILU

RE

 TO

 CO

MP

LY

 RI

SK

S I

NJ

UR

Y

PN

: 6

58

19

85

 BU

NN-O

-M

AT

IC C

OR

PO

RA

TIO

N

FU

NN

EL

 CO

NT

EN

TS


AR

E H

OT

!

CAUTION

DIS

CA

RD

 DE

CA

NT

ER

IF:

. C

RA

CK

ED

. S

CR

AT

CH

ED

. B

OIL

ED

 DR

. H

EA

TE

D W

HE

N E

MP

TY

. U

SE

D O

N H

IGH

 FL

AM

E

. O

R E

XP

OS

ED

 EL

EC

TR

IC

  E

LE

ME

NT

S

FA

ILU

RE

 TO

 CO

MP

LY

 RI

SK

S I

NJ

UR

Y

PN

: 6

58

19

85

 BU

NN

-O

-M

AT

IC C

OR

PO

RA

TIO

N

FU

NN

EL

 CO

NT

EN

TS


AR

E H

OT

!

Summary of Contents for OT

Page 1: ... AN D FIR E HA ZA RD CAUTION DISC AR D DE CA NT ER IF CR AC KE D SC RA TC HE D BO ILE D DR Y HE AT ED WH EN EM PT Y US ED ON HIG H FL AM E OR EX PO SE D EL EC TR IC EL EM EN TS FA ILU RE TO CO MP LY RISK S INJU RY PN 658 198 5 BUN N O MA TIC COR POR ATI ON FU NN EL CO NT EN TS AR E HO T CAUTION DISC AR D DE CA NT ER IF CR AC KE D SC RA TC HE D BO ILE D DR Y HE AT ED WH EN EM PT Y US ED ON HIG H FL...

Page 2: ...asualty THE FOREGOING WARRANTY IS EXCLUSIVE AND IS IN LIEU OF ANY OTHER WARRANTY WRITTEN OR ORAL EXPRESS OR IMPLIED INCLUDING BUT NOT LIMITED TO ANY IMPLIED WARRANTY OF EITHER MERCHANTABILITY OR FITNESS FOR A PARTICULAR PURPOSE The agents dealers or employees of Bunn are not authorized to make modifications to this warranty or to make additional warranties that are binding on Bunn Accordingly stat...

Page 3: ...LY RISKS GLASS FAILURE HOT LIQUID BURNS AND FIRE HAZARD 00831 0000 00658 0000 USER NOTICES Carefully read and follow all notices on the equipment and in this manual They were written for your protection All notices on the equipment should be kept in good condition Replace any unreadable or damaged labels 10021 101598 ...

Page 4: ... Up PLUMBING REQUIREMENTS This brewer must be connected to a cold water system with operating pressure between 20 and 90 psi from a 1 2 or larger supply line A shut off valve should be installed in the line before the brewer In stall a regulator in the line when pressure is greater than 90 psi to reduce it to 50 psi The water inlet fitting is 1 4 flare NOTE Bunn O Matic recommends 1 4 copper tub i...

Page 5: ...f brew station warmer switch must be in the upper position to initiate and complete a brew cycle 6 Place the On Off brew station warmer switch in the lower position 7 Disconnect the brewer from the power source 8 Remove the front panel 9 Rotate the control thermostat knob fully clock wise to the ON position and replace the front panel 10 Connect the brewer to the power source and wait approximatel...

Page 6: ...witch is pressed two seconds are added to the brew time period Allow the brew cycle to finish in order to verify that the desired volume has been achieved To decrease a batch size Press and release the START or BREW switch once for every two second interval to be removed from the total brew time period then immediately press and hold down the START or BREW switch until three clicks are heard Relea...

Page 7: ...lter CLEANING 1 The use of a damp cloth rinsed in any mild non abrasive liquid detergent is recommended for cleaning all surfaces on Bunn O Matic equipment 2 Check and clean the sprayhead The sprayhead holes must always remain open 3 With the sprayhead removed insert the deliming spring provided all the way into the sprayhead tube When inserted properly no more than two inches of spring should be ...

Page 8: ...s have 120 volt ac voltage on their terminals Shorting of terminals or the application of external voltages may result in equipment failure Intermittent operation of electronic equipment is unlikely Component failure will normally be permanent If an intermittent condition is encountered the cause will likely be a switch contact or a loose connection at a terminal or crimp Solenoid removal requires...

Page 9: ...tch for testing pro cedures See page 19 Refer to Service Start Switch for testing procedures See page 25 Refer to Service Brew Timer for testing procedures See page 13 or 14 Refer to Service Solenoid Valve for testing procedures See page 24 Refer to Service Solenoid Valve for testing procedures See page 24 Refer to Service Brew Timer for testing procedures See page 13 or 14 Refer to Service Limit ...

Page 10: ...nk assembly for exces sive lime deposits Delime as re quired A Direction of flow arrow must be pointing away from the solenoid B Remove the control and check for obstructions Clear or replace Check the operating water pressure to the brewer It must be between 20 and 90 psi 138 and 620 kPa Water should flow freely from the sprayhead for approximately twenty seconds after the brew solenoid has shut ...

Page 11: ...should be centered in the funnel and the bed of coffee leveled by gentle shaking Place a funnel over an empty de canter on the warmer beneath the sprayhead Place the On Off brew station warmer switch in the upper position press the start switch and check the water temperature imme diately below the sprayhead with an accurate thermometer The reading should not be less than 195 F Ad just the control...

Page 12: ...should be disconnected from the power source when servicing except when electrical tests are required and the test procedure specifically states to connect the brewer to the power source Contents Brew Timer Early Models 13 Digital Timer Late Models 14 Control Thermostat 16 Warmer s OT Brew Station Upper 17 RT Left Rear Left Front Brew Station Right Front 17 RT Right Rear Three Heat 18 Warmer Switc...

Page 13: ... 5 Disconnect the brewer from the power source If voltage is present as described reconnect the po larized three pin connectors and proceed to 6 If voltage is not present as described refer to the Wir ing Diagrams and check the brewer wiring harness 6 Disconnect the in line connectors on the black and white wires from the timer to the solenoid 7 Check the voltage across the black and white wires w...

Page 14: ...ressed Connect the brewer to the power source The indication must be a 120 volts ac for two wire 120 volt models b 200 or 240 volts ac for two wire 200 or 240 volt models and three wire 120 240 volt models c 100 volts ac for two wire 100 volt models If continuity is present as described reconnect the wires and proceed to 7 If continuity is not present as described refer to the Wiring Diagrams and ...

Page 15: ...ee clicks are heard Release the switch Failure to release the switch within two seconds after the third click causes the volume setting to be aborted and pre vious volume setting will remain in memory Allow the brew cycle to finish in order to verify that the de sired volume has been achieved 2 Setting brew volumes To set a brew volume first check that the SET LOCK switch is in the SET position on...

Page 16: ...cribed in step 2 Voltage must not be indicated across these ter minals when the thermostat is turned OFF fully counterclockwise 5 Disconnect the brewer from the power source If voltage is present as described the control thermo stat is operating properly If voltage is not present as described replace the con trol thermostat Removal and Replacement 1 Remove both wires from the control thermostat te...

Page 17: ... as described the warmer is operating properly If continuity is not present as described replace the warmer Removal and Replacement 1 Remove the 4 40 slotted head screws holding the warmer to the brewer 2 Lift the warmer assembly from the brewer 3 Disconnect both wires from the warmer 4 Refer to FIG 10 when reconnecting the wires 5 Place the new warmer into the brewer and se curely attach it using...

Page 18: ...he 4 40 screws Location The three heat warmer is above and to the right of the brew station as viewed from the front FIG 11 Test Procedure 1 Once the switch has been tested and switch fail ure has been eliminated proceed as follows 2 Disconnect the brewer from the power source and remove the 4 40 screws attaching the warmer being tested 3 Lift the warmer assembly from the brewer and invert the war...

Page 19: ...o the nearby indicator lamp 2 Check the voltage across this terminal and the terminal on the indicator lamp with white or red wires with a voltmeter Connect the brewer to the power source The indication must be a 120 volts ac for two wire 120 volt models b 200 or 240 volts ac for two wire 200 volt or 240 volt models and three wire 120 240 volt models c 100 volts ac for two wire 100 volt models 3 D...

Page 20: ...o the power source The indica tion must be as described in step 1 Voltage must not be present across these terminals in the OFF positions 4 Disconnect the brewer from the power source If voltage is present as described the switch is oper ating properly If voltage is not present as described replace the switch Removal and Replacement 1 Remove the knob from the switch 2 Loosen the 5 8 nut on the swi...

Page 21: ...ous ing and reinstall the knob NOTE Switch must be installed right side up Location This switch is the farthest on the right of the base as viewed from the front FIG 18 Its knob is marked Off Low Med High Test Procedure 1 Check the voltage across terminals L1 and N with a voltmeter Connect the brewer to the power source The indication must be a 120 volts ac for two wire 120 volt models b 200 or 24...

Page 22: ...r lamp ter minals Connect the brewer to the power source The indication must be a 120 volts ac for two wire 120 volt models b 200 or 240 volts ac for two wire 200 volt or 240 volt models and three wire 120 240 volt models MODEL OT Upper BLK to Warmer Switch WHI or RED to Warmer to Harness P2 OT Lower BLK to Start Switch to On Off Brew Station Warmer Switch WHI or RED to Timer P2 to Brew Station Wa...

Page 23: ...t thermostat is located on the tank lid between the tank heater terminals FIG 23 Test Procedure 1 Disconnect the brewer from the power source 2 Check voltage across the black wire from the limit thermostat and the white or red wire on the tank heater terminal Connect the brewer to the power source The indication must be a 120 volts ac for two wire 120 volt models b 200 or 240 volts ac for two wire...

Page 24: ...sole noid valve to the bracket 7 Lift out the solenoid valve 8 Securely install the new solenoid valve to the bracket Check the direction of flow arrow on the valve It must be pointing toward the flow control 9 Securely fasten the water lines to and from the solenoid valve 10 Refer to FIG 26 when reconnecting the wires Location The solenoid valve is located below and to the left of the tank as vie...

Page 25: ...ss the clips inside the housing and gen tly push the switch through the opening 3 Push the new switch into the opening and spread the clips to hold the switch captive in the hous ing 4 Refer to FIG 29 when reconnecting the wires CA UT ION DIS CAR D DEC ANT ER IF CRA CKE D SCR ATC HED BOIL ED DRY HEA TED WHE N EMP TY USE D ON HIGH FLA ME OR EXP OSE D ELE CTR IC ELE MEN TS FAI LUR E TO COM PLY RIS K...

Page 26: ... and sprayhead 15 Reinstall the thermostat into the tank lid 16 Refer to FIG 31 when reconnecting the wires Location The tank heater is located on the tank lid FIG 30 Test Procedure 1 Check the voltage across the black and white or red wires on the tank heater with a voltmeter when the control thermostat is turned ON fully clock wise Connect the brewer to the power source The indication must be a ...

Page 27: ... thermal cut off terminals using an ohmmeter Ifcontinuityispresent thethermalcut offisoperating properly If continuity is not present as described replace the thermal cut off Removal and Replacement 1 Disconnect the thermal cut off from the tank heater terminal and the wiring harness 2 Remove thermal cut off and discard 3 Connect new thermal cut off to the tank heater terminal and the wiring harne...

Page 28: ...POLARIZED THREE PIN CONNECTOR 10278 0000E 7 00 1988 BUNN O MATIC CORPORATION 120 VOLTS AC 2 WIRE 120 240 VOLTS AC 3 WIRE SINGLE PHASE 60 HZ BLK UPPER WARMER BLK BLK WHI P3 WHI P2 WHI KEEP WARM HEATER BLK BLU LIMIT THERMOSTAT SW THERMOSTAT N L1 BLK GREEN L2 RED OT35 WHI OT15 20 TANK HEATER WHI WHI BLK FAUCET OPTION ONLY THERMAL CUT OFF SOL T5 T1 T2 T4 T3 10021 071700 ...

Page 29: ...OF A POLARIZED THREE PIN CONNECTOR 10280 0000D 7 00 1988 BUNN O MATIC CORPORATION 120 240 VOLTS AC 3 WIRE SINGLE PHASE RED TANK HEATER BLK UPPER WARMER 130W BLK WHI P3 WHI P2 WHI TAN SELECTOR CONTROL BOARD BLK PNK TAN GRY PNK TAN GRY GRINDER INTERFACE CONNECTORS WHI 2 3 F 1 3 GRN YEL RED 3500W KEEP WARM HEATER 50W WHI WHI SW THERMOSTAT WHI GRN WHI BLU BREW TIMER SOL T5 T1 T2 T4 T3 10021 071700 ...

Page 30: ...ING DIAGRAM OTA BLK L2 BLK BLK P1 P2 P3 ARE PINS OF A POLARIZED THREE PIN CONNECTOR 10282 0000B 7 00 1988 BUNN O MATIC CORPORATION 240 VOLTS AC 2 WIRE SINGLE PHASE 50 60 HZ RED BLK TANK HEATER BLK UPPER WARMER BLK P3 P2 RED BLK RED BLK RED BLK RED BLK RED BLK BLK RED BLK WHI GRN WHI BLU WHI BREW TIMER SOL T5 T1 T2 T4 T3 10021 071700 ...

Page 31: ...PIN CONNECTOR 100 VOLTS AC 2 WIRE SINGLE PHASE 50 60 HZ BLK UPPER WARMER BLK P3 P2 RED RED RED RED RED BLK RED WHI BLK BLU LIMIT THERMOSTAT L1 BLK GRN YEL N RED TANK HEATER BLU READY INDICATOR BLK SW THERMOSTAT BLK RED K1 N O K1 N O RED BLK 10635 0000B 7 00 1991 Bunn O Matic Corporation K1 WHI GRN WHI BLU BREW TIMER SOL T5 T1 T2 T4 T3 10021 071700 ...

Page 32: ...T35B BLK L2 BLK BLK P1 P2 P3 ARE PINS OF A POLARIZED THREE PIN CONNECTOR 200 VOLTS AC 2 WIRE SINGLE PHASE 50 60 HZ RED TANK HEATER BLK UPPER WARMER BLK P3 P2 RED RED RED RED RED BLK RED BLU READY INDICATOR BLK SW THERMOSTAT 10637 0000B 7 00 1991 Bunn O Matic Corporation WHI GRN WHI BLU WHI BREW TIMER SOL T5 T1 T2 T4 T3 10021 071700 ...

Page 33: ...AR WARMER 2 1 3 OFF LOW HIGH N L RED WHI OFF ON OFF ON L1 1 OFF ON OFF ON L1 1 OFF ON OFF ON L1 1 BRN RED WHI MED BLU BLK P1 P3 P2 BLK BLK P1 P2 P3 ARE PINS OF A POLARIZED THREE PIN CONNECTOR BLU LIMIT THERMOSTAT SW THERMOSTAT TANK HEATER N BLK L1 BLK GREEN L2 RED WHI BLK FAUCET OPTION ONLY THERMAL CUT OFF WHI BLK WHI RED 4 3 2 1 PIN GRY L E D INDICATOR TIMER OPTIONAL FLASHING INDICATOR SYSTEM BLU...

Page 34: ...LK P1 P2 P3 ARE PINS OF A POLARIZED THREE PIN CONNECTOR BLK BLK BLK BLK BLK BLK LEFT FRONT WARMER RIGHT FRONT WARMER LEFT REAR WARMER RIGHT REAR WARMER 2 1 3 OFF LOW MED HIGH N L 240 VOLTS AC 2 WIRE SINGLE PHASE 50 60 HZ OFF ON OFF ON L1 1 OFF ON OFF ON L1 1 OFF ON OFF ON L1 1 BRN RED WHI RED RED RED RED RED RED BLK BLU BLK P1 P2 WHI GRN WHI BLU WHI BREW TIMER SOL T5 T1 T2 T4 T3 10021 071700 ...

Page 35: ...ER 2 1 3 OFF LOW MED HIGH N L 100 VOLTS AC 2 WIRE SINGLE PHASE 50 60 HZ OFF ON OFF ON L1 1 OFF ON OFF ON L1 1 OFF ON OFF ON L1 1 RED RED RED RED RED RED BLK BLK BLU LIMIT THERMOSTAT L1 BLK GRN YEL N RED TANK HEATER BLU READY INDICATOR BLK SW THERMOSTAT BLK RED K1 K1 N O K1 N O RED BLK 10634 0000D 7 00 1991 Bunn O Matic Corporation RED BRN WHI RED BLU BLK P1 P2 WHI GRN WHI BLU WHI BREW TIMER SOL T5...

Page 36: ...K BLK LEFT FRONT WARMER RIGHT FRONT WARMER LEFT REAR WARMER RIGHT REAR WARMER 2 1 3 OFF LOW MED HIGH N L 200 VOLTS AC 2 WIRE SINGLE PHASE 50 60 HZ OFF ON OFF ON L1 1 OFF ON OFF ON L1 1 OFF ON OFF ON L1 1 RED RED RED RED RED RED BLK BLU READY INDICATOR BLK SW THERMOSTAT 10636 0000D 7 00 1991 Bunn O Matic Corporation RED BRN WHI RED BLU BLK P1 P2 WHI GRN WHI BLU WHI BREW TIMER SOL T5 T1 T2 T4 T3 100...

Reviews: