anovafurnishings.com
888.535.5005 tel
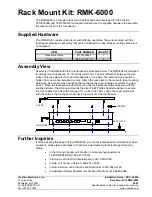
Assembly InstructIons
brp300
7 Bike Rack
brpVc300
7 Bike Rack
brp304
7 Bike Rack
brp305
9 Bike Rack
brptrI305
9 Bike Rack
tools needed
Ratchet with 9/16” Socket
•
9/16” Open-end or Box-end Wrench
•
12 x
3/8”
Flanged Nut
12 x
3/8” X 1.5”
Hex Head Bolt
Assembly:
NOTE: Before assembling the Nuts to the Bolts, it is recommended that a light oil or petroleum jelly be applied to the Bolt threads.
1. Inspect the shipping container contents for damage and to determine that all components and hardware are present.
2. Place the Inner Rack on the packaging cardboard or other soft surface. Position one of the Rack Ends near one end of the Inner
Rack.
3. Align the upper mounting holes in the end of one of the Rack Ends with the upper mounting holes of the Inner Rack. Install a Flat
Washer onto one of the Hex Head Bolts and insert the Bolt through both parts. Install a Flat Washer and Flanged Nut on the end of
the Bolt and tighten finger tight so adjustments can be made during assembly.
Install a Bolt and Washer through each of the other sets of mounting holes in that end of the Inner Rack and Rack End bracket and
secure each Bolt with a Flat Washer and Flanged Nut.
Assembly HArdwAre:
For tamper resistant hardware see page 2
bencH components:
1 x
Left End
Flat Washer
Hex Head Bolt
Hex Head Bolt
and Flat Washer
Model BRP304 shown.
Inner Rack and Ends vary
with models.
1 x
Inner Rack
(3.5” or 7.5” Spacing)
Packaging cardboard
or other soft surface
OR
Inner Rack
Rack End
1 x
Support
1 x
Right End
24 x
3/8”
Flat Washer
Flat Washer
and Flanged Nut
Flat Washer
Flanged Nut
OR