


Chapter 8 Basic Setting
GS1915 Series User’s Guide
114
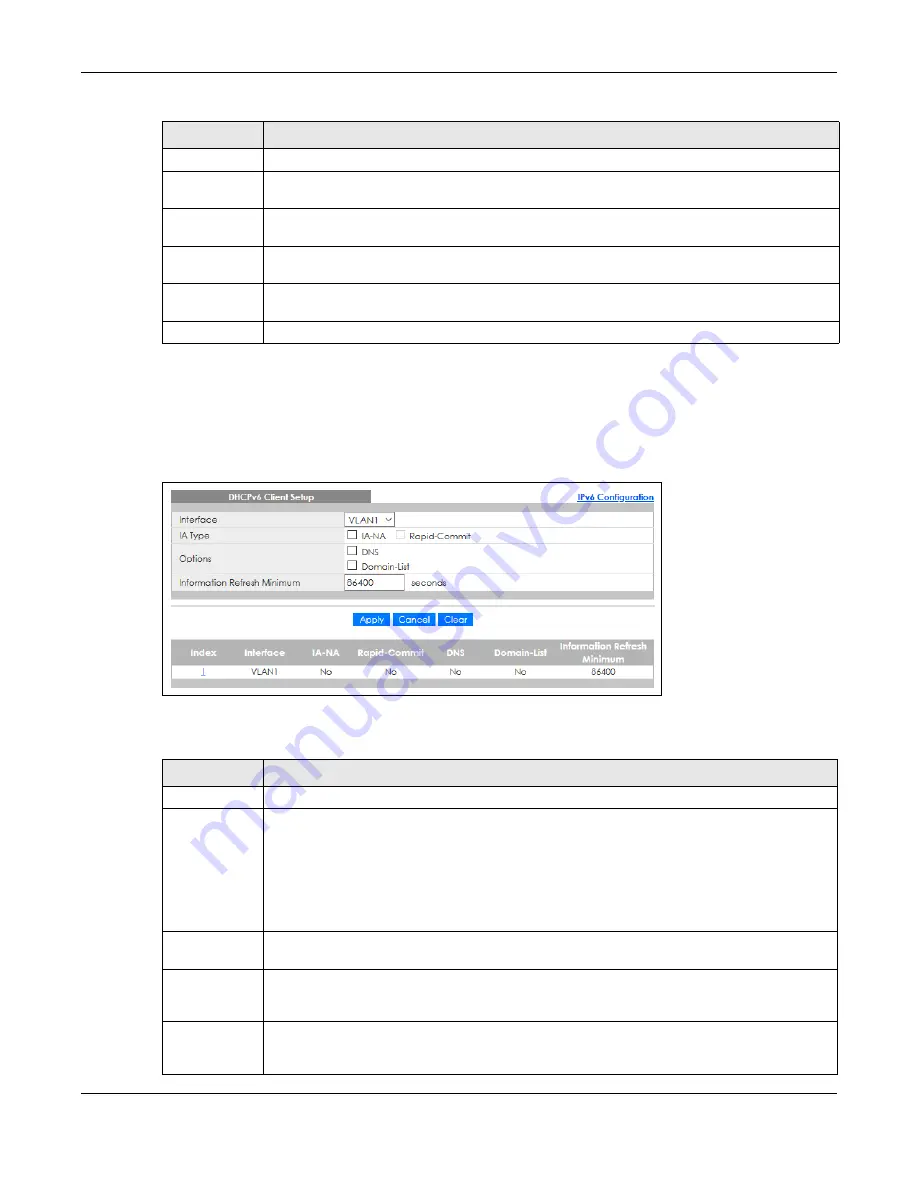
8.9.10 DHCPv6 Client Setup
Use this screen to configure the Switch’s DHCP settings when it is acting as a DHCPv6 client. Click the link
next to
DHCPv6 Client Setup
in the
IPv6 Configuration
screen to display the screen as shown next.
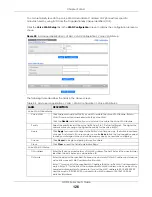
Figure 86
Basic Setting > IPv6 > IPv6 Configuration > DHCPv6 Client Setup
The following table describes the labels in this screen.
Interface
This is the name of the IPv6 interface you created.
Neighbor
Address
This field displays the IPv6 address of the neighboring device which can be reached through the
interface.
MAC
This field displays the MAC address of the neighboring device which can be reached through the
interface.
Select an entry’s check box to select a specific entry. Otherwise, select the check box in the table
heading row to select all entries.
Delete
Check the entries that you want to remove and then click
Delete
to remove the selected entries
from the summary table.
Cancel
Click
Cancel
to clear the check boxes.
Table 46 Basic Setting > IPv6 > IPv6 Configuration > IPv6 Neighbor Setup (continued)
LABEL
DESCRIPTION
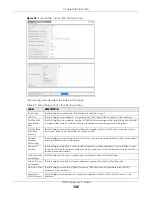
Table 47 Basic Setting > IPv6 > IPv6 Configuration > DHCPv6 Client Setup
LABEL
DESCRIPTION
Interface
Select the IPv6 interface you want to configure.
IA Type
Select
IA-NA
to set the Switch to get a non-temporary IP address from the DHCPv6 server for this
interface.
Optionally, you can also select
Rapid-Commit
to have the Switch send its DHCPv6 Solicit message
with a Rapid Commit option to obtain information from the DHCPv6 server by a rapid two-
message exchange. The Switch discards any Reply messages that do not include a Rapid
Commit option. The DHCPv6 server should also support the Rapid Commit option to have it work
well.
Options
Select
DNS
to have the Switch obtain DNS server IPv6 addresses and/or select
Domain-List
to
have the Switch obtain a list of domain names from the DHCP server.
Information
Refresh
Minimum
Specify the time interval (from 600 to 4294967295 seconds) at which the Switch exchanges other
configuration information with a DHCPv6 server again.
Apply
Click
Apply
to save your changes to the Switch’s run-time memory. The Switch loses these
changes if it is turned off or loses power, so use the
Save
link on the top navigation panel to save
your changes to the non-volatile memory when you are done configuring.