For Users of Windows Vista/XP
For Users of MacOS X
ZFX Tools is an application combining a number of useful functions. It includes a recorder that makes it easy to capture your instrument, a sound-coordinated rhythm machine that gives
you a virtual drummer and bassist, an editor with an intuitive mouse-based interface, a librarian function for managing patches, and a precision tuner.
In addition, a search function lets you download the latest patches or rhythms and access a vast assortment of preset patches and rhythm patterns.
This Startup Guide explains how to install ZFX Tools on your computer. The steps for recording while playing rhythm patterns are also explained.
ZFX Tools Startup Guide
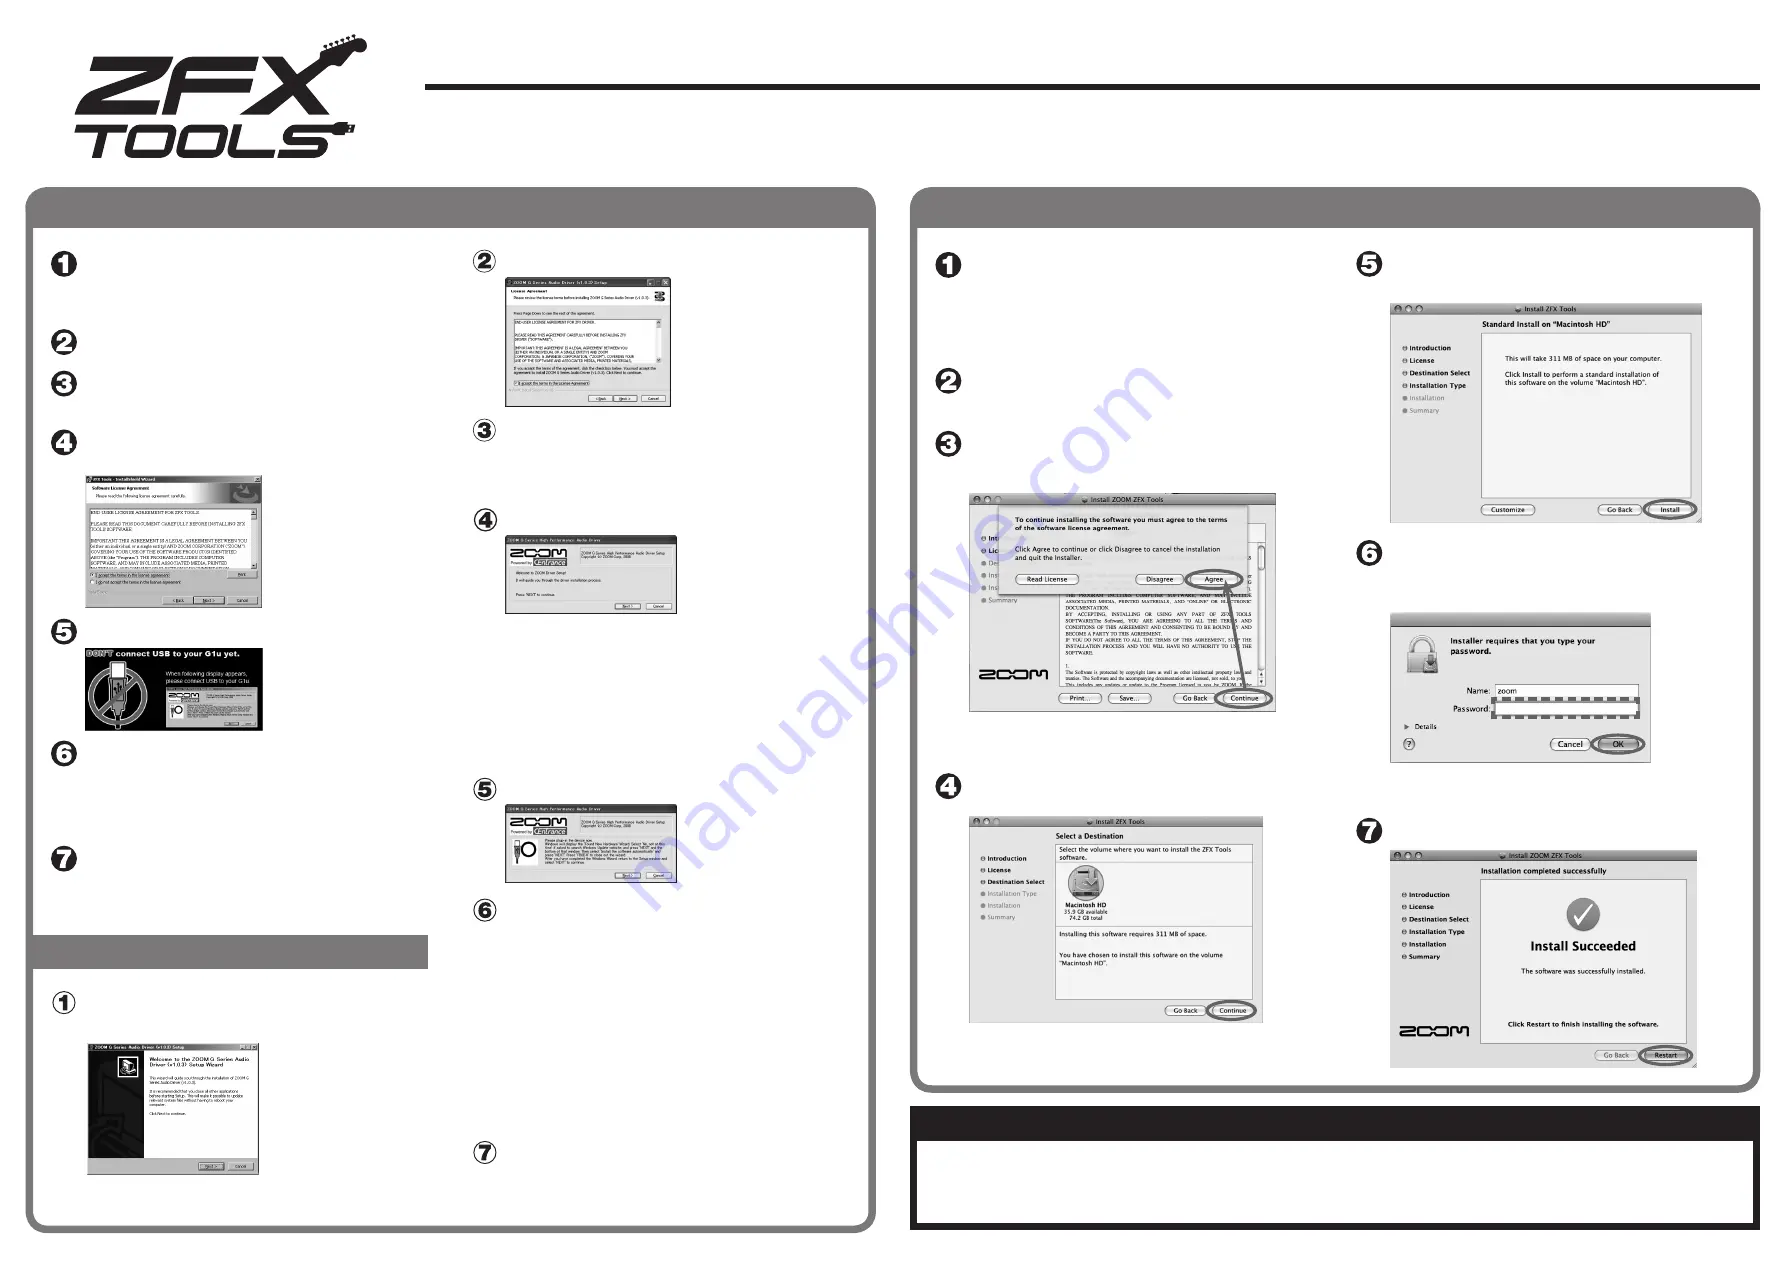
Insert the Install Disc and click on
"ZFX Tools 1.
*
.
*
.
*
Setup.exe" in the
"Windows" folder to start the installer.
Select the setup language and click [OK].
The installation wizard starts up.
Click [Next] to begin the installation.
The "Software License Agreement"
screen appears.
Read the agreement
and check the "I accept
the terms in the license
agreement" radio button to
confirm your acceptance of
the agreement. Then click
[Next].
A warning message appears.
Do not yet connect the
USB cable at this point.
Select the installation target folder.
To accept the default installation target folder, click [Next].
To select a different folder, click [Change].
* If you do not want a shortcut to be created on the Desktop, remove
the check mark from the box.
Click [Install] to start the installation.
ZFX Tools will be installed.
Next, proceed to the installation of the driver software.
Driver Installation
The ZOOM G Series Audio Driver
installation wizard appears
Click [Next].
* If the driver install wizard
window is not visible, click
on "ZOOM G Series Audio
Driver" in the task bar.
License Agreement
The License Agreement
is displayed. Read the
agreement and place a
check mark in the "I accept
the terms in the License
Agreement" box to confirm
your acceptance of the
agreement. Then click [Next].
Choose Start Menu Folder
You can specify the destination folder where the shortcut to
uninstall/repair the driver will be located. Normally, simply
click [Install].
Welcome to ZOOM Driver Setup!
A dialog box such as shown
here will appear three times.
Click [Next] every time to
proceed.
If a software installation warning dialog box is shown, click
[Continue].
If a Windows Security message indicating that the driver
software publisher cannot be verified appears, click [Install
this driver].
* In this case, the message "ZOOM G Series Audio Driver (Not
Responding)" may appear, but this is not a problem. Wait until the
driver responds.
Please plug in the device now
When the "Please plug in
the device now" dialog box
appears, connect the unit
and the computer with the
USB cable and click [Next].
Standard driver installation
When you connect the unit to the computer, a dialog box for
installing the standard driver appears.
· When using Windows XP
g
When the message "Welcome to the Hardware Update Wizard"
appears, select "Install the software automatically" and click
[Next] to complete the process.
· When using Windows Vista
g
Select "Locate and install driver software" and click [Continue]
to complete the process.
When the installation of the standard driver for your operating
system has completed, return to "ZOOM G Series Audio
Driver" and click [Next].
ZOOM G Series Audio Driver installation
If a warning message to confirm Hardware installation
appears, click [Continue Anyway].
Click [Finish] to complete the installation.
Insert the Install Disc and click on"ZFX
Tools 1.
*
.
*
.
*
Setup.mpkg" in the
"MacOS X" folder to start the installer.
* Before the Installer starts, a dialog box may be displayed. Click
[Continue].
The Installer starts, and the "Introduction"
screen appears. Click [Continue].
The "Software License Agreement"
screen appears. Read the information
carefully and then click [Continue].
* When you click [Continue], a confirmation dialog box appears.
Click [Agree] to continue.
The "Installation Destination" screen
appears. Click [Continue].
* The installation destination for ZFX Tools cannot be changed.
* This screen appears only under OS X 10.4, not under OS X 10.5.
The ZFX Tools "Standard Installation"
screen appears. Click [Install].
The password entry dialog box appears.
Enter the name and password of a user with
administrator privileges, and click [OK].
* When you click [OK], the installation confirmation dialog box
appears again. Click [Continue installation].
Click [Restart] to complete the installation.
Installation precautions
• You must have Administrator privileges to install the software. If your user level does not provide this, please contact your system
administrator.
• Before starting the installation, shut down all other applications.
• Before starting the installation, disconnect the USB cable between the G1u and the computer.
• When installation is complete, a restart of the computer may be necessary.
ZFX_Tools-Startup-E-2


