


ZONEMASTER MAXIPOINT V2 DAMPER CONTROL SYSTEM
- Installation Manual
9
Opening the case of the Touchpad for fitment to wall
The plastic casing of the touchpad consists of two halves. The front cover
contains the PCB board along with the LCD screen and the buttons. The back
cover attaches to the wall. During the installation process the case will have
to be opened to mount the touchpad on the wall. In order to prevent the case
from being damaged, follow the steps below to carefully open the casing,
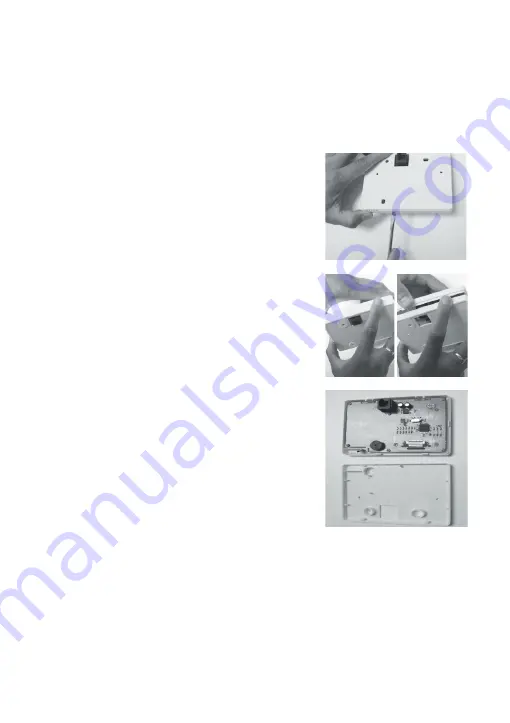
1)
Use a flat head screw driver to push the
two notches at the bottom of the casing
inside and turn the screwdriver blade just
enough to open the cover as shown in the
right figure.
2)
The bottom end opens up and the top end
still remains attached.
3)
The top part is now removed by folding
back the front section of the body thus
releasing the clip from the notch of the
back cover.
4)
Position the back cover on the wall (about
1.5m high from the floor) away from any
heat or cool source and mark the cable hole
and screw holes. Cut the hole for the cable/
retrieve the touchpad cable (from main
control module) out of the cable hole and
plug it into the touchpad. Mount the back
cover to the wall on the marked place.
5)
Replace the front cover on the back cover.