127899 Rev. A
33
Z I PP I E Z M- 3 1 0
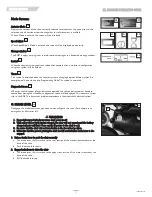
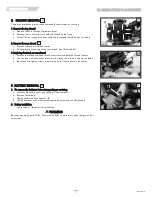
M. SEAT DEPTH ADJUSTMENT
10" - 18", 12" - 20" only
The seat depth can be adjusted in one inch increments on standard rehab seating.
1. Seat Frame Depth Adjustment
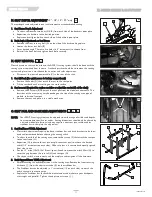
a. To adjust, remove the two bolts (A & B) from each side of the backrest pivot plate.
b. Reposition the backrest to the desired position.
c. Replace and retighten bolts on each side of the backrest pivot plate.
2. Back Angle Adjustment on Seat Frame
a. Remove the front securing bolt (A) on the side of the backrest hinge plate.
b. Loosen the lower rear bolt (B)
c. Set at desired angle. There are five holes (in 4º increments) to choose from.
d. Reinstall the front bolt and tighten both bolts securely.
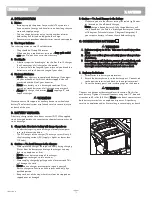
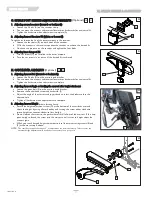
N. SEAT REMOVAL
Most adjustments that can be made to the ASAP II seating system, should be done with the
seating system removed from the base. Standard practice should be to remove the seating
system and place it on a workbench for an easier and safer adjustment.
a. Disconnect the joystick power cable (C) in the rear of the chair.
1. Seat tilt back (for quick access to battery compartment)
a. Remove the knobs (D) that attach the seat to the seat posts.
b. Tilt the seat back until it is resting on the work surface.
2. Seat removal (required to replace modules or adjust the seat width of the chair)
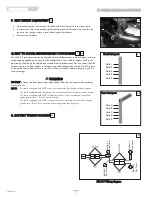
a. Remove the 4 screws (E) to detach the seat pan from the modules underneath. The
locations of the screws may vary depending on the size of the seating area, type of
module, and size of seat pan.
b. Remove the seat and place it in a stable work area.
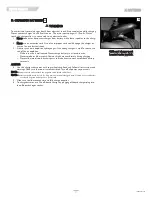
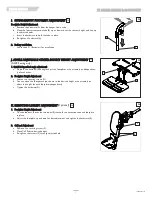
O. SEAT PAN AND BACK SIZE ADJUSTMENTS
NOTE: Your ASAP II seating system can be adjusted to a wide range of widths and depths
to accommodate specific user needs. Seating dimensions should only be altered by
a trained medical professional and may require a new seat pan, cushion and/or
stabilizer bar to complete the adjustment.
1. Seat Pan/Frame Width Adjustment
a. Most width adjustments require the back, stabilizer bar, and back brackets to be loos-
ened and/or removed before adjusting the seating width.
b. To adjust the width of the seating area, remove the screws (F) that attach the seat pan
to the seat frame (H).
c. Reposition (G) (either solid seat pan, or split-cover seat pan) to achieve the desired
width (1/2” increments on each side). Make sure that it is centered and equally spaced
from side to side.
d. For the 13” wide, (10x10-13x18 seat), you will need to mount the width fillers (H) to
cover the gap between the seat rail (H) and seat pan (G).
e. Check your width measurements and then replace and retighten all the hardware.
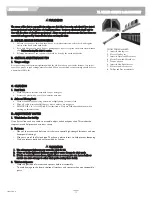
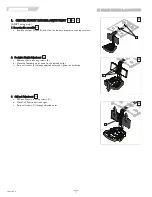
2. Back Support Frame Width Adjustment
a. After measuring the width adjustment in the seating area, Remove the front securing
hardware ( J ) from the adjustment tube (K) on the stabilizer bar.
b. The Stabilizer bar can be adjusted in 1” increments(1/2’ on each side) to match the
width change in the seating area.
c. Replace the Stabilizer bar, recheck the measurement and make sure your backposts
are straight and parrallel. Tighten the adjustment screws ( J )
60
62
61
63
64
65
XI. DEALER SERVICE & ADJUSTMENT
61
63
C
60
A
B
64
65
62
D
F
J
G
H
K
E
I


