background image

O w n e r ’ s   M a n u a l

Kid  Kart

®


Xpress by Zippie

®

*

with transit option

*

without transit option

Supplier:

This manual must be given to the user of 
this wheelchair.

User:

Before using this wheelchair read this entire 
manual and save for future reference.

Kid Kart Xpress

M


a


n


u


e


l

d


i


n


s


t


r


u


c


t


i


o


n


s

*

avec option pour transport   

*

sans option pour

transport

Au Fournisseur : Ce manuel doit être remis à l’usager de 

ce fauteuil roulant.

À l’Usager :

Veuillez lire tout le manuel et le conserver pour
rérérence ultérieure.

Chaque fauteuil est livré avec un manuel d’instructions en anglais. La version en français est 
à


votre disposition en format PDF sur le site : www.SunriseMedical.com. Veuillez vous 

rendre


à la page de votre produit pour télécharger le manuel dans la langue souhaitée, ou 

contactez


un fournisseur agréé Sunrise Medical. 

M


a


n


u


a


l

d


e  I


n


s


t


r


u


c


c


i


o


n


e


s

Kid Kart

®

 Xpress by Zippie

®


*

con opción de tránsito     

*


sin opción de tránsito

Distribuidor:


Este manual debe ser entregado al pasajero de esta
silla de ruedas.

Pasajero:

Antes de usar esta silla de ruedas, lea este manual en
su totalidad y guárdelo para futura referencia.

Cada una de las sillas se envía con un manual de instrucciones en inglés. El manual en 
español


está disponible en formato PDF en nuestra página en Internet: 

www.SunriseMedical.com.


Ingrese a la página del producto específico para descargar el 

manual, o comuníquese con el


proveedor autorizado de Sunrise Medical.

Kid Kart

®

 Xpress by Zippie

®

Summary of Contents for Kid Kart Xpress

Page 1: ...at PDF sur le site www SunriseMedical com Veuillez vous rendre la page de votre produit pour t l charger le manuel dans la langue souhait e ou contactez un fournisseur agr Sunrise Medical M a n u a l...

Page 2: ...d reliability of your chair and the service you receive from your Sunrise supplier Please feel free to write or call us at the address and telephone number below Sunrise Medical US LLC Customer Servic...

Page 3: ...Option and Use 10 VIII USE MAINTENANCE 11 A Maintenance and Safety Notes 11 B Cleaning 11 C Storage Tips 11 D Safety Checklist 11 E Rear Wheel Removal and Installation 12 F Wheel Locks 12 G Unfold and...

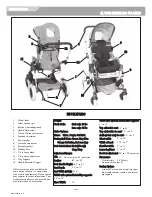
Page 4: ...5 to 41 Seat Depth 5 5 to 11 Seat Width at hip 12 5 Width with optional Lateral hip supports 6 5 to 10 Knee Width 13 Width with optional Lateral knee supports 5 to 11 Top of head to seat 13 to 22 Top...

Page 5: ...occur and cause severe injury to the rider and or others Never hang items greater than 5lbs 2 3kg from stroller handle or seat back handle A fall tip over or loss of control may occur B GETTING TO KN...

Page 6: ...sibility 5 IF you have to cross a road make eye contact with drivers before you go forward When in doubt yield until you are sure it is safe H MOTOR VEHICLE SAFETY WARNING 1 As indicated on the front...

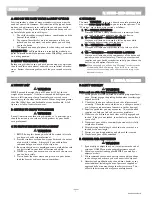
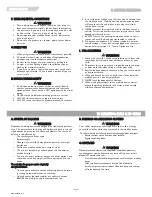
Page 7: ...e sure they are placed as far back onto the seat surface as possible This will reduce the risk that the mobility device will tip over and or move away from you G NEGOTIATING A CURB OR SINGLE STEP WARN...

Page 8: ...th fasteners They require periodic checks and maintenence to ensure the safety of both the user and attendant 1 Most adjustments that require removing hardware should be done by your Service provider...

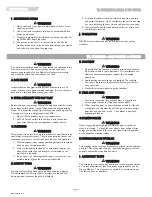
Page 9: ...flat between the belt and the rider 3 A pelvic wedge or a similar device can help keep the rider from sliding down in the seat Consult with the rider s doctor nurse or therapist to find out if the ri...

Page 10: ...cles Please contact SAE International 400 Commonwealth Drive Warrendale PA 15096 0001 or by phone at 724 776 4970 or 877 606 7232 P TRANSIT CONFIGURATIONS WARNING Be sure the device is in one of the c...

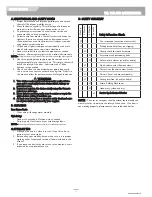
Page 11: ...e or premature wear 2 Inspect and maintain this device strictly using this Owner s manual as a reference 3 If you detect a problem make sure to service or repair the device before putting it back into...

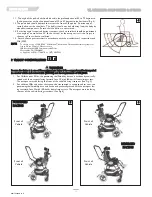
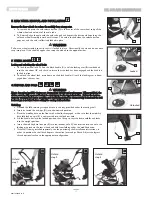
Page 12: ...tability and performance When unfolded the device must be fully open and locked to avoid injury to the dependent rider Follow the instruc tions for unfolding the device carefully and double check that...

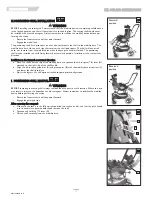
Page 13: ...ctivate the trigger handle B Fig 15 and fold the handle A downwards until it is fully lowered against the frame as shown in Fig 14 Two stage Folding Frame 1 Full compact folding The Xpress can fold co...

Page 14: ...eversed direction a Place the shell over the top of the mobility base and squeeze the tilt in space TIS lever D attached to the right side of the shell handle b Align the tilt in space guide pins A an...

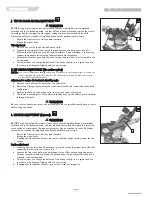
Page 15: ...tment b Adjust the hip angle by removing the screw that attaches the frame tube to the back shell bracket c Position the back to the desired angle re insert the screw and tighten d The lower mounting...

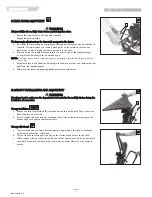
Page 16: ...remove the sup port from the footbed hanger d Make sure the levers are properly locked after every adjustment N CANOPY INSTALLATION AND ADJUSTMENT WARNING It is always best to make sure the dependent...

Page 17: ...17 ZIPPIE XPRESS NOTES 9921700000 Rev E 9921700000 Rev E...

Page 18: ...t head support s 6 Make other standard and optional adjustments that are needed 7 Check to be sure that all adjustment screws are torqued to specifications B SEAT DEPTH ADJUSTMENT a Start by determini...

Page 19: ...lcro attachment inside the cover c The fabric seat cover should be hand washed in laundry soap thoroughly rinsed with clean water and air dried d The foam cushion pieces may be wiped down with soap an...

Page 20: ...to allow the bracket to slip off the end of the tube c Flip the bracket over and replace it on the end of the tube being careful to align the screw with the same hole in the end of the tube d Tighten...

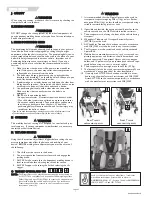
Page 21: ...oom around the child s neck for easy breathing and eating f Once the butterfly straps are adjusted snap the lower straps into the plastic tri glide up against the quick release buckle 39 40 IX DEALER...

Page 22: ...t a Lock the lateral by rotating inwards b Loosen the angle lock screw C as shown at the lateral hinge point c Adjust the lateral angle to the proper position and tighten L HIP PADS Width Adjustment a...

Page 23: ...a stable pelvic position 2 Anterior supports should ONLY be used with seat back and pelvic supports or belts that keep the child from sliding down in the seat 3 Anterior supports must be fitted by yo...

Page 24: ...Loosen the guide rods adjustment screw D and slide both guide rods evenly to desired diameter b Locate neoprene strap E in desired position on forehead c Slide guide rods through clamp until front of...

Page 25: ...d angles are too different from one another Try loosening both tray supports if tray will not align properly S SHOE HOLDER FOOT STRAP ADJUSTMENT Option WARNING Using a pelvic positioning belt is criti...

Page 26: ...26 ZIPPIE XPRESS NOTES 9921700000 Rev E...

Page 27: ...orized supplier while this warranty is in effect prior approval for return or repair of covered parts 2 Return the device or part s freight pre paid to Sunrise Mobility Products Division at 2842 Busin...

Page 28: ...2021 Sunrise Medical Canada Inc 9921700 Rev A Customer Service 800 263 3390 www SunriseMedical ca Sunrise Medical Canada Inc 237 Romina Drive Unit 3 Concord ON L4K 4V3...

Reviews: