background image


6

Interface Information 

ƒ


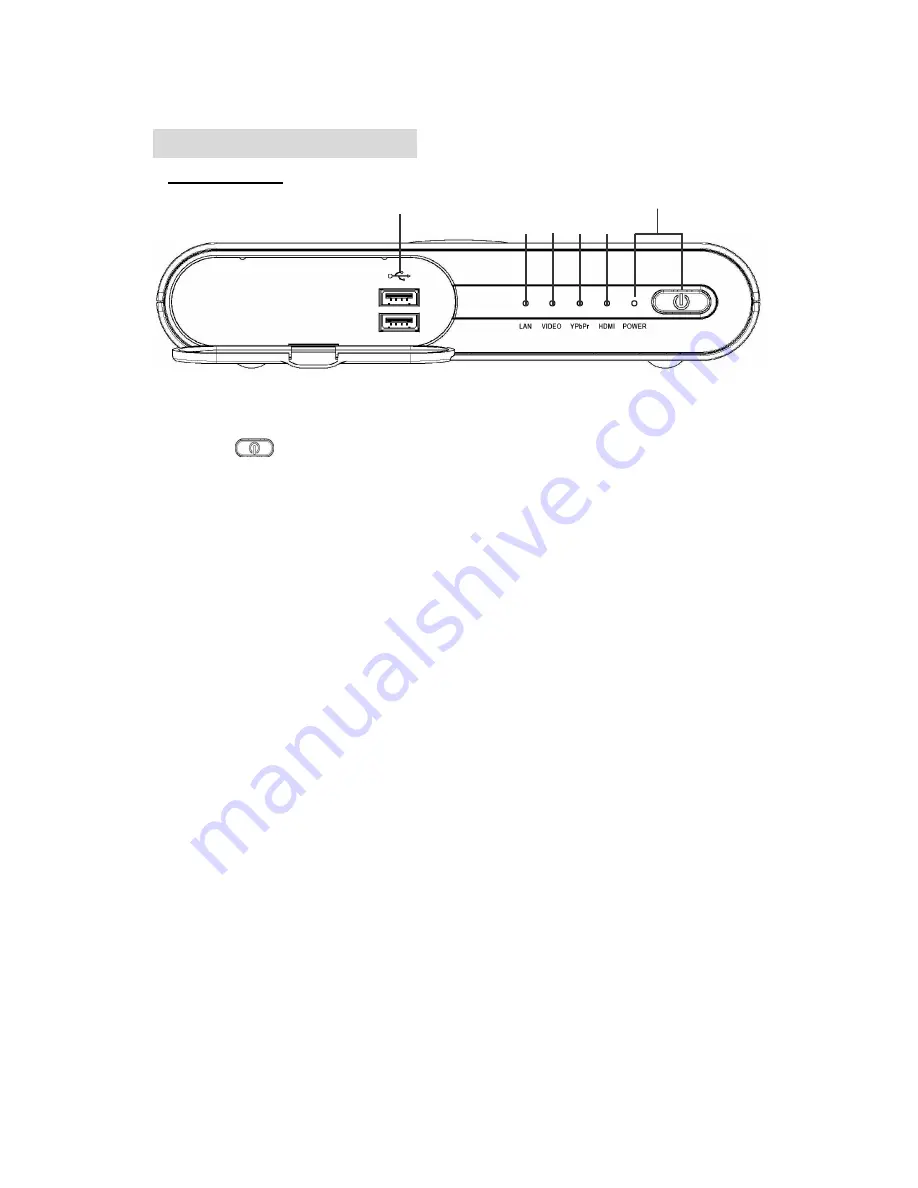
Front panel 


X


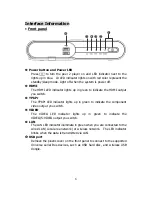
Power button and Power LED


Press     to turn the peer 2 player on and LED indicator next to the 
lights up in blue.    Or LED indicator lights on with red color represent the 
standby/sleep mode. Light off when the system is power off. 

Y


HDMI


The HDMI LED indicator lights up in green to indicate the HDMI output 
you switch. 

Z


YPbPr


The YPbPr LED indicator lights up in green to indicate the component 
video output you switch. 

[


VIDEO 

The VIDEO LED indicator lights up in green to indicate the 
VIDEO/S-VIDEO output you switch. 

\


LAN


The LAN LED indicator illuminate in green when you are connected to the 
wired LAN (Local area network) or wireless network.    The LED indicator 
blinks when the data is transmitted via LAN. 

]


USB port   

Remove the plastic cover on the front panel to connect to the supported 
Universe serial Bus devices, such as USB hard disc, and wireless USB 
dongle. 


X

Y

Z

[

\

]

Summary of Contents for Peer 2 Player ZIN-5003

Page 1: ...0 ...

Page 2: ...f power supplied to your home consult your local power company or appliance dealer Only use the power cord and adapter provided by the manufacturer Internal component may be damaged if you use a different adapter to power this product To avoid electric shock and fire hazard match the plug and outlet connections carefully then fully insert If the plug fails to fit the outlet please contact an elect...

Page 3: ...ord is already unplugged from the electrical outlet Only use damp cloth to clean this product and never use a liquid cleaner or an aerosol cleaner During a thunderstorm or when this product is unused for long periods of time unplug power cord from the wall outlet This will prevent damage to the product due to lightning and power line surges Service Warning Refer all servicing to qualified service ...

Page 4: ...and the content described in this manual may be changed at any time we cannot guarantee the accuracy of the content of this document We disclaim liability for errors omissions or future changes The information of this document is subject to change without notice This device complies with Part 15 of the FCC Rules Operation is subject to the following two conditions 1 This device may not cause harmf...

Page 5: ... up Peer 2 Player ZIN 5003 8 Identifying the remote control button 13 OSD Main Menu instructions 14 Setup Menu 15 Network Setting 15 System Menu 17 Default Setting 18 System Information 18 Online Update 19 PC Media 20 Music 21 Video 22 Photo 23 USB Media 24 Download Media 25 Info Push 26 Troubleshooting 27 Specifications 28 ...

Page 6: ...t downloaded media format You can also access the shared folders of nearby PCs thru the intranet local area network and play the digital media files from your desktop laptop to your TV Besides connecting your PC with the network you can simply plug in your USB devices to access and play the media files via user friendly On Screen Display OSD menu The content of package Please make sure the followi...

Page 7: ...ch Z YPbPr The YPbPr LED indicator lights up in green to indicate the component video output you switch VIDEO The VIDEO LED indicator lights up in green to indicate the VIDEO S VIDEO output you switch LAN The LAN LED indicator illuminate in green when you are connected to the wired LAN Local area network or wireless network The LED indicator blinks when the data is transmitted via LAN USB port Rem...

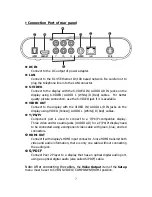
Page 8: ...g VIDEO Yellow AUDIO L White R Red cables Y Pb Pr Component port is used to connect to a Y Pb Pr compatible display Three video and two audio jacks AUDIO L R for a Y Pb Pr display need to be connected using a component video cable with green blue and red connectors HDMI OUT Connect it with display s HDMI input connector Since HDMI transmit both video and audio information there is only one cable w...

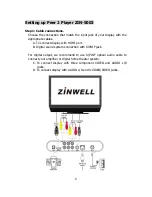
Page 9: ... cables A To connect display with HDMI port B Digital sound system connection with S PDIF jack For digital output we recommend to use S PDIF optical audio cable to connect your amplifier or digital home theater system C To connect display with three component VIDEO and AUDIO L R jacks D To connect display with AUDIO L R and S VIDEO VIDEO jacks ...

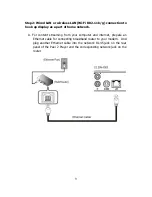
Page 10: ... of home network A For content streaming from your computer and internet prepare an Ethernet cable for connecting broadband router to your modem And plug another Ethernet cable into the network RJ 45 jack on the rear panel of the Peer 2 Player and the corresponding network jack on the router ...

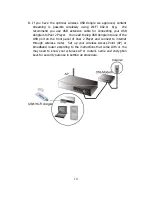
Page 11: ...SB dongle into Peer 2 Player You need to plug USB dongle into one of the USB port on the front panel of Peer 2 Player and connect to internet through wireless router Set up your wireless Access Point AP or broadband router according to the instructions that come with it You may need to know your wireless AP or router s name and encryption keys for security purpose in setting up procedure ...

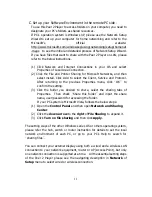
Page 12: ...ous Properties menu click OK to confirm the setting 3 Click the folder you desired to share select the sharing tabs of Properties Then check Share this folder and input the share name user password for accessing the folder If your PC system is Microsoft Vista follows the below steps 1 Open the Control Panel and then open Network and Sharing Center 2 Click the down arrow to the right of File Sharin...

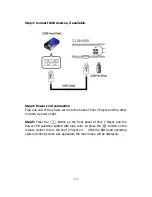
Page 13: ... 2 Player and the other end into a power outlet Step5 Press the button on the front panel of Peer 2 Player and the Power LED would be lighted with blue color Or press the button on the remote control to turn the Peer 2 Player on After the BIOS and operating system booting screen was appeared the main menu will be displayed ...

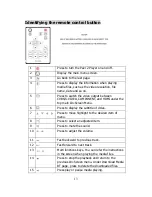
Page 14: ...op main On Screen Menu 6 Press to display the subtitle of video 7 Press to move highlight to the desired item of menu 8 Press to select an adjusted item 9 Press to mute the sound 10 Press to adjust the volume 11 Fast backward to previous track 12 Fast forward to next track 13 Multi functions keys You can refer the instructions in the screen when playing the media files 14 Press to stop the playbac...

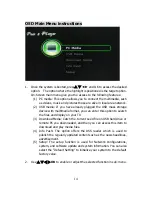
Page 15: ...a format you can enter this option to search the files and display on your TV 3 Download Media Catch the torrent seed file on USB hard drive or remote PC you downloaded and then you can access this item to download and play media files 4 Info Push The option offers the RSS reader which is used to publish the regularly updated content such as the news headlines advertisement 5 Setup The setup funct...

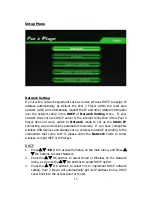
Page 16: ... connecting way and various parameters manually If you have compatible wireless USB devices and already set up wireless router AP according to the instructions that come with it please enter the Network mode to select wireless to input WEP or WPA keys DHCP 1 Press S T W X OK to access the Setup on the main menu and Press S T OK buttons to select Network 2 Press the S T OK buttons to select Wired o...

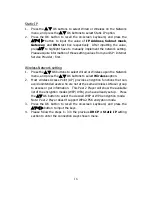
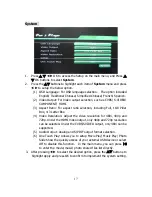
Page 17: ...OK buttons to select Wired or Wireless upon the Network menu and press the S T OK buttons to select Wireless option 2 Most wireless Access Point AP provides encryption functions that can avoid unintended users who are not at the same wireless LAN user group to access or get information This Peer 2 Player will show the available list of the encryption modes WEP WPA you have already set up Press the...

Page 18: ...llar Box 4 3 Letter Box 4 Video Resolution Adjust the video resolution for 480i 480p and 720p Under the HDMI Video output only 480p and 720p resolution can be selected Under the CVBS SVIDEO output only 480i can be supported 5 Audio Output Analog and S PDIF output format selection 6 One Touch Play Allows you to setup Movie Play Music Play Photo Slide Show the quickly access of your external USB dev...

Page 19: ...setting or select No to return the previous menu After returning the defaults the initial installation wizard page will be appeared and return to CVBS S VIDEO source System Information 1 Press the S T OK buttons to select the System Information of Setup menu and you can see the Software related information of Peer 2 Player 2 Press the RETURN button on the remote control to the previous menu ...

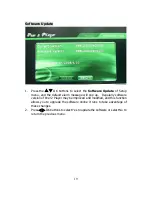
Page 20: ...lt alarm message will pop up Regularly software version of Peer 2 Player may be improved and modified and this function allows you to upgrade the software online it runs to take advantage of these changes 2 Press W X OK buttons to select Yes to update the software or select No to return the previous menu ...

Page 21: ...ss Point first See the previous Setting up Peer 2 Player and Network Setting section 1 Press S T W X OK to enter the PC Media to search PC within the local area network and press S T OK to choose available PC 2 Press W X to select Music Video or photo and press S T W X OK to select files searching way including by Folders or All files list 3 About the Music Video Photo related navigating steps ple...

Page 22: ...ote 1 Peer 2 Player supports below audio formats WMA mp3 OGG FLAC and real audio ra Some audio files may not be playable due to incompatible format Please check the original format of your music file to verify that it is compatible format we support 2 Press the below buttons on the remote control to play the song Play the previous song Pause the song and resume the playing Press to stop the playba...

Page 23: ...tons on the remote control to play the video Play previous track of playing video Pause the video and resume the video playing Fast backward Fast forward Press to stop the playback Play next track of the playing video Increase or decrease the volume of the playing video Mute the audio portion of the playing video 3 You can press the SUBTITLE button to select the suitable SRT language text subtitle...

Page 24: ...files may not be playable due to unsupported format Animated GIF file is not supported 2 Press the below buttons on the remote control to play the picture when you play single picture in the full screen mode Play previous photo Rotate the viewing picture Play next photo of the playing photo list OK Return the Original picture See the information of the picture including Date picture name size and ...

Page 25: ... device with USB interface 1 Plug in the USB storage devices in the USB slots on the front panel of the Peer 2 Player 2 Press S T W X OK to enter the USB Media to search USB devices and press S T OK to choose external USB device 3 The following navigating steps please refers to the Music Video and Photo part of the previous PC Media section ...

Page 26: ... all data in the device Are you sure to be continue will be appeared to remind you to format your hard disc Press S T OK to select Yes to format your USB storage device It may take several minutes according the size of your USB device 2 The message will pop up to let you choose external USB or remote PC for media download Press S T OK to select a source for searching the torrent seeds Note If you ...

Page 27: ...26 Info Push 1 Press S T W X OK to enter the Info Push in the main menu This item shows the frequently updated content published in the website including but not limited to news headlines ...

Page 28: ...ct the correct input source z Make sure Video Output selection in the setup menu such as CVBS S VIDEO COMPONENT HDMI Try to switch the Video Output selection until you see the picture on your screen When entering PC Media menu the available PC list is not displayed z Check your wired wireless connection to make sure that it s working properly Use an Ethernet LAN cable to connect from the Network j...

Page 29: ...28 Specifications ...

Page 30: ...29 ...

Reviews: