PREMIER QUATRO INSTALLATION MANUAL (Fyreye MKII) Firmware Versions: PANEL 1.84 & LOOP 3.70
Doc No: GLT-215-7-1 Issue: 1.36 Author: NJ/TE DATE: 25/05/2017
31
7.1.2 POWER SUPPLY
Quatro is normally supplied with an external PSU Charger card. This is the approved PSU CHARGER option. It can also operate with
a power supply which is part of the panel’s MOTHERBOARD PCB. This is the MOTHERBOARD CHARGER Option. To ensure that the
correct fault monitoring is selected, the installer must indicate whether the MOTHERBOARD CHARGER or the PSU CHARGER is
being used, as follows:
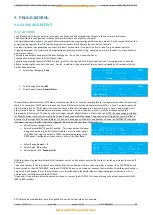
Turn the key switch clockwise to the Controls Enabled Position. The controls Active LED will light.
Press any key followed by the level 2 password (default is 2222)
Select the option
General
Press
ENTER
Select the option
Power Supply
Toggle between
Motherboard Charger
and
PSU Charger
(using the
▲
and
▼
symbols until the correct mode is
displayed).
Press
F1 (Accept)
to accept the selection, or
F4 (Cancel)
to retain the previous PSU mode.
7.1.3 LOOP MANAGEMENT
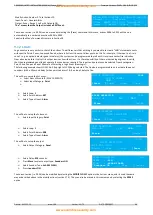
The number of loops connected to the panel should be set here.
Press any key followed by the level 2 password (default is 2222)
Select the option
Loop
Press
ENTER
Select the option
Loop Management
The panel then displays the 4 loops and whether or not they are installed. Adjust as required.
Press
F1 (Accept)
to accept the selection, or
F4 (Cancel)
to retain the previous settings.
7.1.4 SETTING TIME AND DATE
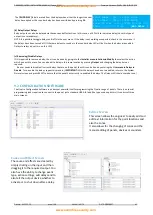
Turn the key switch clockwise to the Controls Enabled Position. The controls Active LED will light.
Press any key followed by the level 2 password (default is 2222)
Press the
▼
key until
Date-Time
is highlighted.
Press the
ENTER
key. The date and time can now be entered using the numeric keypad and the directional keys.
Press
F1 [Accept]
to accept a new date and time, or
F4 [Cancel]
to leave the date / time unchanged.
Press
Cancel
or
◄
until the screen shows
SYSTEM NORMAL
or
FAULT
.
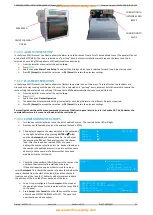
7.1.5 CREATING AN INSTALLATION NAME
This can be entered using the PC configuration software. But to enter it manually at the panel:-
Turn the key switch clockwise to the Controls Enabled Position. The controls Active LED will light.
Press any key followed by the level 2 password (default is 2222)
Press the
▼
key until
General
is highlighted. Select
General
then
Installation Name
. You are now able to enter the site reference
name of the panel, plus name and telephone number of the installation or Maintenance Company. The site reference name is
displayed on the top line of the SYSTEM NORMAL screen, on the left hand side. The name and phone number of the maintenance
company will be alternately displayed with any fault condition of the panel.
7.1.6 PASSWORDS
As described earlier in this section, 2 passwords are required to view and set up the configuration on the Quatro panel. These are
required to increase the security of a site configuration.
(a) Level 1 or User Passwords (Default 1111)
Authorised users are allowed to view the panel’s configuration, status and event logs (see section 16). They can also disable
(section 13) and test (section 14) the panel.
Each authorised user can be assigned his own 4-digit Level 1 password by the installation / commissioning engineer. The panel
permits up to 31 unique level 1 passwords, i.e. up to 31 people can have their own unique access to Level 1 data. It is
recommended that these passwords are assigned during the commissioning of the panel. Changes to these passwords at a later
date will require a further site visit by the installation engineer.
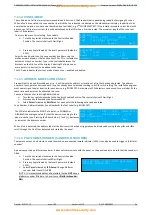
The Level 1 password can be changed as follows:
Turn the key switch clockwise to the Controls Enabled Position. The controls Active LED will light.
Press any key followed by the level 2 password (default is 2222).
Press the
▼
key until
General
is highlighted.
Select
General
and then
Password
. You are now able to enter the password for the 1st authorised user. The LEVEL must be
set to 1 (see top right corner).
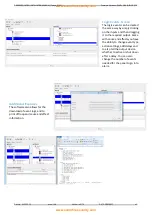
In the example, the 1st user has been assigned a Password of 4321.
There can be up to 31 user numbers, each with a unique Password.
CHANGE PASSWORD LEVEL: <1>
USER :[01]
PASSWORD:[4321]
[Accept ] [Exit ]

