background image

206-3652

2

RECORD YOUR MODEL NUMBER
(Now, while you can see it)

The model and serial number of your new TV are located 
on the back of the TV cabinet. For your future conve-
nience,
we suggest that you record these numbers here:

MODEL
NO.____________________________________

SERIAL
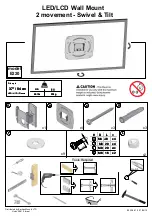
NO.____________________________________

WARNING:

TO REDUCE THE RISK OF ELECTRIC SHOCK DO NOT REMOVE COVER (OR BACK). NO USER SER-
VICEABLE PARTS INSIDE. 
REFER SERVICING TO QUALIFIED SERVICE PERSONNEL.

The lightning flash with arrowhead symbol, within an equilateral triangle, is intended to alert the user to the
presence of uninsulated “dangerous voltage” within the product’s enclosure that may be of sufficient magnitude
to constitute a risk of electric shock to persons.

The exclamation point within an equilateral triangle is intended to alert the user to the presence of important
operating and maintenance (servicing) instructions in the literature accompanying the appliance.

WARNING:

TO PREVENT FIRE OR SHOCK HAZARDS, DO NOT EXPOSE THIS PRODUCT TO RAIN OR MOISTURE. 

POWER CORD POLARIZATION:

This product is equipped with a three-wire grounding-type alternating current line plug. This plug will fit
into the power outlet only one way. This is a safety feature. If you are unable to insert the plug fully into
the outlet, contact your electrician to replace your obsolete outlet. do not defeat the safety purpose of
the three-wire ground type plug.

NOTE TO CABLE/TV INSTALLER:

This reminder is provided to call the cable TV system installer’s attention to Article 820-40 of the National
Electric Code (U.S.A.). The code provides guidelines for proper grounding and, in particular, specifies that the
cable ground shall be connected to the grounding system of the building, as close to the point of the cable
entry as practical.

REGULATORY INFORMATION:

This equipment has been tested and found to comply with the limits for a Class B digital device, pursuant to
Part 15 of the FCC Rules. These limits are designed to provide reasonable protection against harmful interfer-
ence when the equipment is operated in a residential installation. This equipment generates, uses and can
radiate radio frequency energy and, if not installed and used in accordance with the instruction manual, may
cause harmful interference to radio communications. However, there is no guarantee that interference will not
occur in a particular installation. If this equipment does cause harmful interference to radio or television recep-
tion, which can be determined by turning the equipment off and on, the user is encouraged to try to correct the
interference by one or more of the following measures: 

Reorient or relocate the receiving antenna.

Increase the separation between the equipment and receiver.

Connect the equipment into an outlet on a circuit different from that to which the receiver 
is connected.

Consult the dealer or an experienced radio/TV technician for help.

CAUTION:

Do not attempt to modify this product in any way without written authorization from Zenith Electronics
Corporation. Unauthorized modification could void the user’s authority to operate this product.

WARNING

RISK OF ELECTRIC SHOCK

        DO NOT OPEN

K

“Entertainment Machine” is a trademark of Zenith Electronics Corporation

Summary of Contents for ZLD15A1

Page 1: ...machine number ZLD15A1 e n j o y t h e v i e w o p e r a t i n g g u i d e w a r r a n t y Copyright 2000 Zenith Electronics Corporation...

Page 2: ...ntion to Article 820 40 of the National Electric Code U S A The code provides guidelines for proper grounding and in particular specifies that the cable ground shall be connected to the grounding syst...

Page 3: ...ing of the product should follow the manufacturer s instructions and should use a mounting accessory recommended by the manufacturer 8 Transporting Product A product and cart combination should be mo...

Page 4: ...removing covers may expose you to dangerous voltage or other hazards Refer all ser vicing to qualified service personnel 20 Damage Requiring Service Unplug this product from the wall outlet and refer...

Page 5: ...17 Connecting DTV 18 Connecting PC as monitor 19 Function checking in PC mode 21 Using remote control 22 Turning on the set 23 Function checking in TV mode 24 Setting language 25 Closed caption funct...

Page 6: ...6 tv video menu enter vol vol ch ch power On indicator Remote control sensor Power button Remove vinyl coating for protection from staining before using Front of the set Front of the set Back of the s...

Page 7: ...UDIO MONO COMPONENT INPUT B R TV VIDEO button Power input Antenna input Component input Earphone jack Audio Video input PC D TV input S Video input ENTER button Channel buttons POWER button MENU butto...

Page 8: ...flashbk menu mute sleep ch enter vol vol ch cc tv video POWER BUTTON NUMBER BUTTONS FLASHBK BUTTON MENU BUTTON CHANNEL BUTTONS Remote Control Remote Control Press the flaskbk button to view the last p...

Page 9: ...LEEP BUTTON PAGE 28 PAGE 43 PAGE 40 TV VIDEO button TV VIDEO button on Remote Control on Remote Control Each press of this button changes the mode as below VIDEO S VHS DVD Select each mode for watchin...

Page 10: ...nu mute sleep ch enter vol vol ch cc tv video AS mark LG TV Table style stand AC Adaptor Remote Control Batteries Power cord Customer service card Wall mount Contact your dealer for buying this option...

Page 11: ...LCD TV in the correct using the installation accessories Refer to page 13 14 b Connect the antenna cable to the antenna input port of the set c Connect the adaptor to the power input port of the set d...

Page 12: ...falling this product should be secured at all times 1 Installation on the wall Don t install the set on a weak wall surface such as plaster or form board a Fix the wall installer with four screws in...

Page 13: ...r in the position you wish to install the set b Put the set in the table installer When you assemble the TV set with table style stand please match the stick of TV set to the hole of the table style s...

Page 14: ...antenna antenna input port bronze wire Turn clock arise to tighten antenna converter 300 flat cable 75 round cable In case of 75 round cable insert the bronze wire and then tighten the connecting nut...

Page 15: ...PC D TV INPUT EARPHONE EARPHONE S VIDEO S VIDEO R VIDEO VIDEO INPUT INPUT AUDIO AUDIO MONO MONO AUDIO VIDEO CH3 IN DC 12V ANT IN PC D TV INPUT H P S VIDEO INPUT R L VIDEO IN AUDIO MONO COMPONENT INPU...

Page 16: ...O AUDIO AUDIO ANT IN PC D TV INPUT H P S VIDEO INPUT R L VIDEO IN AUDIO MONO COMPONENT INPUT B R TV connection panel Camcorder CDGP VCDP Video Game set CDI Back panel of external equipment tv video VI...

Page 17: ...DEO INPUT R L VIDEO IN AUDIO MONO COMPONENT INPUT B R TV connection panel Back panel of DVD tv video DVD Turn the set on and press tv video button to select DVD On remote control Try this after turnin...

Page 18: ...NT IN PC D TV INPUT H P S VIDEO INPUT R L VIDEO IN AUDIO MONO COMPONENT INPUT B R TV connection panel Back panel of DTV or tv video PC Turn the set on and press tv video button to select PC On remote...

Page 19: ...efore connecting Refer to page 23 Connect the set to the PC with PC signal cable Connect the audio ports to the PC to get PC sound DC 12V ANT IN PC D TV INPUT H P S VIDEO INPUT R L VIDEO IN AUDIO MONO...

Page 20: ...requency Hz 640x480 640x480 656x496 640x480 640x480 720x400 800x600 800x600 800x600 800x600 800x600 832x624 1024x768 1024x768 1024x768 V G A S V G A MAC X G A 31 5KHz 35KHz 37 9KHz 37 5KHz 43 3KHz 31...

Page 21: ...time you press the button you can see menus as below 2 Press the channel buttons to select a function you want to use Use And Captions Off Caption Text CC1 Parental Ctl Use And Brightness 90 Use And B...

Page 22: ...ies with new bat teries Remove batteries when you don t use the remote control for long time Liquid leakage from old battery may cause operation failure Make sure these are no objects between the remo...

Page 23: ...g received broad casting signals in the local area 3 Adjust volume level power flashbk menu mute sleep ch enter vol vol ch cc tv video 0 2 3 5 6 4 8 9 7 1 displayed only in stereo signal displayed onl...

Page 24: ...buttons to select a function you want to use Use And Sleep Timer Off On Time AM Off Time AM On Off Timer Off Use And Captions Off Caption Text CC1 Parental Ctl Language English Clock Set AM Use And B...

Page 25: ...ect a language you want to adjust Use And Captions Off Caption Text CC1 Parental Ctl Language English Use And Captions Off Caption Text CC1 Parental Ctl Language English 3 Press the enter button Each...

Page 26: ...n signals on the same channel By selecting MODE1 or MODE2 you can choose which signal you view MODE1 is usually the signal with the captions while MODE2 might show demonstration or programming informa...

Page 27: ...Language English Captions Off Parental Ctl Caption Text CC1 Use And Language English Captions Off Parental Ctl Caption Text CC1 Each time you press the volume button the caption mode is displayed one...

Page 28: ...ect Captions 2 Press the channel buttons to select On and press the enter button Each press of channel buttons changes the screen display as below Captions function setting is completed Use And Captio...

Page 29: ...epeat the steps 1 2 at page 28 2 Press the channel buttons to select Text 1 Text 2 Text 3 or Text 4 3 Press the enter button VGE 1033 Closed Caption Calibrated Distortion Unit Text mode Green text Gre...

Page 30: ...ies previously shown in theaters Movie Ratings Unblocked G and Above general audience PG and Above parental guidance suggested PG 13 and Above 13 years and up R and Above restricted NC 17 and Above 18...

Page 31: ...f Must Set Hours 4 Press the buttons to select the types of blocking to be set Press the buttons to select the types of ratings to block MPAA Age and or Content block may be set Press the menu button...

Page 32: ...d press the number buttons 0 9 to change as 2 Press the volume buttons Memorizing channel num ber is displayed Press the menu button to select the screen display as below general wireless TV Cable TV...

Page 33: ...l Add Del 3 4 Press the enter button Each time you press the volume but tons you can select as below alternative ly The current channel is to be added deleted Deleted Added Deleted Press the channel b...

Page 34: ...k Set 3 Press the volume buttons 0 2 3 1 5 6 4 8 9 7 power flashbk menu mute sleep ch enter vol vol ch cc tv video Use And Sleep Timer Off On Time AM Off Time AM On Off Timer Off Clock Set AM Use And...

Page 35: ...for button Select 30 and press the enter button to complete the setting Time is progressed from the point of press ing the enter button Press the enter button again and the screen display is disappear...

Page 36: ...hannel buttons to select Off Time 3 Press the volume button 0 2 3 1 5 6 4 8 9 7 power flashbk menu mute sleep ch enter vol vol ch cc tv video Use And Sleep Timer Off On Time AM Off Time AM On Off Time...

Page 37: ...uttons to select On and press the enter button Each press of channel buttons changes the screen display as below The screen display will disappear if you press the enter button once more The screen di...

Page 38: ...olume button 6 Press the channel buttons to select minute you want If you hold the button the minute display is changed in the sequence of 00 01 02 58 59 and changed in the reverse sequence for button...

Page 39: ...select On Off Timer Press the channel buttons to select On and press the enter button Each press of channel buttons changes the screen display as below On Timer function setting is complet ed If you...

Page 40: ...for one minute untill automatically turning off This function will automatically turn the set off after a set time When a sleep time you want is displayed on the screen don t press the sleep button T...

Page 41: ...ess the channel buttons to select a audio item you want to adjust 3 Press the volume buttons to adjust the audio condition as you want 4 Press the enter button Use And Bass 50 Balance 0 MTS Mono Trebl...

Page 42: ...ereo Screen display in bilingual signal SAP Bilingual dual language signal This signal contains the secondary language signal in addition to the primary language There are the primary and secondary la...

Page 43: ...muted sound press the mute button or volume buttons If muted sound is released volume level is displayed on the screen Earphone is an optional item You can adjust earphone sound with volume buttons Ea...

Page 44: ...6 4 8 9 7 power flashbk menu mute sleep ch enter vol vol ch cc tv video Each press of APC button or channel buttons changes the screen display as below Clear Optimum Off Soft APC Auto Picture Control...

Page 45: ...Press the channel buttons to select a picture item you want to adjust 3 Press the volume buttons to adjust the picture condition as you want 4 Press the enter button APC setting is to be released if...

Page 46: ...set External antenna impedance 75 Audio output 1 0W 1 0W Speaker outputs 8 X 2 External input ports A V input port set 1 S Video input 1 Earphone jack 1 PC D TV input 1 Component video input set 1 Po...

Page 47: ...206 3652 Memo...

Page 48: ...bill of sale or delivery ticket as evidence of the purchase date Operating Guide Read your Operating Guide carefully so that you will understand the operation of your set and how to adjust the custome...

Reviews: