background image

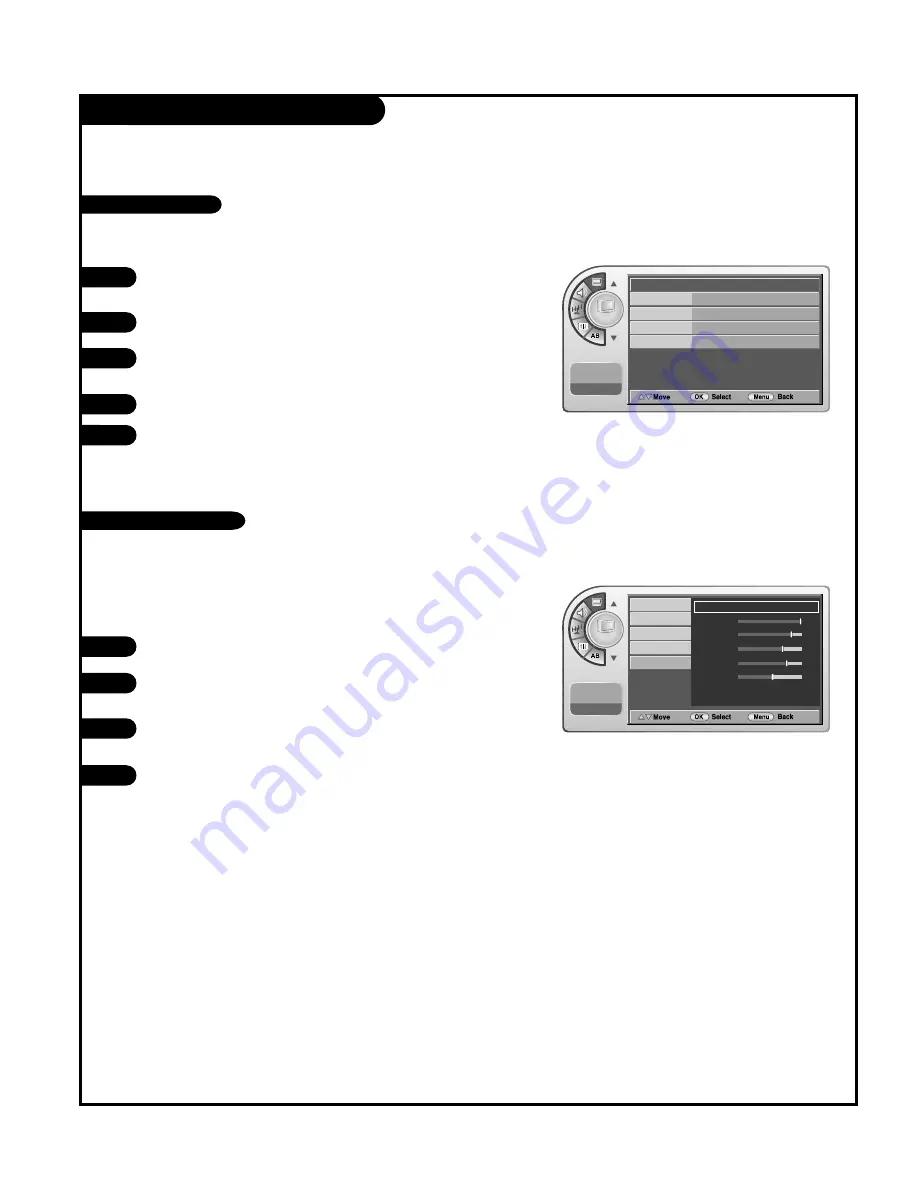
Picture Menu

P A G E   3 6

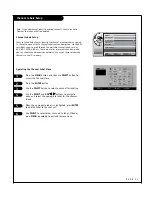
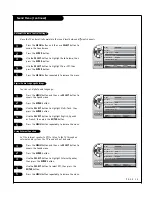
To make custom picture settings, set the Mode to Manual on the menu.

Press the 

MENU

button and then use 

SELECT

button to

access the Picture menu.

Press the 

ENTER

button.

Use the 

SELECT

button to highlight Mode, then press

the 

ENTER

button.

Use the 

ADJ 

G

button to select a preset picture mode.

Press the 

MENU

button several times to remove the

menu.

1

2

3

4

5

- Set the picture mode to the program content, e.g. Dynamic or Mild etc.

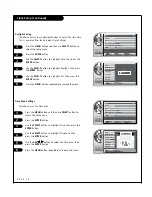
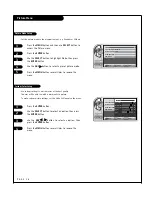
Picture Mode Setup

Press the 

ENTER

button.

Use the 

SELECT

button to select an option, then press

the 

ENTER

button.

Use the 

ADJ 

F

G

G

button to select an option, then

press the 

ENTER

button.

Press the 

MENU

button several times to remove the

menu.

1

2

3

4

- Use custom settings to watch movies at the best quality. 

The user will be able to watch a more realistic picture.

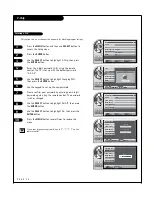
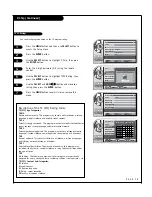
Custom Color Setup

Picture

Mode

G

Color Temperature Normal

16:9

Screen Format

Noise Reduction

Film Mode

11:20 PM

Sep.11, 2006

Picture

Mode

Color Temperature

Standard

G

Contrast

100

Brightness

79

Sharpness

65

Color

70

Tint

0

Screen Format

Noise Reduction

Film Mode

11:20 PM

Sep.11, 2006

Summary of Contents for L26W56B

Page 1: ... S A Inc Installation and Operating Guide Warranty Model Numbers L26W56S L26W56B L26W56W LCD TV Monitors page 5 t a b l e o f c o n t e n t s Zenith and the lightning Z logo are registered trademarks of Zenith Electronics Corporation ...

Page 2: ...to comply with the limits for a Class B digital device pursuant to Part 15 of the FCC Rules These limits are designed to provide reasonable protection against harmful interference when the equipment is operated in a residential installation This equipment generates uses and can radiate radio frequency energy and if not installed and used in accordance with the instruction manual may cause harmful ...

Page 3: ...r power supply cords may be used if the cord is approved by the local regulating agency IMPORTANT SAFEGUARDS FOR YOU AND YOUR NEW PRODUCT YOUR PRODUCT HAS BEEN MANUFACTURED AND TESTED WITH YOUR SAFETY IN MIND HOWEVER IMPROPER USE CAN RESULT IN POTENTIAL ELECTRICAL SHOCK OR FIRE HAZARDS TO AVOID DEFEATING THE SAFEGUARDS THAT HAVE BEEN BUILT INTO YOUR NEW PRODUCT PLEASE READ AND OBSERVE THE FOLLOWIN...

Page 4: ...to avoid injury from tip over 13 Unplug this apparatus during lightning storms or when unused for long periods of time 14 Refer all servicing to qualified service personnel Servicing is required when the apparatus has been damaged in any way such as power supply cord or plug is damaged liquid has been spilled or object have fallen into the apparatus the apparatus has been exposed to rain or moistu...

Page 5: ...Setup 39 Reference 49 56 Troubleshooting 56 57 Glossary of Terms 59 Commercial Mode Check 58 Warranty Back Cover The table of contents lists the pages to go to for setting up the features for the end user Optional Installer Remote Control for Model No L26W56X Shown herein is an optional Installer remote control available for the L26W56X model only The remote control is NOT included with the LCD TV...

Page 6: ... No___ End User Remote Control Will a remote control be provided to the end user to operate the TV The remote is included with the TV Yes___ No___ End User Menu Access Will the end user have access to all the menus on the TVs from the front panel Yes___ No___ LCD TV Monitor Setup Checklist 1 Install the LCD TV Monitor where it will be used Prior to Operation The LCD TV Monitor must be connected to...

Page 7: ...AUDIO OUT Optical RS 232C PORT RS 232C SELECT SWITCH UPDATE SWITCH ANTENNA CABLE Connect to an antenna or cable system S VIDEO IN AUDIO VIDEO 1 3 IN Connect Audio Video equipment to these jacks COMPONENT 1 2 IN AC IN RJP INTERFACE To hook up source equipment see below and also refer to the Table of Contents on page 5 shows pages to go to for equipment hookup options VIDEO2 SIDE AUTO CAMPORT VIDEO ...

Page 8: ...e are several Vesa standard mounts available that can be used with this TV The mount shown to the right would be installed on the TV back using required bolts in the four pre threaded holes provided Follow any instructions supplied with the Vesa mount if one is to be used for the TV installation TV Swivel Stand Vesa Standard Mounting Holes Typical Vesa Mount ...

Page 9: ...enna to a 75 ohm RF jack They are usually about an inch long with two screws on one end and a round opening with a wire sticking out on the other end 1 2 3 RF Coaxial Wire 75 ohm 300 75 ohm Adapter Connections Panel Connections Panel Locate the Antenna Cable jack on the back of the LCD TV Monitor Connect the antenna wire Flat or Round that runs from the wall to this jack according to one of the di...

Page 10: ...nections Panel Cable TV Wall Jack RF Coaxial Wire 75 ohm Cable TV Wall Jack Coaxial Wire RF 75 ohm Connections Panel Connect cable service to the LCD TV Monitor Mini glossary 75 OHM RF CABLE The wire that comes from an off air antenna or cable service provider Each end looks like a hex shaped nut with a wire sticking through the middle and it screws onto the threaded jack on the back of the TV A s...

Page 11: ... ANTENNA CABLE VCR Back P A G E 1 1 300 75ohm Adapter VCR Back Panel Round or Flat wire 300 ohm Locate the Antenna Cable jack on the back of the VCR Connect the antenna wire that runs from the wall jack to the VCR Connect other wires according to the diagram to the right After all connections are complete plug in the TV The LCD TV Monitor is designed to operate on AC power 1 2 3 Connect antenna an...

Page 12: ...3 UPDATE DIGTAL AUDIO OUT OPTICAL S VIDEO IN RS 232C SELECT NORMAL DTV CONTROL AUDIO IN VIDEO IN VIDEO IN VIDEO IN VIDEO IN VIDEO 3 AUDIO IN VIDEO 3 S VIDEO VIDEO 1 AUDIO IN COMPONENT DVD DTV 1 COMPONENT DVD DTV 2 AUDIO IN M P I ANTENNA CABLE Cable Box Cable TV Wall Jack Cable TV Wall Jack Connections Panel VCR AV Panel Connect cable service and a VCR to the LCD TV Monitor For cable box operation ...

Page 13: ...ent out jacks on the DVD player Connect component video cables between the DVD player and Component 1 or 2 In on the TV Make R L Audio connections as indicated to the right After all connections have been made select the Component 1 or 2 source to display the DVD image on the TV 1 2 3 AUDIO IN VIDEO IN VIDEO IN VIDEO 3 AUDIO IN VIDEO 3 S VIDEO VIDEO 1 VIDEO IN VIDEO IN AUDIO IN COMPONENT DVD DTV 1...

Page 14: ...the right After all connections have been made select the DVI source to display the DVI image on the TV 1 2 3 Locate the computer out port on the computer Connect a computer cable between the computer and PC In on the TV Make PC Audio connections as indicated to the right After all connections have been made select the PC source to display the PC image on the TV 1 2 3 DVI PC AUDIO IN HDMI DVI IN D...

Page 15: ...er Cord input socket on the back of the LCD TV Monitor Insert the AC power cord connector into the AC Socket on the TV as shown below 1 2 Connect the AC power cord directly to the LCD TV Monitor AC Power Cord VIDEO IN VIDEO IN AUDIO IN COMPONENT DVD DTV 1 COMPONENT DVD DTV 2 AUDIO IN M P I ANTENNA CABLE RJP INTERFACE FUTURE USE AC IN ...

Page 16: ...r preference On Screen Displays See descriptions on page 18 On screen displays will appear when the feature is active or the function is being used Remote Control Sensor Power Standby Indicator Glows red in Standby mode Glows green when the TV is turned on Glows orange in Sleep Timer and or Alarm mode A B C D E Using the front control panel to operate the LCD TV Monitor A B C D E LED Color Action ...

Page 17: ...et ID Specifies the TVs identity CAPTION MENU 32 Chooses analog and digital captioning options SOUND MENU 34 Sets up the sound Options are Mode Balance Digital Output Auto Volume Multi Track Internal Speaker PICTURE MENU 36 Sets up the picture appearance Options are Mode Color Temperature Screen Format Noise Reduction Film Mode 18 OTHER MENUS AND ON SCREEN DISPLAYS Volume Shows current sound level...

Page 18: ...aptions page to select options Alarm Timer Current Time 11 17 AM Exit Adjust Move OK Hr Off Min Alarm Display Press ALARM Set a time for the TV to turn itself on Channel Channel List 1 1 ANALOG 14 ANALOG 15 ANALOG 16 DIGITAL 7 1 DIGITAL 11 1 DIGITAL 84 1 DIGITAL 88 1 Add Move Add Del View OK V Chip CC CHPREVIEW EXIT Antenna Auto Program Channel Label Channel List Fine Tune Signal Strength Channel ...

Page 19: ...m information screen status multi sound status and time BUTTON When selecting a digital broadcast channel key in the Main channel number followed by the then the sub channel number Analog channels do not contain a sub channel number VOLUME CHANNEL OK Increase or decrease the volume Change channels Select on screen menu items and change menu values NUMBER BUTTONS Use for direct channel entry TIMER ...

Page 20: ...Use the A V jacks on the back of the TV as a source MENU SELECT ADJ Adjust Press to display the main on screen menu Use SELECT to choose an option and ADJ adjust Left Right to change the selected option Optional Installer Remote Control Part Number 6710V00108M POWER Turns TV On or Off TV FM Down arrow for navigating menus VOLUME Decreases increases sound level NUMBER KEYPAD Selects channels direct...

Page 21: ...e MENU button to remove the menu 1 2 3 4 5 6 Use Auto Program to automatically find and store all of the channels available in the selected Tuning Band Notes Tuning Band must be set before doing the channel search See Installer menu item 003 Band AFC Default setting is 1 for CATV When Auto Program is run any assigned channel labels are automatically removed Auto Program finds channels being receiv...

Page 22: ...ess the ADJ G button Press the MENU button repeatedly to remove the menu 1 2 3 4 5 After the channel search remove unwanted channels If you delete a found channel it isn t gone forever Simply re enter the Channel List menu and re add the channel to show the check mark Channel Antenna Auto Program Channel Label Channel List G Fine Tune Signal Strength Channel Channel List 1 1 ANALOG 14 ANALOG 15 AN...

Page 23: ...abel Menu Channel Antenna Auto Program Channel Label G Channel List Fine Tune Signal Strength Note If you add channel labels to existing channels then re run Auto Program the labels will all be deleted Press the MENU button and then use SELECT button to access the Channel menu Press the ENTER button Use the SELECT button to select a channel for labeling Use the SELECT and ADJ F F G G buttons to na...

Page 24: ... month day AM PM hours and minutes Press the MENU button repeatedly to remove the menu 3 4 5 6 7 8 2 1 Use the SELECT and ADJ F F G G buttons to set the year month day hours and minutes Setup Setup Clock Manual G Manual Clock Daylight Saving Time Zone On Timer Off Timer Auto Off On Setup Clock Manual G Manual Clock Daylight Saving Time Zone On Timer Off Timer Auto Off Clock Manual Clock Daylight S...

Page 25: ...alarm HOURS First two digits that are entered when setting the clock or the wake up alarm MINUTES The last two digits that are entered when setting the clock or the wake up alarm Setup Setup Time G V Chip PC Menu Language English Transparent 96 Menu Transparency Set ID Setup Clock Auto G Manual Clock Daylight Saving Yes Time Zone Pacific On Timer Off Timer Auto Off Auto Off On Clock Manual Clock D...

Page 26: ...ENU button and then use SELECT button to select the Setup menu Press the ENTER button Use the SELECT button to highlight Time then press the ENTER button Use the SELECT button to highlight Time Zone then press the ENTER button Use the ADJ F F G G button to select the time zone then press the ENTER button Press the MENU button repeatedly to remove the menu 3 4 5 6 Setup Time G V Chip PC Menu Langua...

Page 27: ... the on screen means will be shown in the language chosen Press the ENTER button to save Press MENU repeatedly to remove menu 1 2 3 Choose a language for the on screen menus 4 5 6 Setup Time V Chip PC Menu Language English G Menu Transparency Set ID 11 20 PM Sep 11 2006 Setup 11 20 PM Sep 11 2006 Time V Chip PC Menu Language Menu Transparency Set ID English Español Français Setup Time G V Chip PC ...

Page 28: ...ss the ENTER button Press the MENU button several times to remove the menu 1 2 3 4 5 6 7 8 9 10 Entering a PIN This option sets up or changes the password for blocking program ratings Setup Time G V Chip PC Menu Language English Transparent 96 Menu Transparency Set ID 11 20 PM Sep 11 2006 Setup Enter your PIN 0 9 Menu Back Number Time V Chip PC Menu Language Menu Transparency Set ID 11 20 PM Sep 1...

Page 29: ...mited violence some suggestive sexual dialog and situations TV G General audience This contains little or no violence no strong language and little or no sexual dialog or situations TV Y7 Directed for older children Themes and elements in this program may include mild physical or comedic violence or may frighten children under the age of seven TV Y All children The themes and elements in this prog...

Page 30: ... 13 should be accompanied by an adult PG 13 Parental guidance suggested Children under 13 should be accompanied by an adult R Restricted Viewers should be 17 or older NC 17 Not classified Viewers should be 17 or older X Adults only MPAA ratings The selected rating will be locked In addition any ratings that are more restrictive will also be blocked Setup Time G V Chip PC Menu Language English Tran...

Page 31: ...the remote control Use the SELECT button to highlight Can French Rating then press the ENTER button Use the SELECT and ADJ F F G G button and move to a rating then press the ENTER button Press the MENU button several times to remove the menu 1 2 3 4 5 6 7 Canadian French Ratings Canadian French Ratings E Expect No restriction G For all 8 Restricted Viewers should be 8 or older 13 Restricted Viewer...

Page 32: ... 1 2 3 4 5 Analog Mode Analog Captions will display on the screen whether the signal is from an RF channel or external equipment input Mini glossary CAPTIONS The term for the words that scroll across the bottom of the TV screen usually the audio portion of the program provided for the hearing impaired TEXT The term for the words that appear in a large black frame and almost cover the entire screen...

Page 33: ... the SELECT button to highlight Font Size Edge Style then press the ENTER button Make your selections Press the MENU button repeatedly to remove the menu 1 2 3 4 5 Digital Font Options Digital Captions only appear on digital channels Caption On Off On G Analog Mode Digital Mode Digital Font Option 11 20 PM Sep 11 2006 Caption On Off On G Analog Mode Digital Mode Digital Font Option 11 20 PM Sep 11...

Page 34: ...edly to remove the menu Sound Balance Setup Sound Mode Setup 3 4 5 Press the MENU button and then use SELECT button to access the Sound menu Press the ENTER button Use the SELECT button to highlight Balance then press the ENTER button Use the ADJ F F G G button to change the sound to the left right Press the MENU button repeatedly to remove the menu 1 2 Adjust the speaker balance for optimum sound...

Page 35: ...ge Digital Audio Language Settings Press the MENU button and then use SELECT button to access the Sound menu Press the ENTER button Use the SELECT button to highlight Internal Speaker then press the ENTER button Use the SELECT button to select Off then press the ENTER button Press the MENU button repeatedly to remove the menu 1 2 3 4 5 Set the internal speaker to Off to listen to the TV through an...

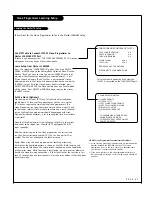
Page 36: ...c Picture Mode Setup Press the ENTER button Use the SELECT button to select an option then press the ENTER button Use the ADJ F F G G button to select an option then press the ENTER button Press the MENU button several times to remove the menu 1 2 3 4 Use custom settings to watch movies at the best quality The user will be able to watch a more realistic picture Custom Color Setup Picture Mode G Co...

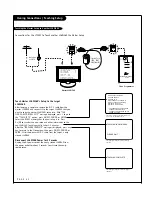
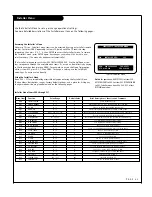
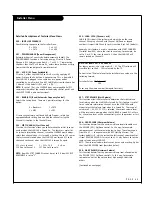
Page 37: ...tton Use the SELECT to select a preset option Press the MENU button several times to remove the menu 1 2 3 4 5 Color Temperature Settings Press the MENU button and then use SELECT button to select the Picture menu Press the ENTER button Use the SELECT button to highlight Screen Format then press the ENTER button Use the SELECT button to select a preset screen format Press the MENU button several t...

Page 38: ...in by setting installer item 117 to 001 and pressing Enter to reset the TV to default values in the installer menu You can do 2 5 4 Menu mode more than once but this mode is limited to only editing channel icons and channel labels Refer to the appropriate section in the Manual for other TV features Picture Sound etc LT2002 Clone Programmer As the cloning procedure is being performed specific steps...

Page 39: ...s like ABC CBS NBC etc to the channel onscreen display Add identifiable labels for the end user to readily know what common networks are available In the Channel menu select the Channel Label option follow instructions on the bottom of the screen 4 Transfer TV Setup to Controller Box 2 5 5 Menu After the TV channel scan has been edited and channel label icons added enter the Installer menu Once in...

Page 40: ... menus Make sure that the batteries in the Clone programmer are fresh If batteries are removed the Clone Clock time will be lost Decide if you want to set the time from the Clone programmer TV which has the clock set to the current time Setting the time and transferring it to the Clone or other device is a separate procedure Follow the connection diagram above to connect the Clone to a Master L26W...

Page 41: ...s time cannot be set directly the current time needs to be copied from a Zenith LG TV equipped with M P I input capability After the time is copied to the Clone programmer the current time can then be transferred to another TV This can be a master TV or another TV which has already had the features set up Notes When using the clone programmer for teaching or learning be sure that the heartbeat pat...

Page 42: ...inished detach M P I cable from the target newly cloned L26W56X Disconnect L26W56X Power for 5 Seconds Unplug the AC power cord of the newly cloned L26W56X from the power outlet for about 5 seconds to activate the newly copied setup CLONE SELECTION MENU 1 LEARN FROM TV 2 TEACH TO TV 3 SET CLONE CLOCK FROM TV 4 SET TV CLOCK FROM CLONE 5 DISPLAY TV SETUP 6 DISPLAY CLONE SETUP TO CHANGE MENU ITEMS PR...

Page 43: ...and Comments 000 INSTALLER SEQ 0 3 0 Leave default set to 0 001 POWER MANAGE 0 7 0 Sets number of hours of no activity before auto shut Off 002 AC ON 0 1 0 Set to 1 to enable auto turn On at power up 003 BAND AFC 0 3 1 Selects Tuning Band 0 Broadcast 1 CATV 2 HRC 3 IRC 004 STRT CHANNEL 0 125 126 127 255 255 Channel at turn on Set 255 to return to last channel before power Off 005 CHAN LOCK 0 1 0 I...

Page 44: ...255 0 User programmable number least significant byte 082 CHKSM ERROR 0 1 1 Enforces rigid M P I checksum 083 HANDSHK TIME 0 5 5 Relaxes M P I timing to be compatible with PC based Windows controlled systems 084 PERMANENT BLK 0 1 0 Removes block hours setting for Parental Control and makes block permanent 087 REAR RGB EN 0 1 1 Enables RGB1 input Set to 1 to enable set to 0 to disable 088 EN NOISE ...

Page 45: ...093 RJP AVAILABLE is set to 1 005 CHAN LOCK Channel Lock CHAN LOCK is ideal if the system must always be on the same channel Changing channels with Channel Up Down or keypad numbers is impossible Channel Lock is inactive if set to 0 default Generally this feature is used in connection with START CHANNEL Installer item 004 where the start channel may for example be set to 3 or 4 If the start channe...

Page 46: ... 028 CH OVERIDE Channel Override If set to 1 the user can select channels with either Channel up down or by direct keypad entry If set to 0 only those channels that are added on the channel list can be selected 029 OLD OCV On Command VideoTM Set to 1 for operation with systems from On Command Corporation 030 ACK MASK M P I Communication Parameter Leave at default setting unless changed by Pay Per ...

Page 47: ...cant byte readable by M P I command Not linked to serial number 082 CHKSM ERROR Checksum Error Enforces rigid M P I checksum validation Set to 1 for validation Set to 0 to disable does not check checksum on M P I async port SPI is always checked 083 HANDSHK TIME Handshake Time Adds an additional delay to the handshake time which is 64 msec thus relaxing M P I timing requirements to be compatible w...

Page 48: ...er menu 104 START MINOR CHANNEL Sets XX XX minor starting channel at power up 0 NTSC If not 0 number selected is the Minor start channel number 106 ASP RATIO LOCK Aspect Ratio Lock Set to 1 to retain previous aspect ratio with power Off Set to 0 to retain default aspect ratio with power Off See item 96 Default Aspect Ratio above 107 BANNER SELECT Not applicable 116 VIDEO MUTE EN Video Mute Enable ...

Page 49: ...re Mode Contrast Brightness Color Sharpness Tint Color Temperature Screen Format Film Mode Sound Mode Treble Bass Balance Auto Volume Multi Track Internal Speaker Setup Time Clock Auto Off V Chip TVPG Rating MPAA Rating Menu Language SET ID Caption On Off Analog Mode Digital Mode Digital Font Option Reference TV Features Menus that can be Cloned ...

Page 50: ... to enter the index number of the ICON if known ENTER SELECT Changes the ICON after the number has been entered TV AV Changes the Aux input label This key is located in side of set or user remote control MENU Exits the editing process Changing a Channel s ICON on Master TV 1 With Channel Up Down select the channel you want to change the Icon for 2 With the Right or Left ADJ arrow select the letter...

Page 51: ... L26W56X installer menu a Reset the internal controller to factory default by accessing installer menu item 117 FACT DEFAULT set it to 1 and press ENTER The value will change back to 0 after the TV s internal controller has been restored to factory default condition b Within the Installer menu set the Installer menu items to the configuration required of your institution c It is important to set t...

Page 52: ...ASH File System Setup follows downloading 10 If report window shows all is done and you may power off power off PTC Upgrade Procedure Below order should be kept for UART upgrading 1 Power off TV 2 Select CONTROL using RS 232C SELECT switch in the rear 3 Open the Windows HyperTerminal program Set the properties to 115200 N 8 1 No Handshake and select the port to be used Click on the disconnect and ...

Page 53: ...Commands are not direct access tuning commands and they are also ignored CAMPORT Operation PPV The operation will be similar to that of the Stand Alone mode However the PPV providers may send different commands to the TV for the same user commands For instance some providers will always send a direct tune command when it receives a channel up down or a flashback command while other PPV providers w...

Page 54: ...TYPE 0x41 SOURCES ENABLED R W DATA STATUS TYPE 0xD2 CURRENT AV SOURCE R DATA STATUS TYPE 0X0D AUX SOURCE R MPI DATA STATUS AUX SOURCE ASSIGNMENT Troubleshooting Symptoms Possible Cause s Possible Solution s See Page s Software Corrupted Virtual and Physical channels appear in channel scan w Channel Up Down Can not direct enter channel number Channel not included in channel scan in TV controller Af...

Page 55: ...to select TV puts remote into L26W56X mode Not aimed at IR remote sensor Point remote at TV s IR receiver on TV Remote too far from IR sensor Move remote closer to TV s IR receiver or darken room IR path to TV s receiver obstructed Remove obstructions Weak batteries Replace batteries Wrong battery polarity Check that and match in battery compartment Too much light in room Dim room light Wrong Inst...

Page 56: ...nds Monitor LED on clone to assure that the blinking heartbeat pattern is present throughout clone operations After cloning be sure to disconnect power from the target TV for about 15 seconds Problem Possible Cause s Possible Solution s Remote does not operate clone Wrong Installer remote Only use an appropriate Installer remote to operate clone program mer with L26W56X LED does not blink M P I co...

Page 57: ...by removing and re connecting the AC power cord Observe the POWER LED and TV screen as soon as AC power is re applied Bad TV Did DTV Board POWER LED Turn On Momentarily No Check to see if TV is in Commercial Mode See Commercial Mode Check chart Did TV Turn On Momentarily No Yes Yes Yes Did TV Turn On Yes No Press POWER or ON OFF key on TV 1 Bad TV Press POWER or ON OFF or VOLUME UP DOWN or MUTE ke...

Page 58: ...onal Did you get a response Bad TV Yes No Did TV stop responding or continue to respond TV is in Commercial Mode Stopped responding TV is not in Commercial Mode Call Technical Support for Assistance Continued to respond Leave the TV set On Go to Installer menu by pressing MENU until the TV stops responding ...

Page 59: ...ting three color video signals COMPONENT VIDEO Uses three wires for transporting three color video signals The end result is usually better video quality DELETED Lets you remove channels from the list that the end user can scroll through using CH Channel Up Down HDMI High definition multimedia interface HDTV High definition television Refers to television signals that have higher resolution than o...

Page 60: ...by LG Electronics U S A Inc 2000 Millbrook Drive Lincolnshire IL 60069 Copyright 2006 LG Electronics U S A Inc Warranty Service New or remanufactured replacements for factory defective parts will be supplied by an LG authorized service center for one year from effective warranty date color picture tube two years Such replacement parts are warranted for the remaining portion of the original warrant...

Reviews: