background image

RECORD YOUR MODEL NUMBER 

The model and serial number of your Multimedia

TM

TV  are located on the back of the TV

cabinet. For your future convenience, we suggest that you record these numbers here:

Model No._________________________ Serial No. __________________________
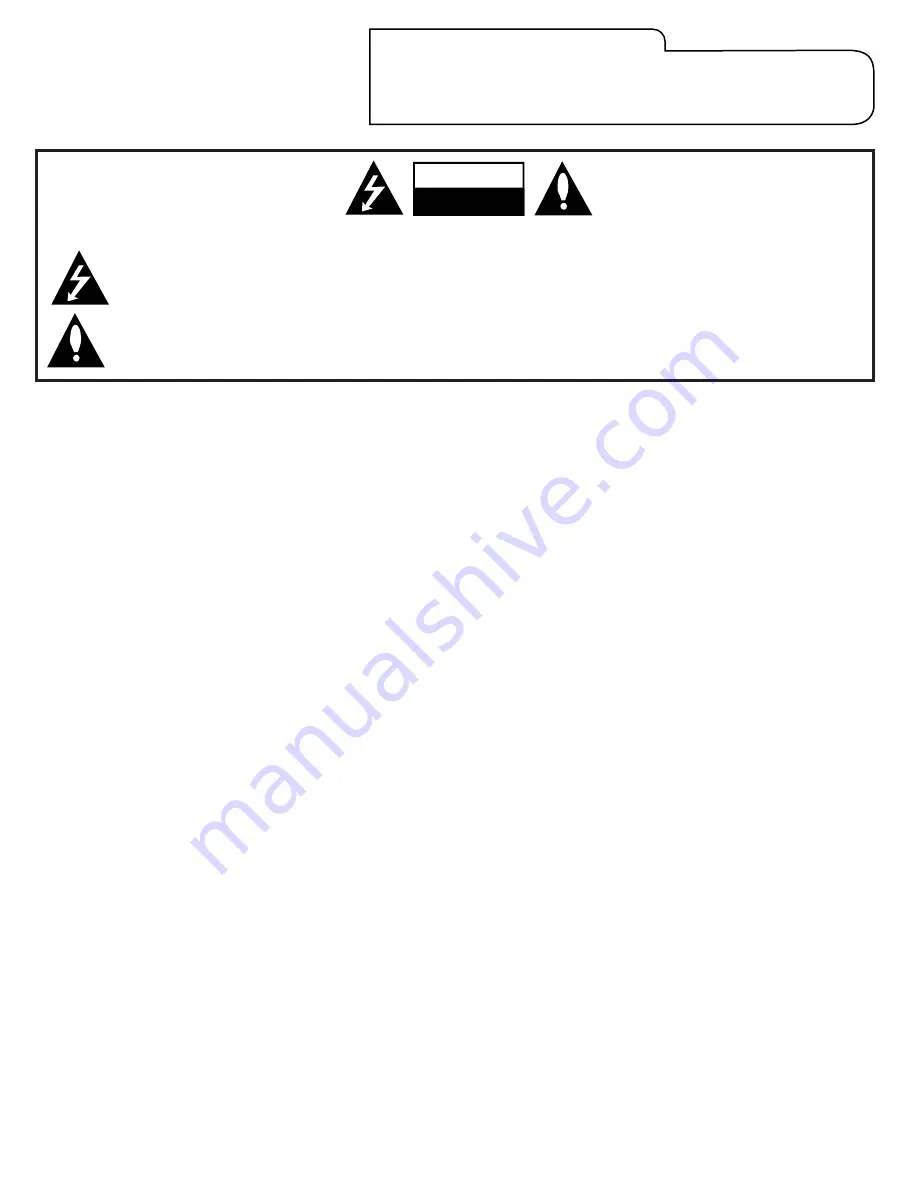
WARNING:

TO REDUCE THE RISK OF ELECTRIC SHOCK DO NOT REMOVE COVER (OR BACK). NO USER SERVICEABLE PARTS INSIDE. 
REFER TO QUALIFIED SERVICE PERSONNEL.
The lightning flash with arrowhead symbol, within an equilateral triangle, is intended to alert the user to the presence of uninsulated
“dangerous voltage” within the product’s enclosure that may be of sufficient magnitude to constitute a risk of electric shock to persons.

The exclamation point within an equilateral triangle is intended to alert the user to the presence of important operating and mainte-
nance (servicing) instructions in the literature accompanying the product.

WARNING:

TO PREVENT FIRE OR SHOCK HAZARDS, DO NOT EXPOSE THIS PRODUCT TO RAIN OR MOISTURE. 

POWER CORD POLARIZATION:

CAUTION: To prevent electric shock, match wide blade of plug to wide slot, fully insert.
ATTENTION: Pour éviter les chocs électriques, introduire la lame la plus large de la fiche dans la borne correspondante
de la prise et pousser jusqu’au fond.

NOTE TO CABLE/TV INSTALLER:

This reminder is provided to call the cable TV system installer’s attention to Article 820-40 of the National Electric Code (U.S.A.). The
code provides guidelines for proper grounding and, in particular, specifies that the cable ground shall be connected to the grounding sys-
tem of the building, as close to the point of the cable entry as practical.

REGULATORY INFORMATION: FCC Part 15

This product has been tested and found to comply with the limits for a Class B digital device, pursuant to Part 15 of the FCC Rules. These
limits are designed to provide reasonable protection against harmful interference when the product is operated in a residential installa-
tion. This product generates, uses and can radiate radio frequency energy and, if not installed and used in accordance with the instruc-
tion manual, may cause harmful interference to radio communications. However, there is no guarantee that interference will not occur in
a particular installation. If this product does cause harmful interference to radio or television reception, which can be determined by
turning the product off and on, the user is encouraged to try to correct the interference by one or more of the following measures: 

• Reorient or relocate the receiving antenna.
• Increase the separation between the product and receiver.
• Connect the product into an outlet on a circuit different from that to which the receiver is connected.
• Consult the dealer or an experienced radio/TV technician for help.

FCC Part 68

• This product complies with Part 68 of the FCC rules. On the back of this product is a label that contains, among other information, the
FCC registration number and Ringer Equivalent Number (REN) for this product. If requested, this information must be provided to the
telephone company.
• The REN is used to determine the quantity of devices that may be connected to the telephone line. Excessive RENs on the telephone
line may result in the devices not ringing in response to an incoming call. Typically, the sum of the RENs should not exceed five (5). To
be certain of the number of devices that may be connected to the line (as determined by the total RENs) contact the local telephone
company.
• If this product causes harm to the telephone network, the telephone company will notify you in advance that temporary discontinu-
ance of service may be required. But if advance notice isn’t practical, the telephone company will notify the customer as soon as possi-
ble. Also, you will be advised of your right to file a complaint with the FCC if you believe it is necessary.
• The telephone company may make changes to it’s facilities, equipment, operations or procedures that could affect the operation of the
product. If this happens, the telephone company will provide advance notice so you can make the necessary modifications to maintain
uninterrupted service.

• 

Connection to party line service is subject to state tariffs. (Contact the state public utility commission, public service commission, or 

corporate commission for information.) 
• If trouble is experienced with this product, for repair or warranty information, please contact Zenith Electronics Corporation. If the
product is causing harm to the telephone network, the telephone company may request that you disconnect the product until the prob-
lem is resolved.

COMPLIANCE:

The responsible party for this product’s compliance is: 

Zenith Electronics Corporation, 201 James Record Road, Huntsville, AL 35824, USA  • Digital TV Hotline: 1-800-243-0000.

CAUTION

:

Do not attempt to modify this product in any way without written authorization from Zenith Electronics Corporation. 
Unauthorized modification could void the user’s authority to operate this product.

MULTMEDIA I PHONE10/00

Multimedia

TM

is a trademark of Zenith Electronics Corporation

© Copyright 2002 Zenith Electronics Corporation

WARNING

RISK OF ELECTRIC SHOCK

        DO NOT OPEN

Summary of Contents for C27V28

Page 1: ...Operating Guide Warranty Model numbers C27V28 C32V28 C36V28 Direct View HDTV Monitors Copyright 2002 Zenith Electronics Corporation TM t a b l e o f c o n t e n t s p a g e 5...

Page 2: ...ng measures Reorient or relocate the receiving antenna Increase the separation between the product and receiver Connect the product into an outlet on a circuit different from that to which the receive...

Page 3: ...not be placed in a built in installation such as a bookcase or rack unless proper venti lation is provided or the manufacturer s instructions have been adhered to 11 Power Sources This product should...

Page 4: ...ice person nel 20 Damage Requiring Service Unplug this product from the wall outlet and refer servicing to qualified service personnel under the following condi tions a If the power supply cord or plu...

Page 5: ...olor Temp Cool Warm EZ Picture Custom Normal Movie Digital Pres Video Game Sports Night Time Weak Signal Video Sub Menu Aspect Ratio and other settings 32 Audio Menu 33 Bass Treble Balance Audio Mode...

Page 6: ...urrent program information see page 40 EZ Features Designed to make your viewing experience less work EZ Program EZ Clock EZ Timer EZ Picture EZ Demo EZ Bass EZ Sound EZ SoundRite EZ Mute For a more c...

Page 7: ...A CABLE Use to hookup your antenna or cable system LINE IN Connect your telephone line here for Caller I D hookup RGB COMPUTER INPUT Connect RGB computer here Computer Format SVGA 800 x 600p Computer...

Page 8: ...cable then you don t need any adapters A 300 to 75 ohm adapter is not included with the TV 300 TO 75 OHM ADAPTER Typical TV Back Flat Wire 300 ohm Antenna 300 75 ohm Adapter ANTENNA CABLE RF Coaxial W...

Page 9: ...Box In Out RF Coaxial Wire 75ohm 3 4 output switch Typical TV Back ANTENNA CABLE Locate the Antenna Cable jack on the back of the TV Connect the cable service wire that runs from the wall or cable box...

Page 10: ...IN VIDEO 1 IN DVD IN HD IN MONITOR OUTPUT AUDIO AUDIO AUDIO AUDIO AUDIO MONO MONO HD COMPUTER VIDEO VIDEO VIDEO S VIDEO 1 S VIDEO 2 G LINK ANTENNA CABLE RF Coaxial Round Wire 75ohm Connect your VCR to...

Page 11: ...UTER VIDEO VIDEO VIDEO S VIDEO 1 S VIDEO 2 G LINK ANTENNA CABLE Typical Cable TV Wall Jack Cable Box In Out 3 4 output switch Cable service with or without a cable box Connect your VCR to the Video 1...

Page 12: ...V Panel output switch R L LINE IN TO PHONE Your Zenith TV may be connected to a Super VHS VCR through the S Video Input located on the front or rear connection panel on your TV Hook up your S VHS VCR...

Page 13: ...ary from those in the illustrations Plug in your TV Do not plug it into a switched outlet Your Entertainment Machine is designed to operate on standard household current 120 volt 60 Hertz AC Do not at...

Page 14: ...select Front PC or Rear PC the front or rear computer inputs as the source for the picture and sound Hook Up a PC Computer Here is the basic setup to use your TV as a computer monitor If your computer...

Page 15: ...L R L R L RGB COMPUTER INPUT VIDEO 2 IN VIDEO 1 IN DVD IN HD IN MONITOR OUTPUT AUDIO AUDIO AUDIO AUDIO AUDIO MONO MONO HD COMPUTER VIDEO VIDEO VIDEO S VIDEO 1 S VIDEO 2 G LINK VCR Cable Box 17 LINE I...

Page 16: ...turn TV on and off Press the CHANNEL Up or Down button to select the next higher lower channel number Use either the VOLUME Up or Down button to adjust the sound level louder or quieter to your prefe...

Page 17: ...r of the direc tional arrows for an Enter func tion or use the ENTER key PIP Feature Keys PIP CH FREEZ PIP Lock For PIP Picture in Picture operation See PIP section FLSHBK FLASHBACK Returns to the pre...

Page 18: ...Z Program finds channels being received by the TV tuner Cable will not work unless you subscribe to a cable service Press MENU if not selected use the Up Down arrow to choose Setup Menu then press ENT...

Page 19: ...ter function Use the Up or Down directional arrow to highlight an option like CONTRAST then press ENTER You can select other menu options like COLOR TEMP by pressing the UP or DOWN directional arrow r...

Page 20: ...TV back Jackpack Set of Component Audio Video Input jacks R Comp on TV back Jackpack Rear Computer Input Connector F Comp on TV front Jackpack Front Computer Input Connector TV Back CR CB Y R L PR PB...

Page 21: ...ers numbers See page 44 CH 32 UPN 2 45 STEREO PIP CH 2 CBS PM GUIDE Plus GOLD system Premium electronic program guide that uses an easy to read grid guide system for channel navigation Offers current...

Page 22: ...and stores active channels you tune to by using Channel Up Down Add Del Surf 25 Choose which channels will appear when using Channel Up Down Adds favorite channels to Surf channel list EZ Clock 26 Set...

Page 23: ...Off If available shows program information when a new channel is tuned to or ENTER is pressed PIP Menu 41 Adjusts the PIP inset image appearance Advanced 42 43 44 Source Sense GUIDE Plus Caller ID op...

Page 24: ...to display No Surfing and return to normal channel tuning mode using Channel Up Down Mute Display Press MUTE to quiet the sound Press MUTE again to remove the sound Press MUTE again to restore the sou...

Page 25: ...Surf on only those channels specified as Surf channels will appear when using Channel Up Down Use the NUMBER keypad to go to the Channel you want to Add Delete or include in the Surf channel list Pre...

Page 26: ...ock Mode Auto Manual Time Set Highlight Time Set press the right arrow Set hours minutes using the NUMBER keypad or the left right arrow keys Use Flashbk for AM PM Automatic Mode TV sets the clock but...

Page 27: ...t the option will appear when the TV is muted or a program is tuned to that has Closed Captions or Text Press QUIT to remove menu and return to TV viewing Caption Text allows your Entertainment Machin...

Page 28: ...enu then press ENTER Use the Up Down arrow to select the Language option on your screen then press ENTER Use the Up Down arrow to choose any of the following options English Spanish or French then pre...

Page 29: ...f EZ Clock Captions Caption Text Language Source Menu Background EZ Program Add Del Surf EZ Clock Captions Caption Text Language Source Menu Background Setup Video Audio Lock Special Setup Video Audio...

Page 30: ...up Video Audio Lock Special Next Back MENU Move 1 2 3 4 5 6 7 8 9 0 mute vol ch flshbk freez pause rew f f play vcr record stop skip info ratio guide pip page down page up quit tv vcr power dvd hd stb...

Page 31: ...re Cool or Warm Advanced Video Menu Options See next page EZ Picture Choose either Custom Normal Movie Digital Video Game Sports Night Time or Weak Signal Custom Allows you to adjust the picture the w...

Page 32: ...ts vertical position of picture Using the Up Down arrow choose Aspect Ratio on the menu or choose another option then press ENTER Using the Up Down arrow change the Aspect Ratio to the correct video p...

Page 33: ...Mode Choose from Stereo sound Mono sound or 2nd Audio SAP EZ Bass Turns the bass booster function on or off Front Surround Turns front surround sound on or off EZ SoundRite Turns the uniform volume l...

Page 34: ...tal Control to be active all the time If not you can turn it on or off with the Lock On Off option If used this optional feature can block undesirable programming from appearing on the TV Note Lock al...

Page 35: ...EZ Program Add Del Surf EZ Clock Captions Caption Text Language Source Menu Background Setup Video Audio Lock Special Video Audio Special Setup Lock Next Back MENU Move 1 2 3 1 2 3 4 5 6 7 8 9 0 mute...

Page 36: ...Y7 Children 7 and over Considered suitable for children over 7 may contain Fantasy Violence Scenes Lock Menu Structure Lock menus with various restriction options are shown below Unblocked Blocked Aux...

Page 37: ...ted press ENTER Use the Up Down arrows to choose Sleep Timer then press ENTER Use the Up Down arrows to select a TV turn off time from the options listed press ENTER Press QUIT to return to TV viewing...

Page 38: ...ER Use the number keypad or the Left Right arrows to pick a time for the TV to automatically turn itself off each day Use FLSHBK to set AM or PM Using the TV On Off Timer Option With the EZ Timer menu...

Page 39: ...ections such as A E To continue channel labeling select another channel or if you are finished press QUIT to remove menu 1 2 3 4 EZ Timer CH Labels XDS Display PIP Menu Advanced EZ Demo Audio Lock Set...

Page 40: ...ss MENU use the Up Down arrow to select the SPECIAL menu on your screen then press ENTER Use the Up Down arrow to select the XDS DISPLAY option then press ENTER Use the Up Down arrow to choose On or O...

Page 41: ...e the Up Down arrow to select the PIP Menu option then press ENTER Your options are Contrast Adjusts the level of difference between white and black in the TV picture The more contrast the brighter th...

Page 42: ...r in white text on the menu Unconnected Sources Appear in gray text on the menu Source Sense Off Default TV shows all source menu options Selected Source Appears in yellow text on the menu Connected N...

Page 43: ...to remove menus and return to TV viewing Set up the TV to have the GUIDE Plus programming grid appear when the TV is turned on GUIDE Plus Option Menu 1 2 3 TO SET PRESS EZ Timer CH Labels XDS Display...

Page 44: ...Off Phone rings No caller number displayed 5 Recent Calls 123 456 7890 11 39 PM OCT 22 123 567 8904 8 30 PM OCT 22 123 678 9045 8 33 AM OCT 21 123 789 0456 10 33 AM OCT 21 123 890 4567 7 33 PM OCT 19...

Page 45: ...he Up Down arrow to select the EZ DEMO option then press ENTER Use the Up Down arrow to choose either On then press ENTER EZ Demo will continue to run even if the TV is turned Off and On again until i...

Page 46: ...PIP source to Antenna as an example Then if you use the TV s tuner to choose your channels you can enjoy 2 tuner PIP channel scan capability for both the main screen and the PIP inset PIP can be used...

Page 47: ...ture and PIP inset Main Picture Source In Main picture channel tuning mode press SOURCE to change the source to Antenna Video 1 Video 2 or F Video Or use the Setup Menu Musical Note Symbol Indicates i...

Page 48: ...lus GOLD system to view schedule to watch and schedule to record programs listed in the Program Grid Guide Note Be sure emitter cable for the VCR and Cable Box are in position and connected see page 1...

Page 49: ...box the cable box screens configuration appears Select your cable box brand from a list Select cable box output channel 2 3 4 you need to check in your cable box hardware configuration Note In this co...

Page 50: ...r ENTER Goes to highlighted channel on Grid Accepts the action QUIT Exits GUIDE Plus GOLD fea ture and returns to the last channel viewed in TV mode INFO Shows selected program s VCR PlusCode and chan...

Page 51: ...s mode Current Time Shows current time PIP Picture in Guide Live video of selected program while user is scrolling the Program Grid Click GUIDE to place this program on TV screen and exit Grid Guide U...

Page 52: ...schedule the program to be recorded Green Key Press VCR to go to the VCR Plus recording menu Press GUIDE to return to TV viewing Note Requires a VCR for recording Notes You must first set up the GUIDE...

Page 53: ...r the Right arrow fig 2 If you want to go back to the main list or close the current story press INFO again When watching a story press the Left Right arrows to change page and get additional informat...

Page 54: ...us Grid TV On Off Setup Each time you turn your TV on the GUIDE Plus program grid display appears on the screen automatically To remove GUIDE Plus grid press QUIT or GUIDE Note To turn off GUIDE Plus...

Page 55: ...ntil the indicator light turns on then release the keys Using the NUMBER keypad enter the three number Brand Code found in the chart on the Brand Code reference pages 56 57 Press ENTER to save the cod...

Page 56: ...266 282 725 Quasar 259 295 Radio Shack 213 265 730 RCA 216 220 228 240 242 249 260 266 282 283 284 285 286 287 288 708 710 711 725 Realistic 212 213 265 730 Saisho 722 Salora 297 Samsung 220 230 Sansu...

Page 57: ...i 925 926 Onkyo 923 924 946 Optimus 920 921 922 Panasonic 431 432 945 Phillips 421 433 434 Pioneer 431 435 944 Quasar 432 Radio Shack 431 441 RCA 437 943 Sanyo 438 439 Sears 936 Sharp 441 442 Sherwood...

Page 58: ...DVD Digit 4 HD STB Digit 4 5 TV Digit 5 VCR Digit 5 Cable Digit 5 DVD Digit 5 HD STB Digit 5 6 TV Digit 6 VCR Digit 6 Cable Digit 6 DVD Digit 6 HD STB Digit 6 7 TV Digit 7 VCR Digit 7 Cable Digit 7 D...

Page 59: ...w HD STB Right arrow PIP Inset Move TV Enter VCR Enter Cable Enter DVD Select HD STB Enter ratio TV Picture Ratio VCR Timer Cable Timer DVD Program HD STB Ratio sleep TV Sleep Timer N A N A N A N A vc...

Page 60: ...cabinet air dry before turning the Presentation TV on Use a quality wood cleaner and polish This will protect the TV from dirt and dust as well as keep the cabinet looking new If you leave your TV do...

Page 61: ...on 7 9 11 Local interference Try different channel Turn off interfering appliance 16 17 Scrambled CATV channel Tune to unscrambled channel 16 17 No CATV reception Cable wire not connected Connect cabl...

Page 62: ...me Zone Reset to your time zone 26 Daylight Savings Time wrong If not observed in your area set to Off Time does not set automatically Set clock manually Auto Clock doesn t work Turn Auto Clock option...

Page 63: ...ted on menu Choose On to make Caller ID work 44 shows on screen Caller has an unlisted number Cannot display unlisted numbers Computer Problems No Laptop Computer image Video monitor out set to intern...

Page 64: ...r other A V equipment ANTENNA The physical receiver of television signals sent over the air A large metal piece of equipment does not always have to be visible for your home to be using an antenna DEL...

Page 65: ...P A G E 6 5 206 03807 Notes...

Page 66: ...P A G E 6 6 206 03807 Notes...

Page 67: ...P A G E 6 7 206 03807 Notes...

Page 68: ...CT SPECIAL OR PUNITIVE DAMAGES OF ANY NATURE EVEN IF ADVISED OF THE POSSIBILITY OF SUCH MAMAGES INCLUDING WITHOUT LIMITATION LOST REVENUES OR PROFITS LOST OR CORRUPTED PROGRAMMING OR DATA OR ANY OTHER...

Reviews: