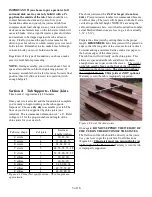
IMPORTANT: If you choose to put a partial or full
surround deck next to your tub, build it with a 1”+
gap from the outside of the tub.
There should be no
contact between the deck and your tub. As your
foundation settles and your chine joists and tub floor
compress under load, changes in any contact with the
deck can cause lateral stress on the tub staves which will
cause tub leaks. Also, a tight fit creates a place for debris
and moisture to be trapped against the tub and cause
decay. Finally, you need the gap for clearance for the
skirt on your hot tub cover, which centers your cover and
holds in heat. Remember to also make 4 reach-through
cutouts to hook your cover hold down bands.
Regardless of the type of foundation you choose, make
sure it is level before proceeding.
NOTE:
During assembly, you will need about 3 feet of
space all around the tub for the tightening process. If
necessary, assemble the tub a few feet away from its final
position, then lift, slide or lower it into position (with
enough helpers)!
Section 4: Tub Supports - Chine Joists
Time needed: Approximately 40 minutes
Once your site is selected and the foundation is complete
you’re ready to begin working on the tub supports.
Important! Choose a
dry day
to assemble your tub. The
floor of your tub is supported by chine joists (not
included). The recommended dimension is 4” x 6”. Refer
to Figure 4.1 for the proper number and length of the
chine joists for your size tub.
Tub size, shape
# of joists
Joist max.
lengths (inches)
4’ circle
3
30, 43, 30
5’ circle
4
33, 48, 48, 33
6’ circle
4
34, 62, 62, 34
7’ circle
5
48, 72, 78, 72, 48
8’ circle
5
52, 78, 90, 78, 52
4’ ellipse
3
20, 40, 20
5’ ellipse
3
30, 52, 30
6’ ellipse
4
34, 62,62, 34
7’ ellipse
4
42, 72, 72, 42
8’ ellipse
4
48, 80, 80, 48
Figure 4.1 Chine joist specifications - Note: lengths are
approximate
The chine joists must be
4”x6” or larger (do not use
4x4s)
. Pressure treated lumber is recommended because
it will not decay. The joists will be placed with the 6” side
vertical to get the full height. NOTE: We are using the
call-out dimensions here. As with all construction lumber,
actual finished dimensions are less (e.g. a 4x6 is actually
3-½” x 5-½”).
Prepare the chine joists by cutting them to the proper
length.
REMEMBER:
4x6 chine joists will be placed on
edge so that the long side of the cross-section is vertical.
Consider adding a moisture barrier, such as tar paper, to
the bottom edges of the chine joists.
The tub floor will sit directly on the chine joists. This
allows air space under the tub and allows the drain
enough clearance to pass under the staves. The weight
of the tub must be borne on the floor of the tub which is
supported on the chine joists.
The staves do not bear
the weight of the tub. Chine joists are NOT optional.
Warranty is void if a tub is improperly supported.
Figure 4.2 Level the chine joists
Once again:
DO NOT SUPPORT THE WEIGHT OF
THE TUB ON THE BOTTOM OF THE STAVES.
The flat floor of the tub should be directly on the joists.
Use your level to get the joists level in all directions
(Figure 4.2.)
Chine joists must run perpendicular (at
right angle to) the floor seam.
Warranty is void if a tub
is improperly supported.
3 of 16


