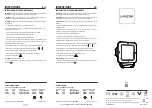
FIG. A
FIG. B
FIG. C
1
2
3
4
CAMBIO DE BATERÍAS / REPLACEMENT OF BATTERIES / REMPLACEMENT DES BATTERIES
No se pueden realizar operaciones de mantenimiento en presencia de una atmosfera potencialmente explosiva. Antes de realizar
cualquier operación de mantenimiento, cortar la alimentación de la luminaria y apagarla mediante telemando
.
1-
Desatornillar el tornillo hexagonal con llave Allen de 2 mm (FIG. A).
2-
Girar la tapa hasta extraerla completamente (FIG. A).
3-
Extraer las regletas de conexión, sin desconectar ningún cable (FIG. B).
4-
Con una llave de tubo de 10mm, quitar las 2 tuercas M6 y las arandelas que la acompañan, que fijan la carcasa metálica del interior de
la luminaria (FIG. C).
Maintenance operations cannot be carried out in the presence of a potentially explosive atmosphere. Before performing any
maintenance operation, cut off the power supply of the luminaire and turn it off by remote control
.
1 - Unscrew the hexagonal screw with the 2 mm Allen key (Fig. A).
2 - Turn the cover until being completely taken off (Fig. A).
3
- Take away the connection plug, without disconnecting any wire (Fig. B).
4
- With the 10 mm tube-key, take away the two M6 nuts and the washers, which fix metallic chassis inside the luminaire (Fig. C).
Les opérations de maintenance ne peuvent pas être effectuées en présence d'une atmosphère potentiellement explosive. Avant
d'effectuer toute opération de maintenance, couper l'alimentation du luminaire et l'éteindre par télécommande
.
1-
Dévisser la vis hexagonale à l'aide d'une clé Allen de 2mm (FIG. A).
2-
Tourner le couvercle jusqu'à l'extraire dans sa totalité (FIG. A).
3-
Extraire les borniers de raccordement, sans déconnecter aucun câble (FIG. B).
4-
A l'aide d'une clé à tube de 10mm, enlever les 2 écrous M6 et les rondelles fixant la carcasse métallique à l'intérieur du luminaire (FIG. C).
ES
FR
EN
5
FIG. E
FIG. F
5- Extraer la carcasa metálica (FIG. D)
6- Desatornillar el reflector para acceder a la carcasa metálica (FIG E).
7- Las baterías se encuentra en el interior de la carcasa metálica (FIG F). Para cambiar las baterías primero desconectaremos los polos positivo y
negativo para posteriormente quitar la batería usada. Antes de colocar la nueva batería, comprobar que la batería es la adecuada para el
modelo de luminaria. Colocar la batería nueva en su ubicación y conectar los polos positivo y negativo, manteniendo la polaridad inicial.
5- Take away the metallic chassis (Fig. D).
6- Unscrew the reflector to access the metal housing (FIG E).
7- The batteries are located inside the metal housing (FIG F). To disconnect the batteries, disconnect the positive and negative poles, then
take away the used battery. Before placing the new battery, check that the battery is the right one for that luminaire. Place the new
battery in its position and connect the positive and negative poles, keeping the initial polarity.
5- Retirez le boîtier métallique (FIG. D)
6- Dévissez le réflecteur pour accéder au boîtier métallique (FIG E).
7- Les piles sont situées à l'intérieur du boîtier métallique (FIG F). Pour changer les batteries, nous allons d'abord déconnecter les pôles positif
et négatif, puis retirer la batterie usagée. Avant d'installer la nouvelle batterie, vérifiez que la batterie est adaptée au modèle de luminaire.
Placez la nouvelle batterie à son emplacement et connectez les pôles positif et négatif, en conservant la polarité initiale.
ES
FR
EN
FIG. D
4-8
Ref:
EIZA005MLA001


