


14
CONFIDENTIAL
DOC-USR-0133-01
____________________________________________________________________________________
Z3 Technology, LLC
♦
100 N. 8th St. STE 250
♦
Lincoln, NE 68508-1369 USA
♦
+1.402.323.0702
5.7
Start Encoding
Click the “start” button at the bottom right corner of the screen.
*Note:
It is possible that the system may have already started encoding (if valid input is connected, it
will autostart 20 seconds after booting up). You can tell this if the status in the lower right corner of
GUI says “RUNNING”. If the encoder is running, click “Stop”, wait for status to say “STOPPED”, and
then click “Start” for the newly entered settings to take effect.
If the status is “POLLING”, a valid HDMI input was not detected in HDMI In.
If you want to encode 1080p60, you must first change “Operating Mode” at the bottom right from
“Encode Interlaced/Progressive” to “Encode Single CH No Scale.” Note that, in “Encode Single CH
No Scale” mode, only the CH1 tab can be used.
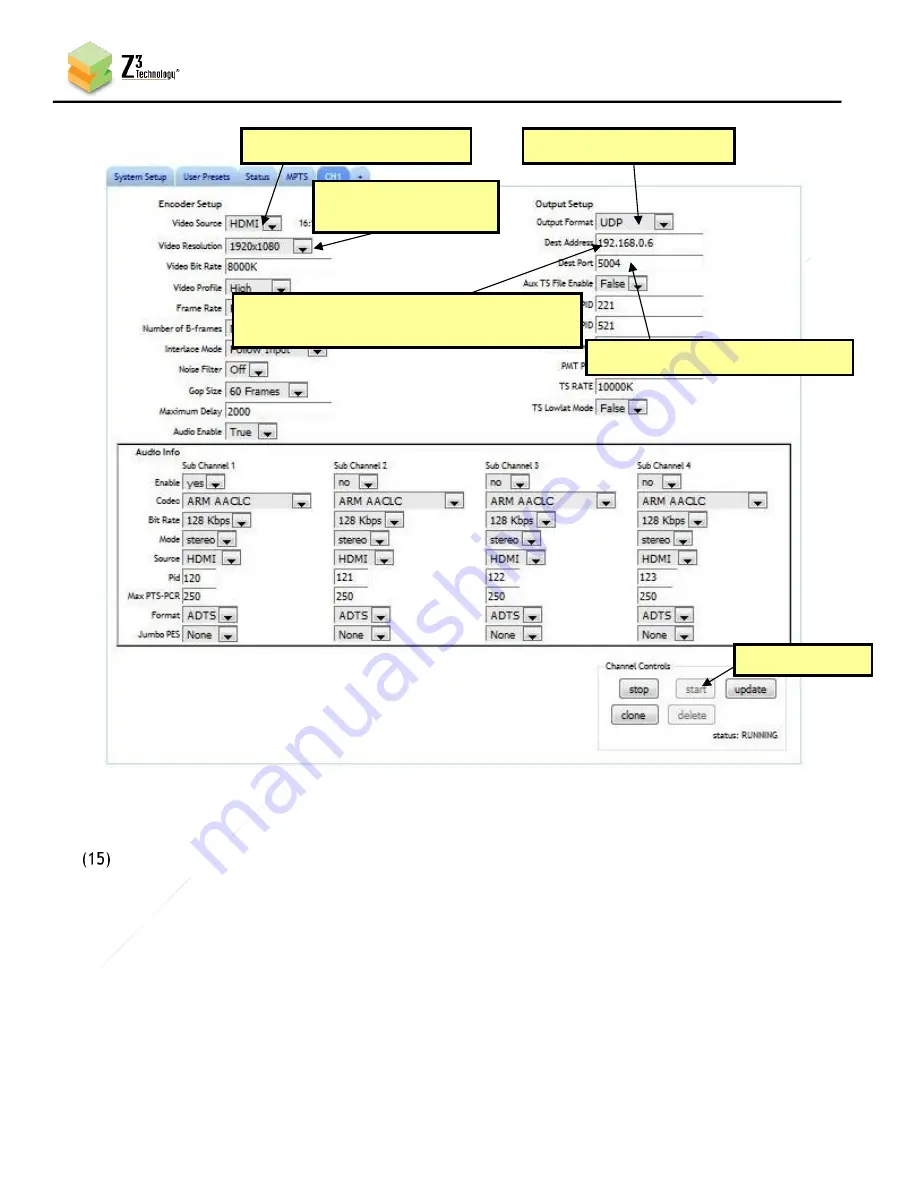
Figure 5 Settings to Encode to UDP
(f) Click “start”
(c) Change format to UDP
(d) Change Dest Address to IP address of PC
or multicast address
(e) Make sure Dest Port is 5004
(a) Verify source is “HDMI”
(b) Verify resolution
is “1920x1808”


