FV4K-DCK-1X User Instructions
DOC-USR-0127-07
______________________________________________________________________________________
Z3 Technology, LLC
♦
100 N 8
th
ST, STE 250
♦
Lincoln, NE 68508-1369 USA
♦
+1.402.323.0702
16
NOTE:
Other Cameras may require RCA or BNC connectors for composite output. Contact the camera
manufacturer if there is uncertainty and sales to purchase the correct cable. Connect camera to power if
required.
(3)
Connect an Ethernet cable from
Ethernet
on the back of the camera to a switch, router or other
DHCP server on the same network as your Windows PC.
(4)
Connect the 12V power supply to
+12V
on the camera and plug into a power outlet.
If Power over Ethernet (PoE) is available, then no connection to the power supply is required.
It will take 15-30 seconds to boot.
5.1
Access the User Interface Using ZFinder
ZFinder is a PC utility that allows you to find any Z3 Technology product on your network. If you have
not yet downloaded this to your computer, you can find this program at
.
(1)
Verify your PC is set to DHCP. If it is set to a static IP address, ZFinder may be unable to discover
your camera.
Note:
The FV4K-DCK-1X is set to DHCP by default. If no DHCP server is available on the network, a static IP
address of
192.168.0.120
and a netmask of
255.255.0.0
will be assigned. The IP address can be manually
entered as the URL in a browser window to access the user interface.
(2)
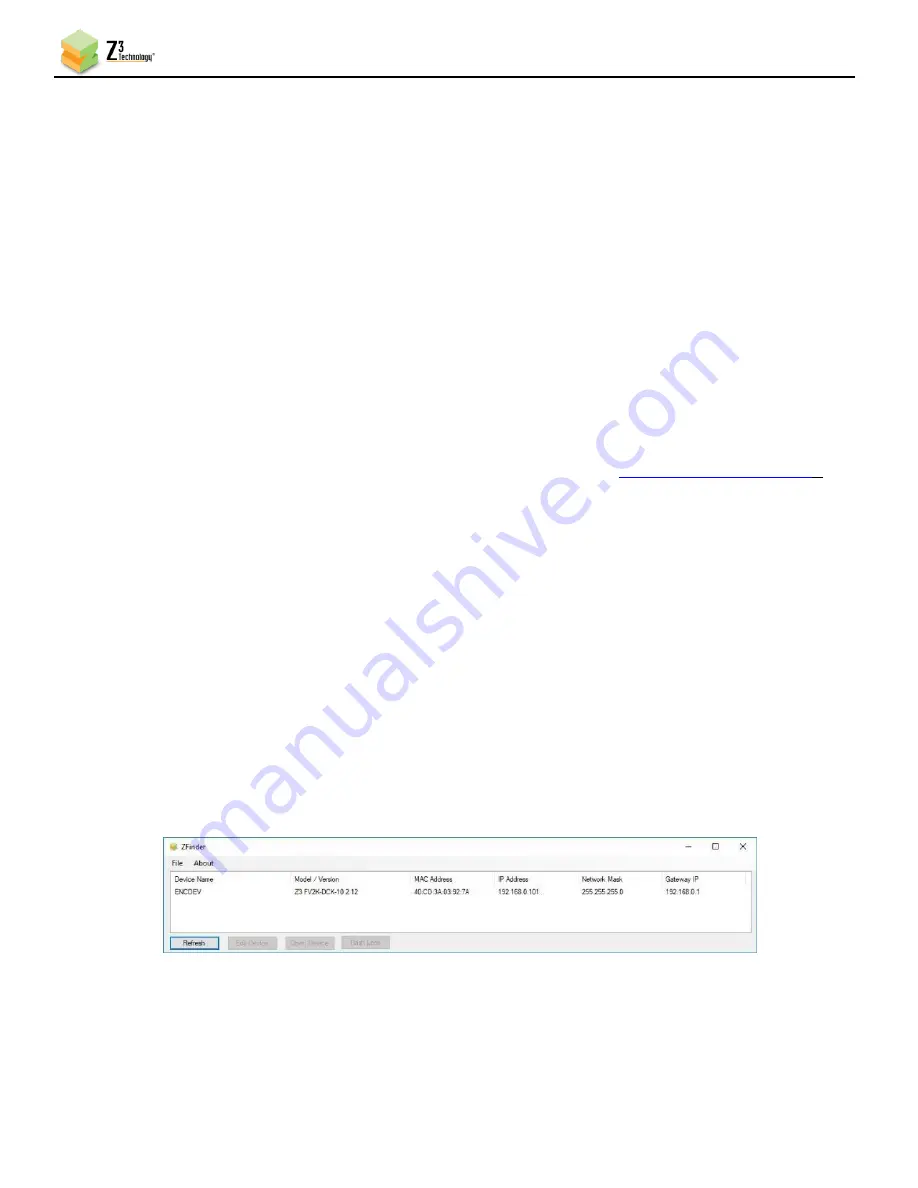
Run the ZFinder PC utility on your PC. You may need to allow it past any firewalls or security
programs on your PC. The ZFinder window appears and completes a scan of the network. ZFinder
then lists all Z3 systems connected to the network. The FV4K-DCK-1X appears.
(3)
Click on the FV4K-DCK-1X entry in the window to select it. This will cause the
Edit Device
,
Open
Device
and
Flash LEDs
buttons to activate.
Figure 12 ZFinder with the FV4K-DCK-1X Selected
Note:
Selecting Edit Device allows for manual changes to network settings. See Section 10.9, ZFinder, for more


