background image

4

Boundary Scan

1

Boundary Scan setup

Step1

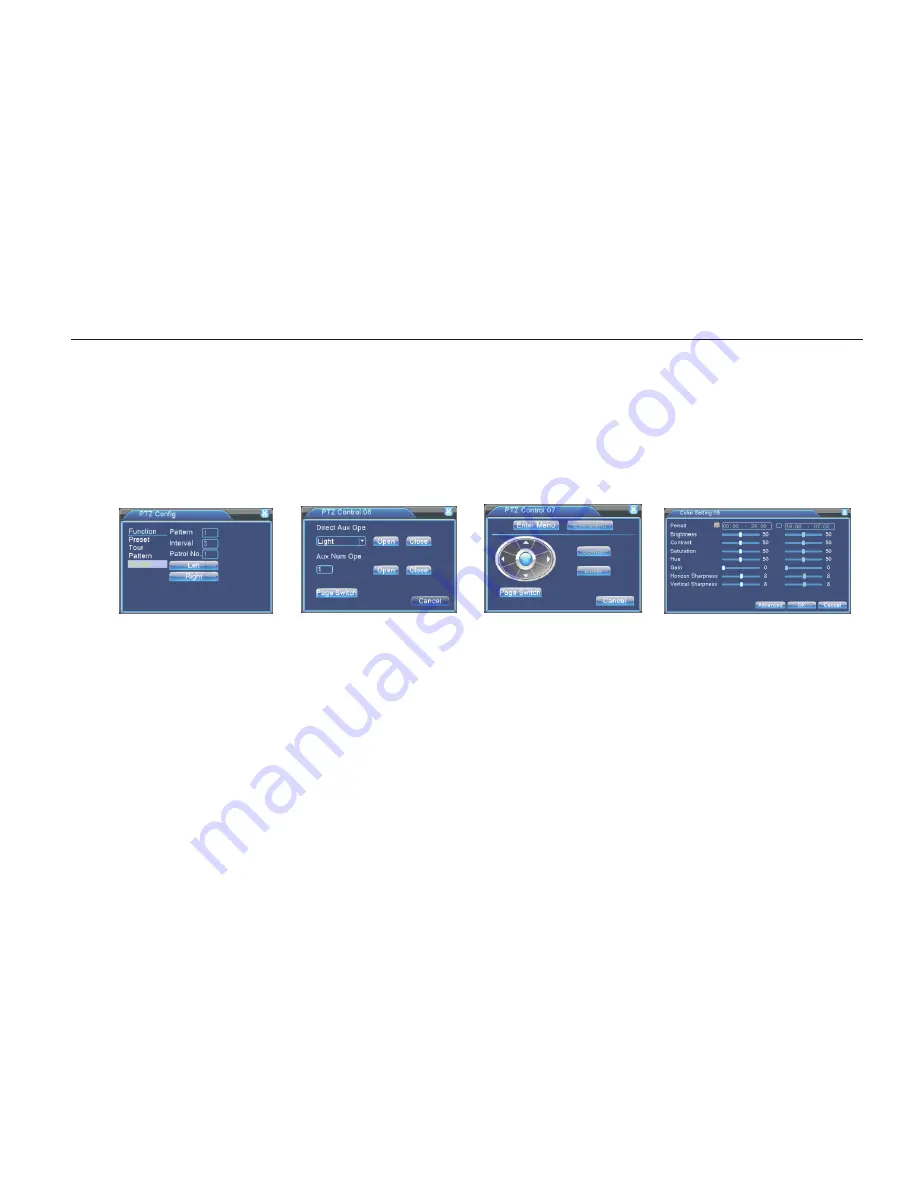
In Picture 3.10, click Direction button to turn the PTZ to preset direction, then click Setup button enter Picture 3.15, select

He left boundary, return to Picture 3.10;
Step2

Please click direction arrows to adjust PTZ direction, click Setup button enter Picture3.15, then select the right boundary ,

return to Picture 3.10;

Step3: Complete setup, that is the position of left and right boundary 

2

Boundary Scan Calls

In Picture 3.10, click Page Shift button, then enter PTZ control menu as shown in Picture 3.12. Please input the number of scan in the value blank , then 
click Scan button

PTZ begins to work on the scan line . Click Stop button to stop.

5

Horizontal Rotating

Click Horizontally Rotating button, PTZ begins to rotate horizontally (relative to the original position of the camera). Click the Stop Button to stop.  


Picture 3.15 Boundary Scan Setup           Picture 3.16 Auxiliary Function Control                Picture 3.17 PTZ menu settings                           Picture 3.18 image color

6

Rotate

Click on horizontal Rotating button, PTZ turn around.

7

Reset

PTZ restart, all the data clears to 0.

8

Page Shift

In Picture 3.12, click Page Shift button into Picture3.16, setting auxiliary function. Auxiliary number 

corresponding to 

auxiliary Switch on the decoder.

Intuitive Auxiliary Operation

 choose auxiliary equipment, select Open or Close button, switch control

Auxiliary Number

The operation of corresponding auxiliary switch according to PTZ agreement

Page  Shift

In  Picture  3.16

click  Page  Shift  button  enter  the  Picture  3.17  PTZ  Main  Menu  ,  the  menu  itself  can  be  control  by  the  Menu  control 

buttons 

 Enter Menu

enter PTZ menu

 Exit Menu

exit PTZ menu

 Direction Button

the function buttons to choose PTZ menu

 Confirm/Cancel

to


choose PTZ menu

3.5.6 Color setting

Set  the  selective  image  parameters  (current  channel  for  single  window  display  and  cursor  place  for  multi-window  display). You  can  use  the  desktop 
shortcut  menu  and  enter  the  interface.  The  image  parameters  include:  tonality,  brightness,  contrast,  saturation.  You  can  set  Different  parameters  at 
different time sections. 

Network


Hard


Disk


Videocorder


Fast


Operation


manual

14

Summary of Contents for D700 Series

Page 1: ...D700 Series D800 Series 4 8 16 24 32 CH NETWORK DIGITAL VIDEO RECORDER...

Page 2: ...fall into or infiltrate the DVR Please brush printed circuit boards connectors fans machine box and so on regularly Before the dust cleaning please Switch Off the power supply and unplug it Do not di...

Page 3: ...menu 10 3 5 1 Main menu 11 3 5 2 Video playback 11 3 5 3 Record Mode 12 3 5 4 Alarm output 14 3 5 5 PTZ control 15 3 5 6 Color setting 15 3 5 7 TV adjust 15 3 5 8 Logout 16 3 5 9 Window switch 16 4 Ma...

Page 4: ...28 4 5 3 Online user 29 4 5 4 TV adjust 29 4 5 5 Auto maintenance 29 4 5 6 Resume default 29 4 5 7 Upgrade 30 4 6 System information 30 4 6 1 Hard disk information 30 4 6 2 Code stream statistics 30 4...

Page 5: ...ctively Surveillance function through monitor or display Storage non working hard disk dormancy processing which is convenient to radiate heat reduce power and extend the life span special storage for...

Page 6: ...of the DVR IR is remote control operation indicator LOCK is panel lock indicator HDD is hard disk indicator POWER is power indicator 6 Direction split confirm Keys t t t t u u u u Exit key USB2 0 por...

Page 7: ...t the screws in the bottom of the DVR for fixing the HDD Fix the HDD by screws Connect the data lead Connect the power lead Cover the housing Fix the housing Name Description Video input Video output...

Page 8: ...tput USB NET Power Connected to USB Pendrive or mouse and used for system software upgrade or video file backup RJ 45 network port connected to network cable and used for remote browse or control Powe...

Page 9: ...er supply switch in the real panel must be turned off 3 Replace the battery Before replacing the battery the setting information must be saved and the power supply switch in the real panel must be tur...

Page 10: ...ce video and the alarm status are shown in Each window 3 5 Desktop shortcut menu In preview mode you can right click mouse to get a desktop shortcut menu The menu includes main menu video playback vid...

Page 11: ...wed Note The storage must be installed before the file backup If the backup is terminated the already backup can playback Individually Detect Detect the storage connected with the DVR such as hard dis...

Page 12: ...ght click mouse to exit 3 5 3 Record Mode Please check current channel status means it is not in recording status means it is in recording status You can use desktop shortcut menu or click main menu r...

Page 13: ...tion 8 directions control is supportive 4 directions in Front panel is supportive high speed PTZ Full screen show channel image Left press mouse and control PTZ to rotate orientation Left press mouse...

Page 14: ...of Cruise between Points In Picture 3 10 click Page Shift button enter PTZ control menu as shown in Picture 3 12 Please input the number of cruise in the value blank then click Cruise between Points...

Page 15: ...ture 3 18 image color 6 Rotate Click on horizontal Rotating button PTZ turn around 7 Reset PTZ restart all the data clears to 0 8 Page Shift In Picture 3 12 click Page Shift button into Picture3 16 se...

Page 16: ...ture 3 20 shut down the system logout Quit the menu Offer password next entrance shut down Quit the system Turn off the power supply When press the shut down button there is schedule hint After three...

Page 17: ...patrol Alarm input Set alarm input channel equipment type linkage parameters defending time section alarm output screen hint recording PTZ patrol Alarm output Set alarm output screen hint recording P...

Page 18: ...already login user Lock the account after break until booting up again TV adjust Adjust TV upside downside nearside starboard distance Automatic maintenance Set automatic reboot system and automatic...

Page 19: ...Record 1 30 seconds before the action time length is decided by the code stream Recording control Set video state configuration manual or stop configuration Record according to the set video type comm...

Page 20: ...lete the file stop Stop the backup backup Click backup button and the dialog box is popped up You can choose the backup file according to the type Channel and Time Remove Clear the file information ad...

Page 21: ...sections means the set valid interval Only one alarm signal is turned on even there are several motion detect signals in the set interval alarm output Start the external equipment of corresponding lin...

Page 22: ...d brightness or reaching the set sensitivy parameter the camera mask function is turned on and the linkage function is turned on Picture 4 8 camera mask Picture 4 9 video loss Picture 4 10 alarm input...

Page 23: ...em time Set the system data and time data format Choose the data format YMD MDY DMY list separator Choose list separator of the data format Picture 4 12 regular setu Picture 4 13 summer time week setu...

Page 24: ...00kbps CIF 384 1500kbps QCIF 64 512kbps video audio When the icons are all in reverse displayed the video file is video and audio multiplex stream Combination coding combination coding When the icons...

Page 25: ...o configure the advanced network functions or double click the service button to configure the parameters Picture 4 17 network service Picture4 18 PPPOE setup PPPoE setup Input the user name and passw...

Page 26: ...in name can be translated only it is the correct Picture 4 20 EMAIL setup Picture 4 21 IP purview setup DNS configuration Port Email server port number SSL Decide whether using Secure Socket Layer pro...

Page 27: ...ver area Code output In the network surveillance and video file mode include channel name time title channel title recording status alarm status code stream information transparency and cover area Cha...

Page 28: ...Picture 4 25 PTZ setup Picture 4 26 serial port setup Picture 4 27 patrol setup serial port function Common serial port is used to debug and update program or set up specific serial port baud rate Cho...

Page 29: ...tring is invalid The middle blank in the char string is valid Legal char include letter number underline subtraction sign dot 2 There is no limit in the user and user team You can add or delete the us...

Page 30: ...delete team button 4 5 3 Online user Look up the network user information in the local DVR You can choose the network user and cut the connection Then the user is locked until next boot strap 4 5 4 TV...

Page 31: ...nformation will display 4 6 2 Code stream statistics Display the code stream Kb S and hard disk capability MB H in real time It displays as the wave sketch map 4 6 3 Log information Look up system log...

Page 32: ...nput voltage is not stable or too low 2 The hard disk is damaged or the hard disk lines are broken 3 The power of the switch power supply is low 4 Frontal video signal is not stable 5 Bad heat radiato...

Page 33: ...d 3 Update the different program with the origin program files 4 The video files to look up are covered 5 The recording is not on 7 The local video is not clear Possible reasons are as followed 1 The...

Page 34: ...eflection otherwise the PTZ control is not stable 8 The distance is too far 12 The motion detect is not working Possible reasons are as followed 1 The time range set is not correct 2 The motion detect...

Page 35: ...hard disk are shared the same data lines 2 The data is too much Please stop recording and backup 3 The data exceeds the backup storage 4 The backup equipment is not compatible 5 The backup equipment...

Page 36: ...X503Bundle exe file to play AVI video files 4 The DivX503Bundle exe and ffdshow 2004 1012 exe files must be installed in the windows xp system 23 I can not remember the advanced code or network code i...

Page 37: ...me function as Multi window button in the front panel 2 Numeric button Code input number input channel switch 3 Esc Same function as Esc button in the front panel 4 Direction button Same function as d...

Page 38: ...es of each channel creating files in an hour Example The video files in each channel need 200M capability in an hour For 4 channels and one month 24hours a day the needed hard disk capability is 4chan...

Page 39: ...Surveillance image quality PAL D1 704 570 Playback image quality PAL D1 704 576 Image compression H 264 mp Aubio Audio compression G711A Talk back Supportive Image control 4 options Recording speed CI...

Page 40: ...Rj45 10M 100M adoptive Ethernet network port PTZ control port 1RS485 USB port 2 USB ports 4 ch 4 ch Hard disk port 2 SATA port Power supply 12V 4 15A external power supply Power consume Working temper...

Page 41: ......

Reviews: