background image

Chapter I Beginning Use


1.3.3 Fixing the GPS Navigator with Mounting Kit 

The mounting kit is composed of a back splint and a bracket. To use the GPS navigator in an 

automobile, fix it on the dashboard under the front windshield. 

[Note] Do not place the GPS navigator in positions obstructing the driver’s vision. Do not place it 

without fixing it, or in the place of air bag or the area after the air bag is inflated. 

1.3.4 Using T-FLASH Card 

Copy mapping applications, map data and media files in a T-FLASH card. Insert the card in the 

corresponding slot. 

[Note] 

1. Do not take out the T-FLASH card while an navigation program is being run or a media file 

is being played. 

2. To avoid drop or crash of the T-FLASH card, do not exert heavy pressure on it or bend it. 

3. Avoid using or storing the T-FLASH card in high temperature, high humidity or direct 

sunlight. Keep the card away from liquid or corrosive substance. 

4. Mind the direction while inserting the T-FLASH card to avoid damaging the slot or the 

card. 

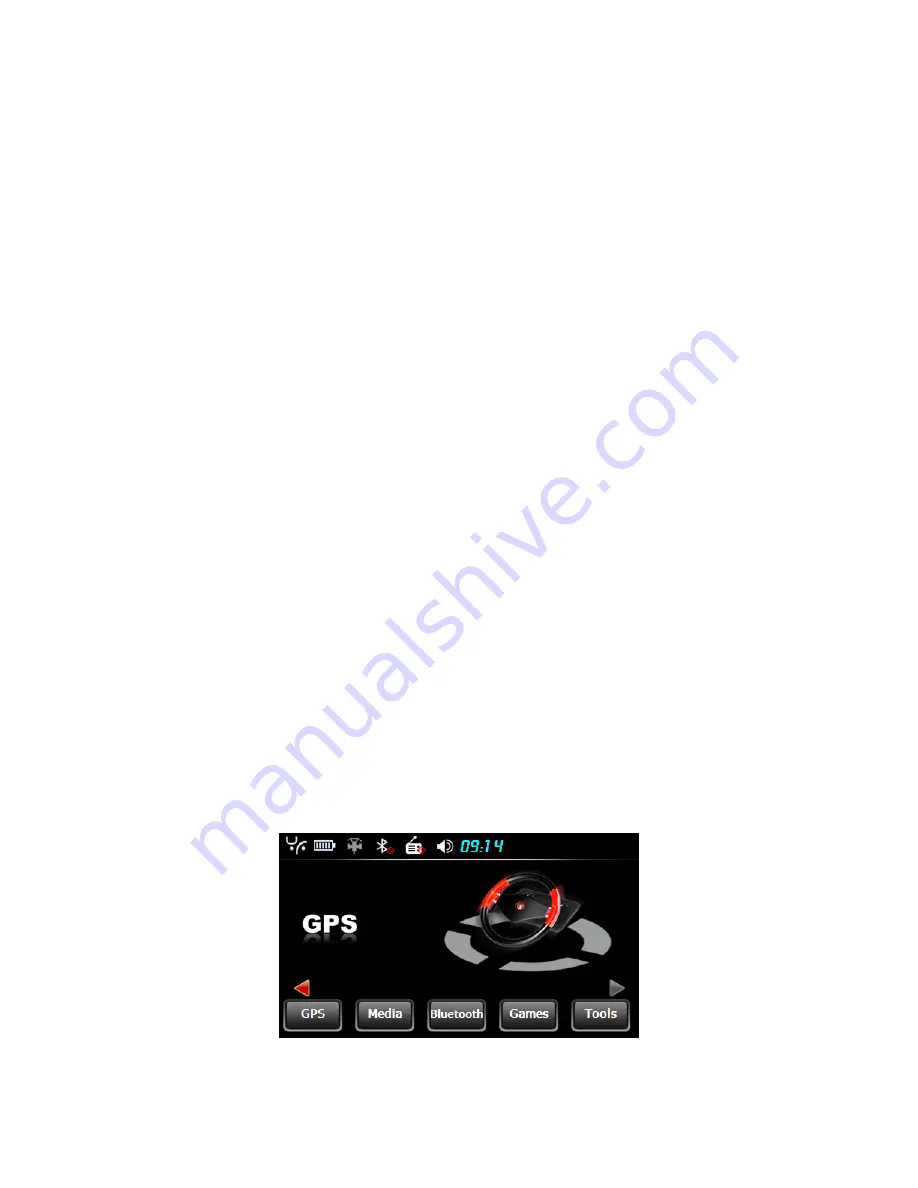
1.4 System Main Interface and Major Functions 

Long press the power key on the top side of the GPS navigator to enter the system main interface 

shown below. 


Summary of Contents for GPS 84A-53

Page 1: ...Statement User Manual GPS 84A 53 ...

Page 2: ... change without notice Please accept our apology for your inconvenience z Please back up your data of the GPS navigator YF assumes no responsibility for any loss caused by data loss z The manual might contain a few mistakes though it has been checked If mistakes are found you are welcome to contact the YF customer service center ...

Page 3: ...gation electronic maps might be inconsistent with actual traffic signals due to transportation development Please follow traffic regulations and signs and drive according to road situation Operating the GPS navigator device while driving might cause serious accidents YF assumes no responsibility for accidents and loss due to improper use z For information of software update and upgrade please go t...

Page 4: ...ter III Media 8 3 1 Music Player 8 3 2 Video Player 10 3 3 Photo Browser 11 3 4 E book Reader 13 Chapter IV Bluetooth 17 4 1 Pair 17 4 2 Outgoing call 18 4 3 Incoming Call 19 4 4 Dial Record 20 4 5 Redial 20 4 6 Setting 21 4 7 Paired Device List 21 4 8 Dailup Networking Service 22 4 9 Search 23 4 10 Phonebook 24 Chapter V Games 26 5 1 Othello 26 Chapter VI Tools 27 6 1 Calculator 27 6 2 Unit 27 Ch...

Page 5: ... 7 3 Backlight 30 7 4 Language 31 7 5 Date Time 32 7 6 Calibration 32 7 7 FM Transmitter 33 7 8 USB 34 7 9 Navigation Path 36 7 10 Restoring the Factory Setting 37 7 11 System Info 37 Chapter VIII GPS Info 38 Chapter IX Troubleshooting 39 ...

Page 6: ......

Page 7: ...tions You may use the GPS navigator anytime anywhere for example while driving walking or cycling Let its navigation and amusement functions enrich your life and work To realize the functions of GPS 84A 53 and to understand the operation details please read the manual carefully You may see the following supplemental information in the manual Note Explanation of relevant subjects Relevant Informati...

Page 8: ...ndicating the operating state of external power supply 2 Touch pen slot Location of the touch pen 3 Speaker Playing sounds such as navigation prompt tones music etc 4 Power key Powering on off and sleep 5 Earphone jack Connected with the stereophone 6 MINI USB port Communicating with PC via MINI USB cable and used as the charging port 7 Battery cover Battery inside 8 T flash card slot T flash card...

Page 9: ...ubstance or burn do not unpack pierce strike on or discard the battery in fire or water 1 2 2 Charging by DC Charger The GPS navigator must be charged with the DC charger before first use Plug the USB terminal of the DC charger into the USB port of the GPS navigator and the other to the power socket to supply power and charge the GPS navigator Note The charging indicator light is red during chargi...

Page 10: ...g interface will be prompted If is selected the navigator will automatically resume the state before entering sleep mode when it is powered again 1 3 2 Restarting the System When the system does not response press the reset key on the back of the GPS navigator to restart the system Relevant Information The following situations might lead to no response of the system 1 Delay or pause in interface s...

Page 11: ...nd media files in a T FLASH card Insert the card in the corresponding slot Note 1 Do not take out the T FLASH card while an navigation program is being run or a media file is being played 2 To avoid drop or crash of the T FLASH card do not exert heavy pressure on it or bend it 3 Avoid using or storing the T FLASH card in high temperature high humidity or direct sunlight Keep the card away from liq...

Page 12: ...er WMA9 and WAV files supported Random sequence and cycle play supported Video player WMV ASF and AVI files supported Adjustment of playing progress pause and full screen play supported Photo browser JPG GIF BMP and PNG files supported Photo rotation zoom in out and auto play supported E book TXT files reading supporting page selection Games Othello Tools Calculator and Unit Setting Volume backlig...

Page 13: ...ference only and the user may decide whether to follow them 2 3 Reception High and crowded structures such as inside of tunnels space between high buildings underground car parks and under viaducts weather change or satellite signals turnoff may influence signal reception resulting in positioning failure inaccurate positioning navigation failure or system function abnormity With stereoscopic maps ...

Page 14: ... section introduces the usage of the music player 3 1 1 Features The music player supports WMA9 and WAW files and selection of play sequence Copy audio files to a folder in your memory card before using the player 3 1 2 Interface and Operation Tap in the system main interface to enter the Media interface as shown below Tap to enter the Music Play as shown below ...

Page 15: ...nce Select sequence random or cycle play Previous Play the previous music Next Play the next music Volume Drag it leftward to turn down or rightward to turn up the volume Progress Drag it leftward or rightward to play from a previous or future moment Music list Enter it to select music to play Time Display the run time Equalizer Enter the equalizer Tap in the interface Music Play to enter the Musi...

Page 16: ... Delete all Delete all the music in the play list 3 2 Video Player This section introduces the usage of the video player 3 2 1 Features The video player supports WMV ASF and AVI files full screen play progress selection and file selection Copy video files to a folder in your memory card before using the player 3 2 2 Interface and Operation Tap in the Media interface to enter the video player inter...

Page 17: ...ming moment Volume Drag it leftward to turn down or rightward to turn up the volume Time Display the play time and the music duration Tap in the Video Player interface to enter the video folder shown as below Icon Name Explanation Close Close the video folder Scroll bar Drag the sliding block upward downward to view all the files inside the folder Film name format Film name and its format 3 3 Phot...

Page 18: ...nterface to enter the photo browser interface shown as below Icon Name Explanation Previous View the preview photo in the folder Next View the next photo in the folder Zoom in Scale up current photo Zoom out Scale down current photo Rotate Rotate current photo 90 clockwise Auto play Cycle play all the photos in the folder from current photo Folder Enter the photo folder to select a photo Close Clo...

Page 19: ...r Scroll bar Drag the sliding block to view all the photos 3 4 E book Reader This section introduces the usage of the E book reader 3 4 1 Features The reader supports TXT files page turn and folder selection Copy TXT files to a folder in your memory card before using the browser 3 4 2 Interface and Operation Tap in the Media interface to enter the reader interface shown as below ...

Page 20: ...content of the e book Folder Enter the e book folder to select an e book to read Previous Read the previous page Next Read the next page Setting Select a text theme font word size and bold type New bookmark Select partial text and tap the icon to create a bookmark Bookmark list Enter the bookmark list to select or delete a bookmark Page total pages Current page total pages ...

Page 21: ... setting interface Save Save the setting Theme Tap to select a theme for the e book Font Tap to select a font for the e book Bold Tap to enable bold type Tap it again to cancel Tap in the e book reader interface to enter the e book folder shown as below Icon Name Explanation Close Close current folder Return Return to the previous folder ...

Page 22: ...rk locate a page by taping or or dragging the scroll bar in the reader interface and drag to select text content Tap when it is on Tap OK to finish Tap to view created bookmarks in the interface of Bookmark List shown as below Drag the scroll bar and select a bookmark on the left list Tap to go to the page with the bookmark or tap to delete the bookmark ...

Page 23: ...tatus bar 4 1 Pair Tap to enter the following interface to pair with mobile phone mobile phone s Bluetooth function should be enabled beforehand Notice Please keep the Bluetooth mobile phone around the PND while pairing them After successful pairing the message Connected established and the mobile phone name will be shown in the interface as below ...

Page 24: ...keyboard to enter a phone number Tap to delete the last number entered Tap to generate a call as shown in the following interface Volume down Tap it to turn down the volume Volume up Tap it to turn up the volume Hang off Tap to hang off When the called number is put through the interface will be as below ...

Page 25: ...c Tap to input voice Volume switch Switch the voice output to the mobile phone Keypad Tap it to open the keypad as shown in the interface below Hang off Tap to hang off If the call fails the below interface will be prompted 4 3 Incoming Call When there is incoming call the following interface will be prompted ...

Page 26: ... Tap it to view the list of incoming call numbers Failed call records Tap it t to view the list of failed calls Delete one Select a number in the list and tap this icon to delete it Delete all Select all the numbers in the list and tap this icon to delete it Generate Select a number in the list and tap this icon to generate a call 4 5 Redial In the Bluetooth interface tap to redial the last dialed...

Page 27: ...tion between the PND and mobile phone Ring Tap to select a ring tone You may choose to keep Bluetooth function when the Bluetooth interface is closed by ticking in the box Otherwise the Bluetooth function will be disabled You may also choose automatic HFP connection when Bluetooth is started up by ticking in the box 4 7 Paired Device List In the Bluetooth interface tap to enter the Paired Device L...

Page 28: ...disconnect the PND from the mobile phone Select a profile from the list and then Connect Tap it to reconnect the PND with the mobile phone Disconnect Tap it to disconnect the PND from the mobile phone 4 8 Dailup Networking Service In the above interface tap to prompt the GPRS Dial up Networking interface as shown below 4 8 1 Operator Info Edit You may add modify or delete the operator information ...

Page 29: ...ve the input information or tap Cancel to quit 4 8 2 Dialup Networking Service In the GPRS Dial up Networking interface tap to connect the navigator to the network After connection is established the Internet Explorer interface will prompt as shown below 4 9 Search In the Bluetooth interface tap to enter the following interface and the device will automatically search and display a list of Bluetoo...

Page 30: ...and tap to pair with it If fail the following interface will be displayed You may also tap to enter the interface of Paired Device List as below Please refer to Part 4 7 Paired Device List for details 4 10 Phonebook Tap to enter the phonebook interface as below ...

Page 31: ...oth 25 Download Download the phonebook of the mobile phone to the PND Dial Select a number from the phonebook and tap this icon to generate a call Delete Select a number from the phonebook and tap this icon to delete it ...

Page 32: ...pter V Games This chapter introduces the usage of Games Tap in the system main interface to enter the games interface as shown as below Tap to exit 5 1 Othello Tap in the Games interface to enter the interface as shown below ...

Page 33: ...onversion Tap in the system main interface to enter the tools interface as shown below Tap to exit 6 1 Calculator Tap in the Tools interface to enter the calculator interface as shown below 6 2 Unit Tap in the Tools interface to enter the unit converter interface as shown below ...

Page 34: ...Chapter VI Tools 28 ...

Page 35: ...ble disable sounds for tap set startup music Backlight Adjust the brightness of touch screen backlight set the interval of auto backlight off under power supply Language Select a system language Date time Set the system date time and time zone Calibration Calibrate the screen when position deviation occurs FM Transmitter Transmits audio signals of the navigator to the radio set via frequency modul...

Page 36: ...t the volume setting Volume Ten volume grades from mute to maximum available Tap to decrease the volume by grade Sounds for taps Tap it to enable the function Tap it again to disable the function Power on music Tap or to select power on music or disable it 7 3 Backlight Backlight setting includes backlight brightness adjustment and latency of backlight off Tap in the setting interface to enter the...

Page 37: ... Auto off Auto backlight shutoff after service stop for a period The options are always On 10s 30s 1m 2m and 3m Tap or to view the options in cycle or select one 7 4 Language Tap to enter in the setting interface to enter the language setting interface as shown below Tap or to select a system language and tap to save the selection ...

Page 38: ...ap or to set the year month day hour and minute Note Time format options are 12 hour and 24 hour You may select one of them 7 5 2 Setting the system time zone In the above interface tap or to select a time zone For example select GMT 08 00 Beijing Chongqing Hong Kong Urumqi for China 7 6 Calibration Tap in the setting interface to prompt the calibration dialog shown as below Tap OK to execute cali...

Page 39: ...to go back to the setting interface 7 7 FM Transmitter FM transmitter realizes transmission of audio signals of the GPS navigator to radio sets Adjust the emission frequency of the GPS navigator the same as that of the receiving frequency of the radio and sounds of the navigator will be output by the amplifier system of the radio sets Tap in the setting interface to enter FM Setting shown as below...

Page 40: ...S navigator provides MASS STORAGE and MS STORAGE modes Select one in the USB setting 7 8 1 MASS STORAGE 1 Have the GPS navigator in operation status and the SD card plugged in the slot 2 Tap in the setting interface to enter USB Option as shown below Select MASS STORAGE and tap to save it 3 Connect the MINI USB terminal of the USB cord to the MINI USB port of the GPS navigator and the standard USB...

Page 41: ...SYNC and tap to save the setting 2 Install the application Mobile Device in a drive of PC Then the following icon will appear in the drive selection 3 Connect the MINI USB terminal of the USB cable to the MINI USB port of the GPS navigator and the standard USB terminal to the USB Host port of PC 4 After the PC finds new hardware double click the Mobile Device drive in the selection area to enter t...

Page 42: ...ntion The following operations will stop suspend the communication of the system and PC and unsaved data will be lost 1 Unplugging the MINI USB cable 2 Powering off the GPS navigator 3 Resetting the system 4 Tap the on close button on the top right 7 9 Navigation Path Insert a T flash card with map data into the GPS navigator and tap to enter the interface shown as below Select a map address and t...

Page 43: ... the setting interface to restore the factory setting The following dialog will be prompted Tap OK to restore the default setting or Cancel to return to the setting interface 7 11 System Info Tap in the setting interface to view the system information as shown below ...

Page 44: ...38 Chapter VIII GPS Info Tap on the system main interface to view the GPS information as shown below To reset the GPS satellite receiver tap to prompt a dialog as below Tap OK to reset the GPS satellite or tap Cancel to exit ...

Page 45: ...r and charge the battery Low backlight Turn up the backlight No vague display Backlight off Tap the screen with the touch pan Incorrect tapping response Touch screen not calibrated Recalibrate the screen Low volume Turn up the volume No sounds Poor contact of earphone Connect the earphone Communication with PC Poor USB connection Connect the USB cable GPS signals reception failure Poor GPS signal ...

Page 46: ...tection against harmful interference in a residential installation This equipment generates uses and can radiate radio frequency energy and if not installed and used in accordance with the instructions may cause harmful interference to radio communications However there is no guarantee that interference will not occur in a particular installation If this equipment does cause harmful interference t...

Reviews: