background image

STEP 6: Pedal installation

1. Take out the pedal assemblies L and R④.

2. Separate the pedal assemblies L and R④.

3. Lock the pedal assembly L④ into the left crank, and tighten with the box-ended 

wrench (D) along the direction indicated by the arrow.

4. Lock the pedal assembly R④ into the right crank, and tighten with the

 box-ended wrench (D) along the direction indicated by the arrow.

Open-ended wrench(D)

Safety tips:

Reverse riding is not recommended, as it is likely to loosen pedals. After 

reverse riding, check whether the pedals are locked, in order to avoid 

safety issues arising from loose pedals.。

Installation Guide

Pedal 

assembly R④

Pedal 

assembly L④

Screw the pedal into the crank manually 

first, and then tighten the pedal assemblies 

L and R ④with the box-ended wrench (D). 

(Note: The tightening directions for both 

the left pedal and the right pedal are 

towards the head direction.)

Summary of Contents for M1

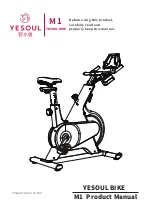
Page 1: ...M 1 YESOUL BIKE Product model YS 002 Before using this product carefully read and properly keep this manual YESOUL BIKE M1 Product Manual...

Page 2: ...Power supply Sensing system connection Height limit Rated maximum load Net weight Gross weight Overall dimensions Maximum tablet width 260mm iOS 10 0 or higher Android 5 0 or higher Magnetron resistan...

Page 3: ...peed or high intensity sports Before attempting any high in tensity short sprints pay attention to the body state and posture and apply a controllable speed 11 Wear professional cycling clothes or tig...

Page 4: ...ng washer 2 hexagon socket cap screw M6 12 Hexagon socket cap screw M6 35 Hex wrench Open ended wrench Name NO NO Name Frame Mobile phone tablet holder Front tube Bottle holder Handlebar cover Ziplock...

Page 5: ...Installation Guide List of Parts Accessories List Tools List L type cross head hex wrench Hex wrench Hexagon socket cap screw M6X35 Open ended wrench NO Name Quantity Picture A B C D 1 1 35 1...

Page 6: ...holes of the frame manually screw the front and rear tubes into frame and tighten it via the L type cross head hex wrench A Installation Guide Washer 1 Take L type cross head hex wrench A out of the z...

Page 7: ...bottle holder with that of the bracket manually install two screws M6 12 into holes and tighten them via the hex wrench B Installation Guide STEP 3 Installation of bottle holder 1 Take the hex wrench...

Page 8: ...ng hexagon socket cap screw C in the ziplock bag into three corresponding holes without tighten ing Finally vertically tighten ve screws down via the hex wrench B and press down the decorative cover o...

Page 9: ...purpose bracket manually install screws M6 12 and tighten them via the hex wrench B Spring washer Installation Guide STEP 5 Installation of tablet mobile phone holder 1 Remove two screws M6 12 and ela...

Page 10: ...g the direction indicated by the arrow Open ended wrench D Safety tips Reverse riding is not recommended as it is likely to loosen pedals After reverse riding check whether the pedals are locked in or...

Page 11: ...tallation Guide 1 If the bike is provided with a battery pull the insulation strip out of the gap of the battery cover before using this product 2 Battery replacement Remove ST4 13 cross head tapping...

Page 12: ...tual product shall prevail Lockable pulley Rear column tightening knob Adjust the saddle height Saddle tightening knob Adjust the saddle horizontally Saddle tightening knob Adjust the saddle horizonta...

Page 13: ...he APP with spinning bike make sure that the Bluetooth of your mobile phone tablet PC has been enabled and no other devices are connected About APP membership Registered users can get the membership f...

Page 14: ...down until the spring is automatically reset when a click sound is heard it means that the knob has been clamped in the hole of the column Tighten the knob as much as possible 2 Saddle height adjustme...

Page 15: ...htly secured on the oor and the body does not shake Loose Tight Horizontal adjustment of saddle How to Adjust Bike 3 Horizontal adjustment of saddle Loosen the knob under the saddle slide the saddle b...

Page 16: ...tep on the pedals forcibly until they are stopped at 6 o clock and the leg can be fully stretched Fig 2 3 o clock the right crank is parallel to oor in the right directio Fig 3 Horizontal position of...

Page 17: ...n the saddle for experienced users Fig 2 Users subject to lumbar muscle strain and lumbar spondylosis may ride the bike with the consent of doctors It is recommended to adjust the handlebar into a hig...

Page 18: ...the belt from jumping out of the groove Inspection of body screws Always check the screws of all body parts for loosening or falling and tighten or replace them in time Inspection of resistance adjus...

Page 19: ......

Page 20: ...ProlinxGmbH Brehmstr 56 40239Duesseldorf Germany EC REP...

Page 21: ...148 210mm 80g 20...

Reviews: