background image

The digital pen can also acts as a mouse with features like hovering, left 
and right click. Additionally, there are some special features to be used 
only with the Online mode. Those features will be described in details in 
the following chapters. Before you connect the device to a PC, first make 
sure to install the Note Taker manager application included in the CD 
and run it.

IMPORTANT
. Do not connect more than one set of this device at the same time. That 
may cause interference with each other.

Avoid interference while using regular mouse.
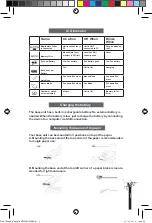
When the pen is not in use it powers off automatically after 60 minutes.
It is recommend that while not in use, the pen is placed as shown, to
avoid interface with regular mouse operation.

Installing Easy Note Taker software

1. Insert the installation CD into your CD ROM drive. The setup program 
should start automatically. If not, run the program by selecting ‘Run’ 
from the Windows ‘Start’ menu and type in D:\WIN\setup.exe. If your CD 
drive uses a different letter, type that letter instead of ‘D’.
2. Follow the instructions on the screen.
3. Once installation is complete, automatic driver installation will start. 
Please follow the displayed steps during this process.
4. After the installation process, when running the application for the 1st 
time, a new folder named ‘My Notes’, is created in your ‘My Documents’ 
directory. All your notes will be saved into this directory.

NOTE
.  In the event that no ‘My Documents’ directory is found, the installation 
process will create a new ‘My Documents’ folder on your C: hard drive. 
The ‘My Notes’ folder will then be created under this directory.
. If you uninstall, upgrade or reinstall the software in a different location, 
the note files will remain in this directory, and will not be overwritten.

When in On-line Mode, you can upload all your notes from the memory 
unit to your PC using the Easy Note Taker software. Before doing so, first 
make sure that:
. Your PC software application is running
. Your memory unit is connected to your PC’s USB port using the memory 
unit USB cable
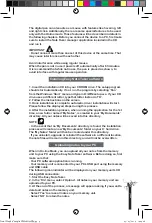
The following icon indicator will be displayed on your memory unit LCD 
during USB connection:
1. Start the Easy Note Taker.
2. In the ‘File’ menu, select ‘Upload’. All notes in your memory unit are 
uploaded to your PC.
3. At the end of the process, a message will appear asking if you want to 
delete all notes on the memory unit.
. Select ‘Yes’ to erase all notes on your memory unit.
. Select ‘NO’ to retain the notes.

Uploading notes to your PC 

p

a

g

e

 7

Final Mode d'emploi YWS08NetBEng9   9

05/05/2010   14:24:28

Summary of Contents for CPK-S100

Page 1: ...YES WE SCAN Mobile Note Taker Ref YWS08 Final Mode d emploi YWS08NetBEng1 1 05 05 2010 14 24 27...

Page 2: ...We Final Mode d emploi YWS08NetBEng2 2 05 05 2010 14 24 28...

Page 3: ...Note Taker software 7 Uploading notes to your PC 7 Operating mode of the digital pen 8 Note mode 8 Mouse mode 9 Creating online notes 9 Using the Mobile Note Taker in Microsoft Windows Vista Ink appl...

Page 4: ...fill and batteries The digital pen is used with any of receiving units such as Mobile NoteTaker and PC Notes Taker It is a unique device that captures notes handwritten on plain paper and transmits th...

Page 5: ...st it 5 Pull the used refill out 4 Gently press the new refill until it is lodged securely in place 1 Remove the battery compartment cover 2 Install 2 x SR41 batteries with the positive poles facing u...

Page 6: ...current working mode At home or in the office the user can connect the Mobile Note Taker to PC using the USB cable then upload and manage the saved notes 1 USB PORT 2 TOP PAPER CLIP 3 LEFT PAPER CLIP...

Page 7: ...own Pen move Number of saved notes in memory Always Unit is Off Memory full or Error Charging the battery The base unit has a built in rechargeable battery No external battery is needed When the batte...

Page 8: ...ON the unit 2 Hold the base unit and gently press all paper clippers together 3 Slide the base unit into the paper s upper edge and make sure the base unit is in the center 4 Pick up the digital pen...

Page 9: ...displayed steps during this process 4 After the installation process when running the application for the 1st time a new folder named My Notes is created in your My Documents directory All your notes...

Page 10: ...ompted if you want to upload your notes When connected to PC the Mobile Note Taker supports a Note mode and a Mouse Mode In Note mode writing on a paper with the digital pen will create an Ink note wi...

Page 11: ...your mouse cursor on that object Now press the tip of the pen a bit longer on the paper A special Right Click cursor will appear Lift the pen from the paper and the context menu Right Click menu appe...

Page 12: ...works in tablet pen mode Start Hovering above the paper Check the coverage area Coverage area means the size of the imaginative square on the paper that covers the whole screen area in between 4 corne...

Page 13: ...word or letter by letter NOTE At any time that the mouse goes dead tip once on the paper with the refill It will take the pen out of sleep mode The following procedure guides you through installation...

Page 14: ...erences you decide Where on your Mac s hard drive you want to save the TIFF images Whether you want to erase the TIFF images from the Mobile Note Taker after you have imported them to your Mac You set...

Page 15: ...cked 5 To save your preferences and close the Easy Note Taker Preferences dialog click Save When you next connect the Mobile Note Taker to your Mac your images will be uploaded according to the prefer...

Page 16: ...ns such as iWork 08 You can write handwritten test on line and the Mac will convert it into text The feature is available for iWork Pages word processor iWork Keynote presentations and iWork Numbers s...

Page 17: ...messy or discontinuous There is barrier between the pen and the base unit Remove the barrier Your handhold is too close to the pen tip that the transmission of the pen tip is blocked by your finger Re...

Reviews: