background image

2              

1. FOR SAFE OPERATION

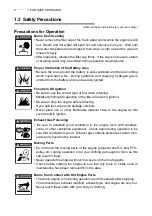
1.2  Safety Precautions

(Observe these instructions for your own safety.)

Precautions for Operation

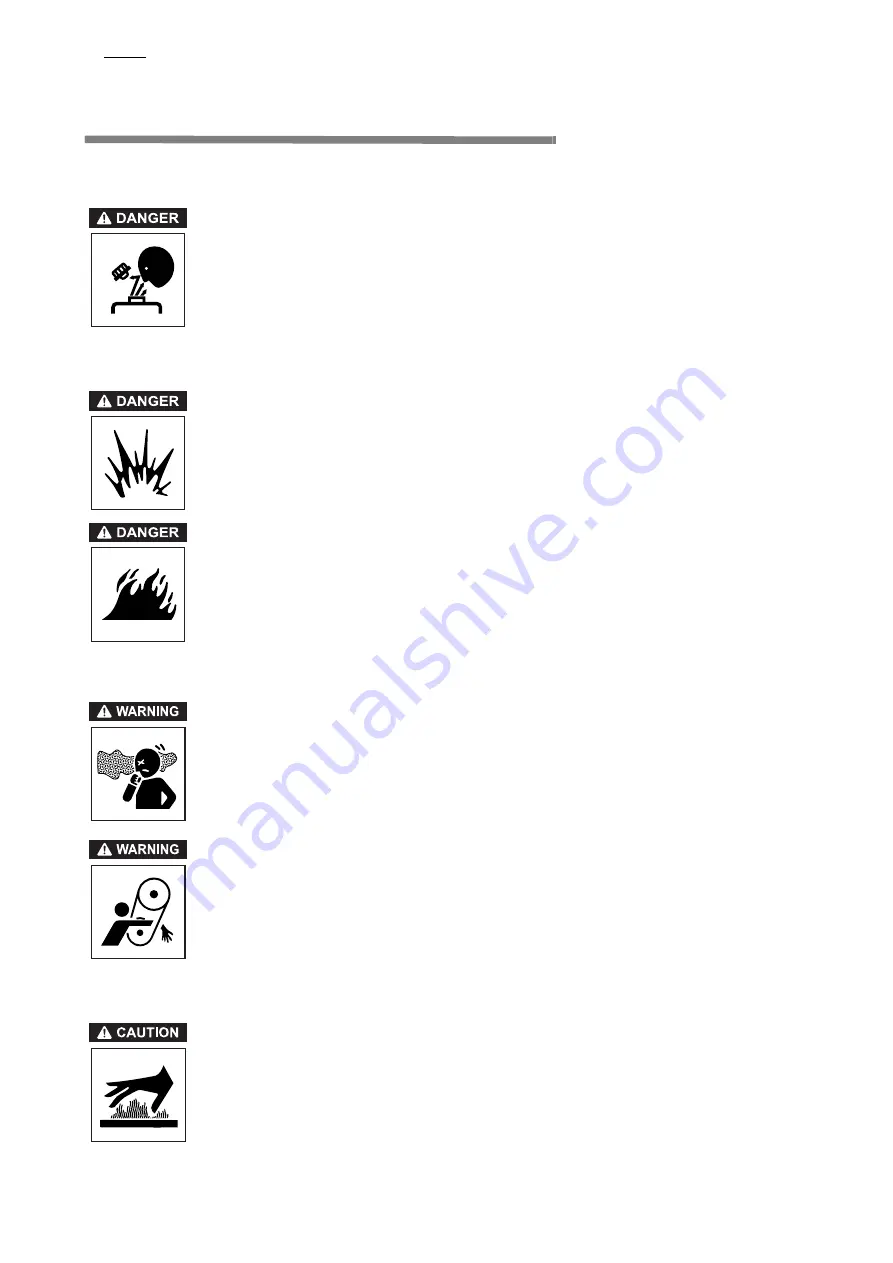
Burns from Scalding

• Never remove the filler cap of the fresh water cooler while the engine is still

hot.  Steam and hot water will spurt out and seriously burn you.  Wait until
the water temperature has dropped, then wrap a cloth around the cap and
loosen it slowly.

• After inspection, refasten the filler cap firmly.  If the cap is not secure, steam

or scalding water may be emitted during operation causing burns.

Proper Ventilation of the Battery Area

• Be sure the area around the battery is well-ventilated and there is nothing

which could start a fire.  During operation and charging, hydrogen gas is
emitted from the battery and can be easily ignited.

Fires from Oil lgnition

• Be sure to use the correct type of fuel when refueling.

Mistakenly filling with gasoline or the like will result in ignition.

• Be sure to stop the engine before refueling.

If you spill fuel, wipe such spillage carefully.

• Never place oils or other flammable material close to the engine as this

could result in ignition.

Exhaust Gas Poisoning

• Be sure to establish good ventilation in the engine room with windows,

vents, or other ventilation equipment.  Check again during operation to be
sure that ventilation is good.  Exhaust gas contains poisonous carbon mon-
oxide and should not be inhaled.

Moving Parts

• Do not touch the moving parts of the engine (propeller shaft, V-belt, PTO-

pulley, etc.) during operation or let your clothing get caught in them as this
can result in injury.

• Never operate the engine without the covers on the moving parts.
• Check before starting the engine to see that any tools or cloths used in

maintenance have been removed from the area.

Burns from Contact with Hot Engine Parts

• The whole engine is hot during operation and immediately after stopping.

The turbocharger, exhaust manifold, exhaust pipe, and engine are very hot.
Never touch these parts with your body or clothing.

Summary of Contents for 4JH3-DTE

Page 1: ...OPERATION MANUAL Be sure to read this manual for safe and proper operation Store this manual carefully after use ...

Page 2: ...rating the engine to ensure that it is used correctly and that it stays in the best possible condition Keep this Operation Manual in a convenient place for easy access If this Operation Manual is lost or damaged order a new one from your dealer or dis tributor If giving your engine to someone else be sure to attach this Operation Manual Constant efforts are made to improve the quality and performa...

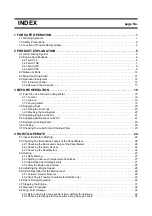
Page 3: ...ng Water 22 3 6 Cranking 23 3 7 Checking the Lube Oil and Cooling Water 23 4 HOW TO OPERATE 24 4 1 Inspection Before Starting 24 4 2 Checking the Illumination Lamps of the Panel Meters 26 4 2 1 Checking the Illumination Lamps of the Panel Meters 26 4 2 2 Checking the Alarm Devices 26 4 2 3 Checking the Panel Meters 26 4 3 starting 27 4 3 1 Daily Starting 27 4 3 2 Starting Under Low Temperature Con...

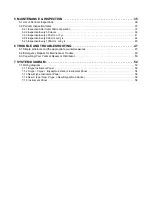
Page 4: ...ection Every 1000 Hrs or 4 yrs 45 6 TROUBLE AND TROUBLESHOOTING 47 6 1 Simple problems and the appropriate countermeasures 47 6 2 Emergency Repairs for Marine Gear Trouble 49 6 3 Consulting Your Yanmar Dealer or Distributor 50 7 SYSTEM DIAGRAM 52 7 1 Wiring diagram 52 7 1 1 B type Instrument Panel 52 7 1 2 C type C type B type No 2 station Instrument Panel 54 7 1 3 New B type Instrument Panel 56 7...

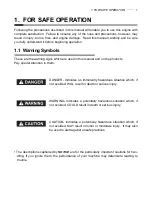
Page 5: ...s manual and on the products Pay special attention to them DANGER Indicates an imminently hazardous situation which if not avoided WILL result in death or serious injury WARNING Indicates a potentially hazardous situation which if not avoided COULD result in death or serious injury CAUTION Indicates a potentially hazardous situation which if not avoided MAY result in minor or moderate injury It ma...

Page 6: ...ike will result in ignition Be sure to stop the engine before refueling If you spill fuel wipe such spillage carefully Never place oils or other flammable material close to the engine as this could result in ignition Exhaust Gas Poisoning Be sure to establish good ventilation in the engine room with windows vents or other ventilation equipment Check again during operation to be sure that ventilati...

Page 7: ...pect while the engine is operating never touch moving parts Keep your body and clothing well clear of all moving parts as this could result in injury Precautions for Removing Hot Oil and Water to Prevent Burns If extracting oil from the engine while it is still hot do not let the oil splash on you Wait until the temperature has dropped before removing cooling water from the engine to avoid getting...

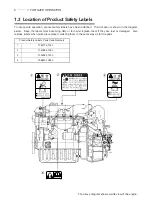
Page 8: ... in the diagram below Keep the labels from becoming dirty or torn and replace them if they are lost or damaged Also replace labels when parts are replaced ordering them in the same way as for the parts The above diagram shows a side view of the engine Product Safety Labels Parts Code Numbers 1 128377 07350 2 128296 07260 3 128296 07300 4 196630 12980 ...

Page 9: ...e engine It is equally important to use the correct driving device and a propeller of the appropriate size and specifications The engine must be installed correctly with safe cooling water and exhaust piping and electrical wiring The PTO work should be easy to use for onboard equipment Consult your Yanmar dealer or distributor when selecting optional parts Optional parts selections should take int...

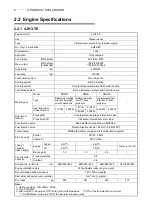
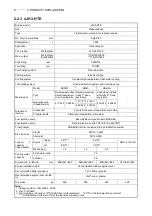
Page 10: ...4 2 04 2 45 2 45 2 63 2 63 3 30 3 30 Direction of rotation Crankshaft Counterclockwise Viewed from stern side Propeller shaft Clockwise Viewed from stern side Fuel injection pump Bosh distributor type Model VE ZEXEL Fuel injection valve Pinhole injection nozzle YDLLA P 5 0 22 150 Turbocharger RHB52 IHI Water cooled and forced lubrication system Elec devices Starter DC12V 1 4kW Alternator DC12V 55A...

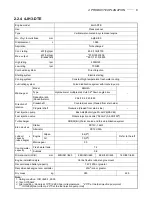
Page 11: ...eller Refer to the operation manual for the sail drive Fuel injection pump Bosh distributor type Model VE ZEXEL Fuel injection valve Pinhole injection nozzle YDLLA P 5 0 22 150 Turbocharger RHB52 IHI Water cooled and forced lubrication system Elec devices Starter DC12V 1 4kW Alternator DC12V 55A Lube oil L capacity raked angle Engine Oilpan 6 4 Raked angle 0 All 7 5 Raked angle 0 Drive Refer to th...

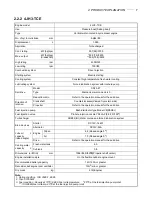
Page 12: ... 2 45 2 63 2 63 3 30 3 30 Direction of rotation Crankshaft Counterclockwise Viewed from stern side Propeller shaft Clockwise Viewed from stern side Fuel injection pump Bosh distributor type Model VE ZEXEL Fuel injection valve Pinhole injection nozzle YDLLA P 5 0 25 150 Turbocharger RHB52 IHI Water cooled and forced lubrication system Elec devices Starter DC12V 1 4kW Alternator DC12V 55A Lube oil L...

Page 13: ...wed from stern side Propeller shaft Clockwise Viewed from stern side Fuel injection pump Bosh distributor type Model VE ZEXEL Fuel injection valve Pinhole injection nozzle YDLLA P 5 0 26 150 Turbocharger RHB52 IHI Water cooled and forced lubrication system Elec devices Starter DC12V 1 4kW Alternator DC12V 55A Lube oil L capacity raked angle Engine Oilpan 6 4 0 Refer to the left All 7 5 0 Marine ge...

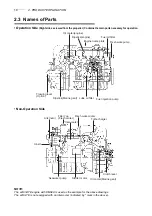
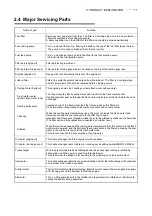
Page 14: ...xample for the above drawings The 4JH3 TE is not equipped with an intercooler indicated by mark in the above Oil cooler engine Dipstick Marine gear Dipstick engine Fuel injection pump Lube oil filter Trawling lever Option Engine name plate Fuel oil filter Fresh wate pump Alternator V belt Filler cap Fresh water Inter cooler Fresh wate cooler Turbocharger Seawater pump Oil cooler Marine gear Clutch...

Page 15: ...iller cap closes the filler port It has two pressure regulating valves pressure valve and vacume valve Filler cap When the cooling water temperature rises the pressure inside the fresh water tank increases causing the pressure valve in the filler cap to open Hot water and steam pass through a rubber hose to the subtank to condense the hot water The filler port and the subtank are connected by a ru...

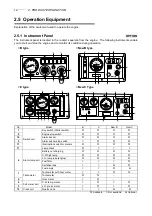
Page 16: ...del B C New B New C 7 Switch unit Key switch Starter switch O O O O 8 Engine stop switch O O O O 10 Alarm buzzer O O O O 9 Alarm buzzer stop switch O O O 11 Illumination switch for meters O O O O 11 Lamp check O 6 Alarm lamp unit Battery not charging O O O O C W high temp O O O O L O low press engine O O O O Fuel filter O Sail drive leak O Fuel empty O 1 Tachometer Tachometer with hour meter O O T...

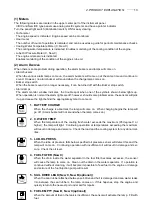
Page 17: ...oblem arise the sensors will pick it up and cause the light behind the appropriate symbol to come on 1 BATTERY CHARGE When the charge is abnormal the lamp will come on When charging begins the lamp will go off Alarm buzzer will not sound when the lamp comes on 2 C WATER TEMP When the temperature of the cooling fresh water exceeds the maximum 95 degree C or higher the lamp will light Continuing ope...

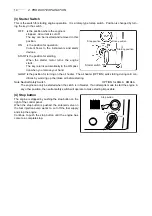
Page 18: ...urning on the air heater The air heater OPTION aids starting during cold con ditions by warming up the intake air before starting Note Neutral Safety Switch OPTION for KM4A KMH4A The engine can only be started when the clutch is in Neutral If an attempt is made to start the engine in any other position the neutral safety switch will operate to make starting impossible 4 Stop button The engine is s...

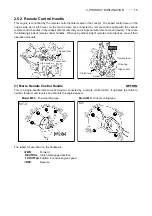
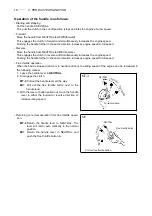
Page 19: ... manuals 1 Morse Remote Control Handle This is a single handle remote control device connected by a remote control cable It operates the clutch to neutral forward and reverse and controls the engine speed Model MT 3 Top mounting type Model MV Side mounting type The labels for operation on the handle are FWD Forward NEUTRAL Clutch disengaged position THROTTLE Position to reduce engine speed REV Rev...

Page 20: ...Free throttle operation When the boat is stopped clutch is in neutral position the idling speed of the engine can be increased in the following manner 1 Leave the handle lever in NEUTRAL 2 Disengage the clutch MT 3 Pull out the handle lever all the way MV Pull out the free throttle button next to the handle lever 3 With the lever or button pulled out move the handle lever in either the forward or ...

Page 21: ...pping against the clutch disk Do not operate at over 1000rpm engine speed 1 Loosen the handle grip by turning it to the left This frees the handle 2 Move the handle toward L low speed and position at the desired speed Turn the handle grip to the right to secure it 3 Before returning to normal high speed operation be sure to position the handle in H high speed tight ening the grip by turning it to ...

Page 22: ...il in a clean container Store the con tainer in a place away from rain and dirt as water and dust mixed in with the fuel cause engine failure Keep the fuel container stationery for several hours to allow any dirt or water to settle to the bottom Use a pump to extract the clear filtered fuel from the top of the container for use 3 Fuel Piping Install the fuel pipe from the fuel tank to the fuel pum...

Page 23: ...r brands Mixing may reduce the lubricating performance Different oils are used for the engine and the marine gear Be careful to use the correct oil for each one and store in separate clearly labeled containers 3 1 3 Cooling Water NOTICE Be sure to add LLC to cooling fresh water In cold seasons the LLC is especially important Without LLC cooling performance will decrease due to scale and rust in th...

Page 24: ...ring operation 3 2 2 Bleeding the Fuel System Bleed the fuel system according to the following procedure When there is air in the fuel system the fuel injection pump will not be able to function 1 Check the amount of fuel in the fuel tank If insuffi cient replenish 2 Open the fuel cock of the fuel tank 3 Loosen the air bleeding bolt on the top of the fuel filter by turning it 2 3 times with a minu...

Page 25: ...with the specified amount of marine gear oil 1 Remove the oil inlet cap with dipstick on the top of the marine gear and fill with marine gear oil 2 Fill with oil to the upper mark on the dipstick attached to the cap To measure the oil level wipe the dipstick using a cloth and then measure the oil level by inserting the dipstick without tightening screw of the oil inlet cap Fill with the necessary ...

Page 26: ...l the water overflows from the filler port Fresh water tank capacity See 2 2 Engine Specification 4 After supplying cooling water replace filler cap and tighten it firmly To replace the cap align the notches on the back of the cap with the slots on the filler port and turn clockwise 1 3 of a turn Cont on next page 5 Remove the subtank cap and fill with water to the upper limit FULL Replace cap Sub...

Page 27: ...button turn the key to the START position and hold it there The engine will begin turning If you remove your hand from the stop button the engine will start Do not take your hand off the button 5 Continue cranking the engine for about 5 seconds checking for abnormal sounds 6 Return the key to the OFF position The engine will stop 3 7 Checking the Lube Oil and Cooling Water When engine lube oil mar...

Page 28: ... the area Bums from Contact with Hot Engine Parts The whole engine is hot during operation and immediately after stopping The turbocharger exhaust manifold exhaust pipe and engine are very hot Never touch these parts with your body or clothing 4 1 Inspection Before Starting Be sure to check the following items daily before starting the engine 1 Visual Check Check for the following If any problem i...

Page 29: ...e operation while the engine is cold Checking the water level while the engine is hot is dangerous and the cooling water reading will be mis leading due to thermal expansion Check the cooling water daily at the subtank and supply if necessary Do not remove the fresh water tank filler cap regularly The amount of water in the subtank will increase during operation This is normal When the engine is s...

Page 30: ......

Page 31: ...low steps 1 6 of the above procedure and then follow the steps below 7 Turn the key from the OFF position to GLOW Continue to hold the key in the GLOW position to heat up the air heater 8 Turn the key to START and start the engine After the engine starts remove your hand from the key NOTICE Do not leave the air heater on for longer than 20 seconds at a time Leaving the air heater on for longer per...

Page 32: ...ound are normal 4 Check that sufficient cooling water is discharged from the seawater outlet pipe Operation with too little seawater discharge will burn the impeller of the seawater pump If seawater discharge is too small stop the engine immediately identify the cause and repair Is the Kingston cock open Is the inlet of the Kingston cock clogged Is the seawater suction hose broken or does the hose...

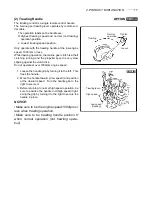
Page 33: ...ard When the clutch is engaged in forward the speed will increase Move the handle to REV to go in reverse When the clutch is engaged in reverse the speed will increase 4 5 2 Switching to Trawling Available for KMH4A only Use the trawling handle to begin trawling When changing from forward or reverse operation to trawling the speed of propeller revolution will be reduced to a bare minimum NOTICE Wh...

Page 34: ...tely check the alarm lamps and stop the engine for repairs 5 Is there water oil or gas leakage or are there any loose bolts Check the engine room periodically for any problems 6 Is there sufficient oil in the fuel tank Replenish fuel oil in advance to avoid running out of fuel during operation 7 When operating the engine at low speed for long periods of time race the engine once every 2 hours Raci...

Page 35: ... OFF remove the key and place it in a safe place 6 Cut off the battery switch 7 Close the fuel tank cock 8 Close the kingston cock In the rare instance where the engine does not stop when the stop button is pushed stop the engine moving the stop lever attached on the fuel injection pump to the left by hand NOTICE Stopping the engine suddenly after operating at high speed or heavy loading without c...

Page 36: ...tion Alam Lamps Instrument Panel Speed Lever Govenor Remote Control Handle Speed Lever Govenor Remote Control Handle Speed Lever Govenor Remote Control Handle Low Speed Position 1000rpm or lower Trawling Handle Trawling Lever Trawling Handle Trawling Lever Driving Device Clutch Clutch Remote Control Lever Driving Device Clutch Clutch Remote Control Lever Speed Lever Govenor Remote Control Handle S...

Page 37: ...ts of the cooling water system Draining the water from the seawater system 1 Open the water drain cock on the marine gear oil cooler and drain off the cooling water The position of the drain cock varies with the different types of marine gears 2 Open the water drain cock on the seawater cooling pipe and drain off the cooling water Open the water drain cock under the inter cooler and drain off the ...

Page 38: ... Safeguarding the Engine Against Water and Moisture Cover the intake silencer exhaust pipe etc with vinyl sheets and seal them to prevent moisture from enter ing Drain bilge in the hull bottom completely Water may leak into the boat when it is moored and whenever possible it should be landed Waterproof the engine room to prevent rain and seawater from entering 5 Maintaining the Battery Charge Be s...

Page 39: ......

Page 40: ......

Page 41: ...l drain pump optional to the dipstick guide 2 Drain off the oil with the drain pump 2 Replace the lube oil filter 1 Turn the lube oil filter to the left with the filter wrench and remove 2 Clean the filter installation face 3 Apply engine oil to the installation face and put on the new filter turning it to the right by hand Next tighten an additional 3 4 of a turn with the filter wrench Tightening...

Page 42: ...r is still warm after operation 1 Remove the filler port cap and insert the hose of the oil drain pump optional into the filler port until it reaches the bottom of the marine gear case 2 Drain off the oil using the drain pump 2 Wash the lube oil filter 1 Remove the side cover and then remove the filter inside the cover 2 Clean the filter thoroughly with kerosene 3 Hold the filter in place with the...

Page 43: ...he fuel injection pump and the fuel injection valve to work Drain periodically to keep the filter from becoming clogged When there is a lot of drain collected in the oil water separator at the bottom of the fuel filter the fuel filter alarm lamp will light up 1 Close the fuel cock 2 Loosen the plug screw at the bottom of the fuel filter oil ter separator and drain off any water and dirt col lected...

Page 44: ...n the battery When the amount of fluid nears the lower limit fill with battery fluid available in the market to the upper limit If operation continues with insufficient battery fluid the battery life is shortened and the battery may overheat and explode Battery fluid tends to evaporate more quickly in the summer and the fluid level should be checked earlier than the specified times If the engine c...

Page 45: ...ghten it by hand until the gasket comes into contact with the seat After tightening by hand use the filter wrench to tighten it about 3 4 of a turn Tightening torgue 11 8 15 6N m 1 2 1 6kgf m 7 Bleed the fuel system See 3 2 2 If you spill fuel wipe spillage carefully Start the engine to check for fuel leakage 2 Replacing Cooling Water Cooling performance drops when the cooling water is contaminate...

Page 46: ...e setting screws on the fittings for the accelerator cable and adjust the position of the cable NOTICE Never remove the limiting bolt for the fuel injec tion pump or the restraint bolt on the amount of fuel injected Doing so will impair safe opera tion and lower the efficiency of the engine and shorten its life 5B Adjusting the Clutch Remote Control Handle for the Marine Gear 1 Check to see that t...

Page 47: ...sh water and a small pitcher Blower Wash 4L Parts Code 974500 00400 2 Put the clutch in neutral and run the engine at high speed 2500 3000rpm 3 Slowly pour approximately 50cc of blower wash into the turbocharger air intake over a period of about 10 seconds 4 After about 3 minutes pour in approximately 50cc of fresh water in the same manner over a period of about 10 seconds 5 After operating the en...

Page 48: ...CE If the V belt tension is too tight the belt and the bearings of the alternator will be dam aged Be careful not to spill any oil on the V belt as this will lead to stretching and slippage 5 2 4 Inspection Every 500 Hrs or 2 yrs 1 Adjustment of Intake Exhaust Valve clearance This maintenance requires specialized knowledge Consult your Yanmar dealer or distributor Adjustment is necessary to mainta...

Page 49: ...ICE When the impeller has been disassembled be careful to replace it so that it moves in the correct direction The seawater pump turns clockwise but the impeller blades must be installed in the counterclookwise direction When turning the engine by hand be sure to turn it in the correct direction Turning it in the opposite direction damages the blades of the impeller If water leaks continuously fro...

Page 50: ... contact with exhaust gas and seawater deteriorates with use and must be replaced If operation is continued without replacing faulty elbow water will leak into the boat and gas leakage may result in fires 6 Lapping of Intake Exhaust Valves This maintenance requires specialized knowledge Consult your Yanmar dealer or distributor Adjustment is necessary to maintain proper contact of the valves and s...

Page 51: ......

Page 52: ...jection Excessive intake exhaust valve clearance Reduce load Replace with recommended fuel Wash turbocharger blower Ask for repairs Ask for repairs 3 1 1 5 2 3 5 White smoke emitted Improper fuel Faulty spraying of F O injection Fuel injection timing delay Lube oil burns excessive consumption Replace with recommended fuel Ask for repairs Ask for repairs Ask for repairs 3 1 1 Faulty Clutch Action R...

Page 53: ...form the following after turning off the engine 1 Remove the hexagonal red bolts at the back of the marine gear with a spanner 2 Check to see if the emergency bolt is visible at the back of the bolt hole When the emergency bolt is not visible insert a turn ing stick little by little in the holes at the front side of the V pulley turning it in the direction of the crank shaft rotation and stopping ...

Page 54: ...o us Normally any problems concerning the product will be handled by our dealer s service department If you have a warranty problem that has not been handled to your satisfaction we suggest you take the follow ing action Discuss your problem with a member of dealership management Often complaints can be quickly resolved at that level If the problem has already been reviewed with the Service Manage...

Page 55: ...MEMO ...

Page 56: ...ring diagram 7 1 1 B type Instrument Panel Optional 1 2 Panel side Detail of coupler AA Starter SW Tachometer Buzzer Eng Oil Press C W Temp Charge Engine stop switch Illumi lamp check switch Extension harness Optional Starter switch Color coding ...

Page 57: ...er C W temp sender Not available for B type C W temp SW Eng oil press SW Alternator Earth bolt Tacho sensor Optional Cross sectional area of wire Customer Battery Battery SW Neutral SW Starter relay Starter motor 1 2 3 Eng oil press sender Not available for B type ...

Page 58: ...station Eng stop SW Buzzer Starter SW Illumi switch Buzzer Switch Fuse 3A C W Temp Charge Eng Oil Press Optional Hour M Relay B type No 2 station C type Eng Oil Press M C W Temp M Tacho M Starter SW Tachometer Buzzer Eng Oil Press C W Temp Engine stop switch Starter switch Illumi lamp check switch Extension harness ...

Page 59: ... Air heater Cross sectional area of wire Customer Battery SW Starter motor Alternator Tacho sensor Eng Oil Press sendor Eng Oil Press SW C W temp SW C W temp sendor Optional Detail of coupler AA Earth bolt Starter relay Neutral SW Battery 1 2 Color coding 3 ...

Page 60: ... side Color coding Starter switch Detail of coupler CC Detail of coupler AA Buzzer Charge C W Temp Eng OilPress Sail Drive Leak Fuel Emp Buzzer stop Illumi Eng stop switch Starter switch Local supplied fuel empty sensor Extension harness Optional Tachometer with hour meter ...

Page 61: ...mag valvee Air heater Cross sectional area of wire Customer Battery SW Starter motor Alternator Tacho sensor Fuel filter Eng Oil Press SW C W Temp SW Optional Local supplied sail drive leak sensor Earth bolt Starter relay Neutral SW Battery 1 2 3 ...

Page 62: ...k Fuel Emp Fuel Filter Buzzer stop New B typen No 2 station Illumi Eng stop SW Starter SW Local supplied fuel empty sensor Extension harness Optional Harness No 2 Tachometer with hour M C W temp M Eng press M Eng Oil Press Eng Oil Press C W Temp Sail Drive Leak Fuel Emp Buzzer Buzzer stop Illumi Relay Eng stop SW Starter SW Tachometer with hour meter ...

Page 63: ...of wire Customer Battery SW Starter motor Alternator Tacho sensor Fuel filter Eng Oil Press SW Eng Oil Press sendor C W Temp SW C W temp sendor Optional Local supplied sail drive leak sensor Earth bolt Starter relay Neutral SW Battery 1 2 3 Starter switch Color coding Detail of coupler AA ...

Page 64: ...4JH3 TE TCE HTE DTE 49961 202851 Operation Manual Models Marine Engine Code No ...

Page 65: ......

Reviews: