


32
AZ7000SDR-8, 7500SDR-8
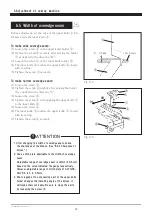
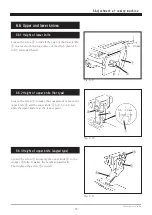
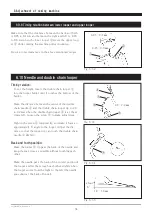
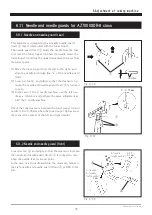
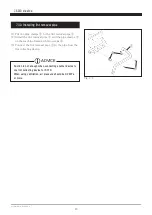
6.9.5 Back and forth position of lower looper
1-needle overlock stitch on AZ7000SDR-8 and
AZ7500SDR-8 classes:
Adjust so that the lower looper ① tip touches the needle
and bends it by no more than 0.03 mm when the lower
looper ① meet the center of the needle.
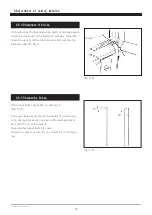
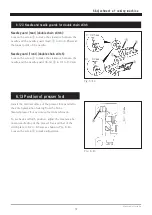
2-needle overlock stitch on AZ7020SDR-8 and
AZ7520SDR-8 classes:
(1) Adjust so that the lower looper ① tip touches the
needle and bends it by no more than 0.03 mm, using
the left needle as a reference, when the lower looper ①
meet the center of the left needle.
(2) Make sure that the lower looper ③ tip touches the
right needle and bends it by no more than 0.03 mm as
with the left needle when the lower looper ③ reaches
the right needle.
Procedure
Loosen the screw ② of lower looper holder arm, and turn
the adjusting screw ③ to adjust the position of the lower
looper.
● When turn it to the right, the lower looper comes to
the front.
● When turn it to the left, the lower looper goes to
the rear.
Be sure to tighten the screw ② after adjustment.
②
③
0 - 0.03 ㎜
Fig. 6-26
①
Fig. 6-27
needles
0 -
0.03 ㎜
①
6.Adjustment of sewing machine